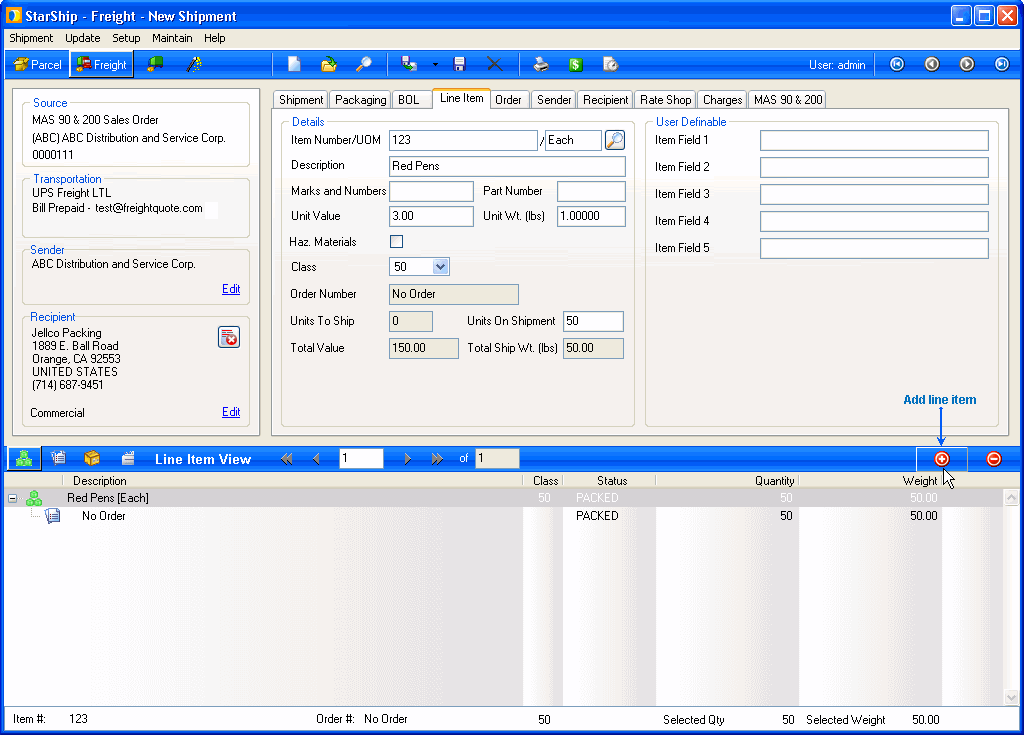
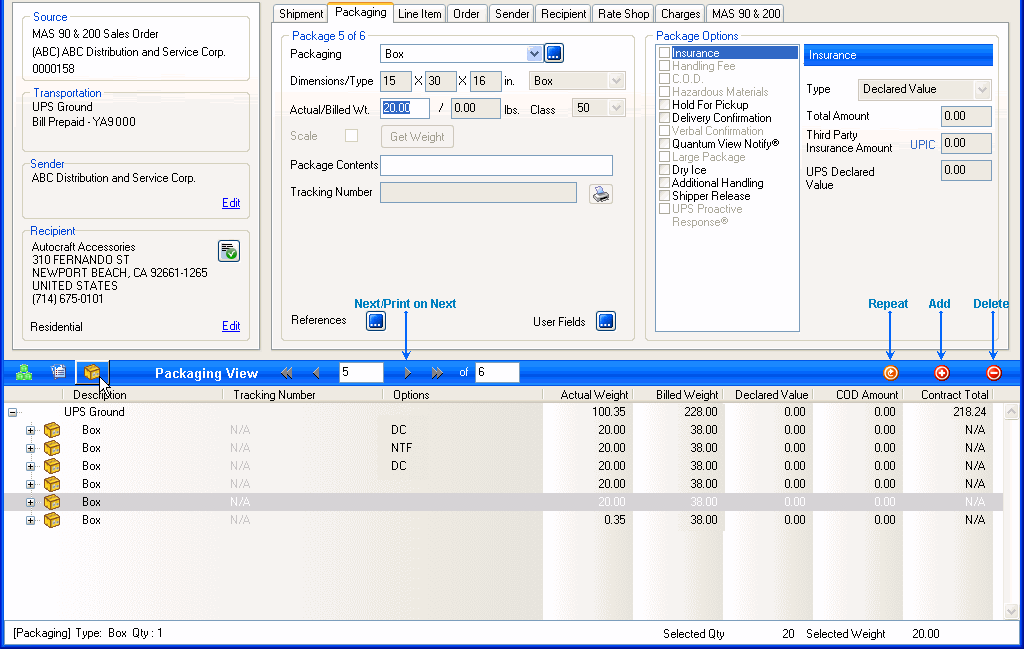
This is the tree view that displays in the lower portion of the Ship screen. It adjusts to the type of view selected on the task bar above it, and views can be changed on the fly.
You can set the default view to display when you start processing a shipment in Setup > Preferences under the Shipment Processing item for Parcel and/or Freight. The default view is the Packaging View.
Notes:
The top node displays detail at the shipment level, while the nodes below it show detail at the order, package, line item, or BOL (Freight) level.
Views will differ depending upon whether Parcel or Freight mode is selected.
Switch to the Line Item View by clicking on the Line Item button just above the shipment tree view. The currently highlighted line item displays in the Line Item tab.

The Add Line Item button allows you to add a new inventory item to the shipment tree.
You can also click on the item in the tree view and manage details in the Line Item tab above it. Use drag and drop to place items into packages.
Deletes the currently selected item(s).
Switch to the Order View by clicking on the Order View button just above the shipment tree view. The currently highlighted order displays in the Order tab.

You can add orders to the shipment or delete orders from the shipment using the controls above the view. The Add Order button launches the Shipping Assistant Add Documents screen.

Switch to the Packaging View by clicking on the Packaging button on the shipment detail task bar. The currently highlighted package or handling unit displays in the Packaging tab.

Place items into packages by dragging the item into a package. For Freight shipments, pack packages onto handling units in the same way.
You can also change any entry by clicking on it and modifying values in the Packaging Tab above it.
![]() If you click CTRL while dragging an item to a different box, StarShip will prompt to enter the quantity of items to move.
If you click CTRL while dragging an item to a different box, StarShip will prompt to enter the quantity of items to move.
Shows the carrier and type of packaging, or handling units (for freight shipments).
The shipment row show the shipment's master tracking number when you have processed the shipment .
The package rows show the tracking number for each package.
Displays selected package options.
The shipment level row is populated with the actual weight of all packages. At the package level, StarShip displays the actual weight for each package.
At the shipment level, StarShip displays the total Billed Weight for the entire shipment. The package level rows show the billed weight for each package.
The Add New Pallet button creates a new handling unit in the tree. You can enter pallet details in the Packaging Tab above it. Use drag and drop to place packages onto a newly created handling unit.
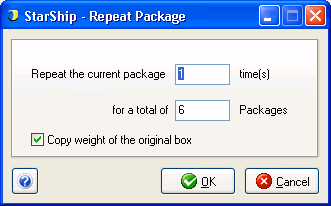
This button will create a copy of the currently selected package. You are prompted for how many times to repeat the package and the total package count. You can also apply the weight of the original package to the newly created packages by checking the 'Copy weight of the original box' check box.

The Add Package button creates a new1st level package (i.e. Box, Bag, etc.). If a handling unit is selected (freight), the package is placed beneath that handling unit. You can enter packaging details in the Packaging Tab above it.
The Delete button deletes the selected handling unit or package. If it is a 1st level package, any line items within it display as Loose Items under the same handling unit or Unpalletized. If the deleted item is a handling unit, all packages it contains display as Unpalletized.
Switch to the BOL View by clicking on the BOL View button just above this section. The currently highlighted BOL entry displays in the BOL tab. Each BOL entry represents one row in the commodity grid section of the Bill of Lading.

Number and type of handling units.
Number and type of 1st level packaging.
Total weight of the handling unit, packaging, or commodity.
Hazardous Materials flag.
This is the description that will print on the Bill of Lading.
If Manually Enter Bill of Lading is enabled in Bill of Lading settings, or the shipment has no line items, this button is enabled to allow you to add a BOL Entry. You can enter BOL details in the BOL tab above it.
If Manually Enter Bill of Lading is enabled in Bill of Lading settings, or the shipment has no line items, this button is enabled to allow you to delete a BOL Entry.