Maintain Customers gives you access to your customer database, where you can add and configure customer entries and address information.
The main window shows you the current customer list. Click on the column headings to change the criteria by which the list is sorted as well as the sort order (ascending/descending).
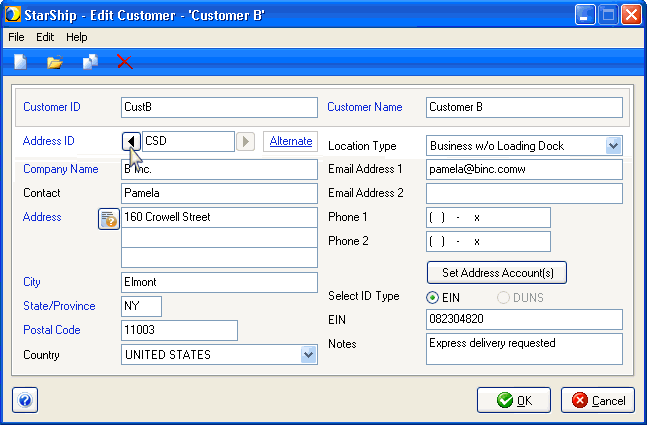
Blue field headings on the Add New or Edit Customer dialog indicate that the field is required.
Type in a unique ID for each customer.
Type in the customer name.
Type in an identifier for the address. You can store multiple addresses for a single Customer ID. After entering the Customer ID and Customer Name, StarShip will populate a default value of "MAIN" in the Address ID. This value can be changed by the user.
Type in the Company Name associated with this address.
Type in the Contact name associated with this address.
Type in the address information you want to associate with the Address ID above.
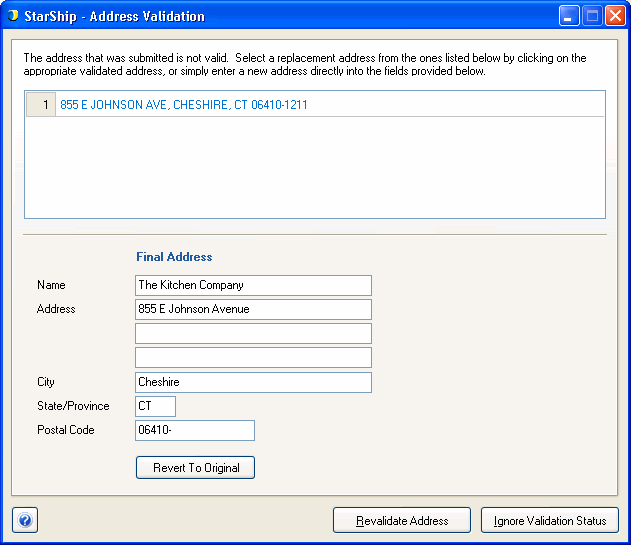
Address Validation : StarShip provides automatic address validation for domestic addresses. When successfully validated, the button displays a green check mark.
To validate the customer address, click the ![]() button. If the address cannot be validated, you have the opportunity to choose a new address or correct the final address in the Address Validation dialog (appears automatically when you validate). For ambiguous addresses, a range of addresses may appear.
button. If the address cannot be validated, you have the opportunity to choose a new address or correct the final address in the Address Validation dialog (appears automatically when you validate). For ambiguous addresses, a range of addresses may appear.
See also : Address Validation setup
Select from the drop-down list of location types:
Business with or without loading dock
Residence
Construction site
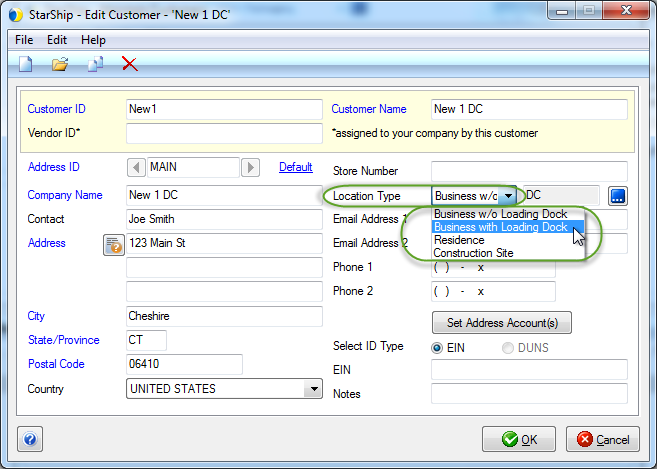
You can also optionally assign location attributes to the type selected by clicking the  button next to the Location Type field.
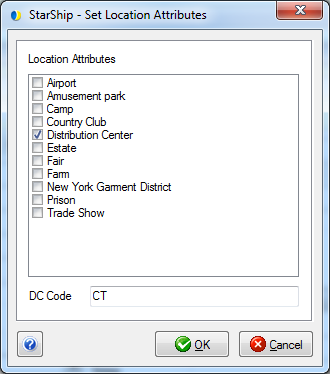
The attributes will appear greyed-out next to the Location Type field under the following codes :
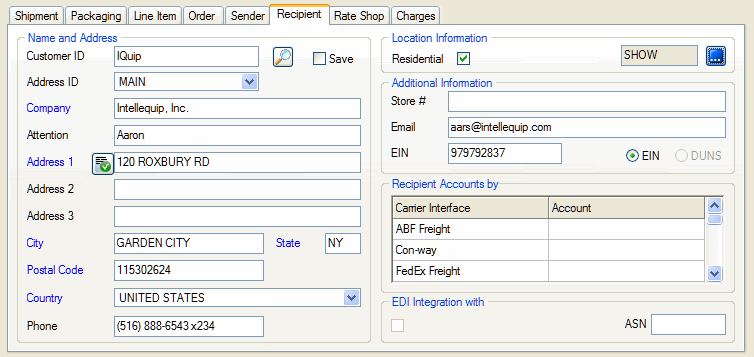
When this customer is selected as the Recipient, the attributes will appear on the Recipient tab under Location Information.
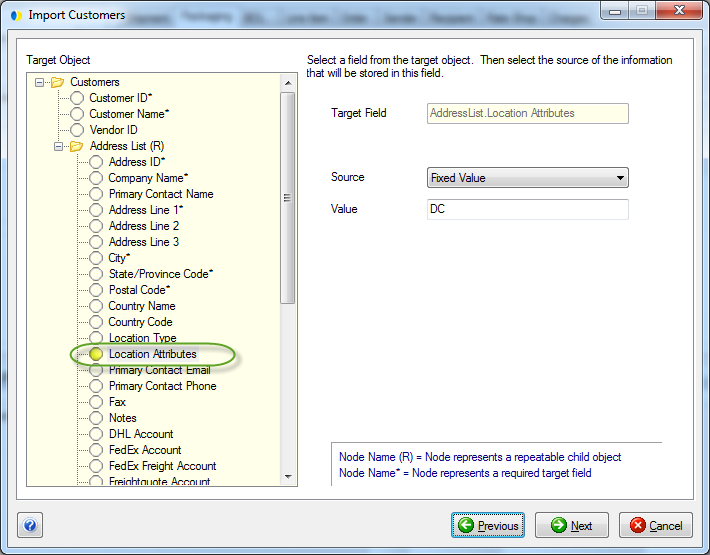
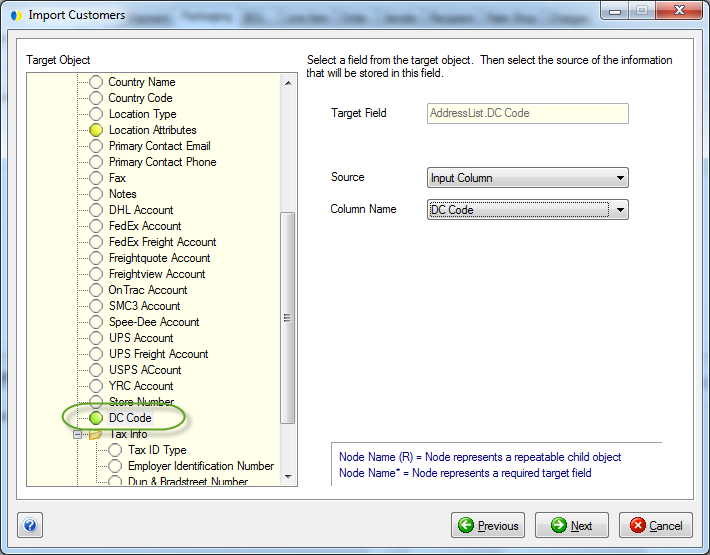
When importing customer data, you must configure the Import Customers target objects as described here to also import the DC codes.
You can provide up to 2 email addresses. Make sure each address is properly formed. Example: john@abcworld.com.
You can provide up to 2 phone numbers, including extensions, for this address.
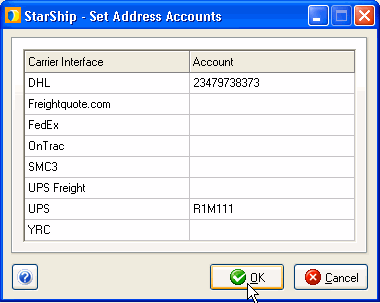
Each Customer Address can have a different carrier interface account set as the default. This account information will populate the customer's account information on the Recipient tab when the billing type is Recipient.
Click the Set Address Accounts button and enter the account number by carrier in the Set Address Accounts dialog.
EIN : An Employer Identification Number (EIN) is also known as a Federal Tax Identification Number, and is used to identify a business entity. Generally, businesses might require an EIN when shipping internationally. Select the EIN radio button to enter the EIN into the field provided.
DUNS : The Data Universal Numbering System (DUNS) is a unique numeric identifier to a single business entity. A DUNS number may be issued to any business worldwide. Certain U.S. government agencies require that a vendor have a DUNS number as well as an EIN number. Select the DUNS radio button and enter the DUNS number in the field provided. You can choose either an EIN number or a DUNS number for each customer address.
Note : DUNS is not currently available in StarShip but will be supported in future versions.
This field is for any additional notes you want to include for this customer at this address.
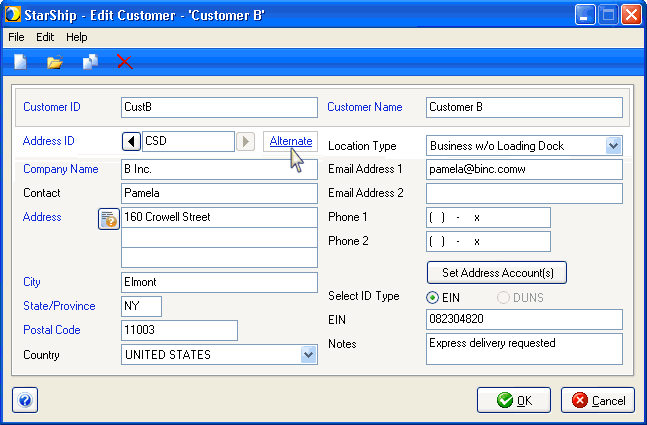
There must be one default address for each Customer ID. However, you can associate multiple addresses with a Customer ID by designating "alternate" addresses.
You can enter alternate addresses by either creating a new address, or by copying an existing address and changing it.
Add: Click Add New Address on the toolbar; or press Ctrl + N; or select File > New Address. Enter all of the new address information and create a unique Address ID for it.
Copy: Click Copy Address on the toolbar; or press Edit > Copy Address. A new instance of the currently open address is created. The Address ID field is empty - you must enter a unique Address ID for the new address.
Delete: Navigate to the address you want to delete and click Delete Address on the toolbar; or press Ctrl + Del; or select Edit > Delete Address.
Click the arrows next to the Address ID field to flip through the addresses stored for this Customer ID. Note that the Customer ID and Customer Name remain the same regardless of the address.
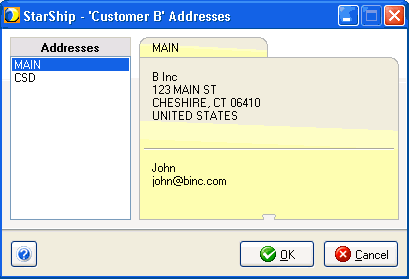
The address browser lets you view all the addresses associated with a Customer ID in a separate window. You can select one and click OK to jump to it in the Add New or Edit Customer window.
To open the address browser, click Open Address on the toolbar; or press Ctrl + O; or File > Open Address.
You'll notice some blue text next to the Address ID field that says either "Default" or "Alternate". If it says Default, this is the current default address for this Customer ID. If it says Alternate, this is an alternate address for this Customer ID. To change an address from Default to Alternate or vice versa, click this link.