The Shipment Import tool offers enhanced flexibility in the handling of shipment data and batches. Shipments can be imported and processed as a batch, including package contents information, generating all of the shipment labels and documents at once.
You can save import settings as a named template, and maintain multiple templates that may be exported and distributed. You can also set up the import template to automatically put line items into packages/handling units.
When processing batches, the configuration settings of the client for the current user will be applied to the imported shipments. Settings regarding address validation, auto-packing, storing line item information, etc., will all have a direct effect on the shipments, in the same way as orders being imported from a source interface.
This section includes information about setting up templates that control shipment import, instructions for the Shipment Import wizard, and how to import shipments and batches.
These are the steps to get started :
Customers who are migrating from StarShip 9.x can export their 9.x Shipment Import Setup configuration using the StarShip Export Utility and then import those files into StarShip to create new import templates.
See the Data Conversion Help for more information.
After your template is set up, you can
We have additionally provided examples to illustrate both a simple import template setup and a more complex template that packages line items.
Import templates allow users to take the standardized data format generated by the accounting system and define how this data is imported into StarShip, what fields are populated with which data (field mapping), and also translate the imported values into shipment values in StarShip (value translations).
The first step in setting up Shipment Import is to import a file containing shipment data and use that data to create an Import Template.
From the Tools menu in StarShip, select Shipment Import. Click the Add New Shipment Import Template button.
Next, select the shipment data file, which can be in comma-delimited or tab-delimited format. Click the Select Import File button and then browse to the shipment data file you want to import. Click Open.

The next dialog allows you to view the columns and the data from the imported file. If the first row of your data file contains the column names, check the "Use first row for column names" option. Click Next.

On the next dialog, you will define the file columns: the input data’s type, the type of shipment data a column contains, and the columns to import. To navigate from one column to the next, simply click on the column you want to define or use the arrows for the Column Name field.
The input's Data Type : Choices are General, List of Values, Number, and Decimal. The data type will define if the column's values are available for value translations during the field mapping process. When the Data Type is specified as List of Values, then the values are included; if not, the values are excluded.
The Data Level and Primary Key : The Data Level specifies the type of shipment data a column will contain (Shipment, Order, Line Item, Package, Package Contents, or Handling Units). The Primary Key identifies the input column that contains the “key” data for a specific data level. For example, package contents can be added to specific packages using the package primary key. Together, these items will specify the type of information being transferred from the import file into StarShip and where that data should be assigned.
Note : The Line Item data level does not require you to specify a Primary Key.
Shipment fields
Recipient : Recipient information can be mapped to the Recipient fields in StarShip. If the customer already exists in the StarShip Customer database (see Maintain Customers), StarShip can use the Customer ID to identify the recipient and automatically populate recipient information. Examples of recipient fields :
Order Fields
These fields could include the Document # or Document ID, which can be used as the Primary Key for the Shipment or Order data level.
Line Item fields
Line Item fields contain information about the items being shipped, such as Item Number, Item Quantity, Item Description, Item Weight, Units Ordered, Units Shipped, etc. Line items can be added to an order using the order Primary Key.
Packaging Contents and Package fields
The combination of Package and Package Contents fields will allow you to place items on the order into specific packages upon import.
Handling Unit fields
Use these fields to import handling unit information, such as the Pallet ID, Type, etc.
This next step allows you to review the columns you defined, along with the data level and primary key state (indicated by an asterisk) that were specified for each.

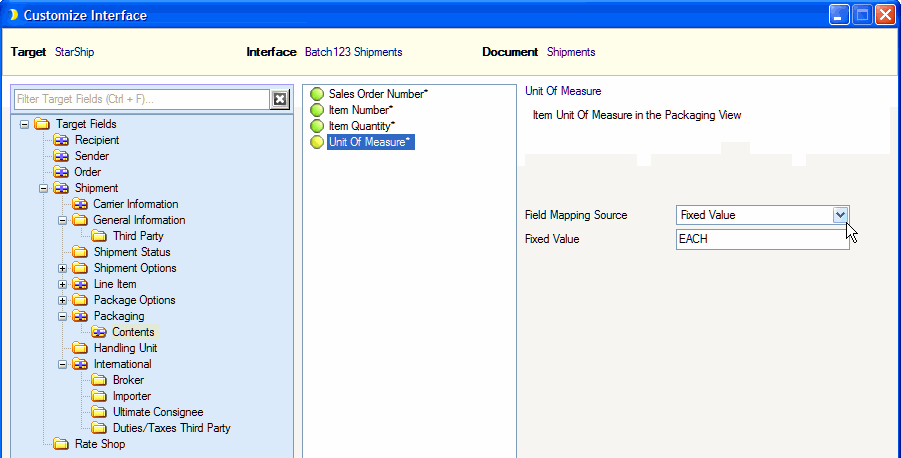
In this phase of the template setup, you are brought to the Customize Interface screen. Note that the Interface Name matches the current template name and that this customization applies to this import template only.
In order for shipment data to be properly imported, the following basic mappings are required.
For line item data to be imported, the following StarShip fields must be mapped :
To import package contents data, the four fields under Shipment > Packaging > Contents must be mapped to your input columns.
These are Sales Order Number, Item Number, Item Quantity, and Unit of Measure.
To import handling unit information, these fields must be mapped :
Beyond these basic requirements, any other shipment fields can also be mapped, based on your company's needs. Please make sure that the data level for each input column is correctly assigned.
Note : Write-Back can be supported through Shipment Export.
Select the Target group in the left-most pane. For example, Shipment > Packaging Contents.

Choose the field you want to map in the center pane, and then define the mapping to the right.
If you want to map a field to one of your input columns, select Import Shipments Field for the Field Mapping Source. Then, select the input column that contains the data for the Shipments Field.
For input fields where you selected a List of Values data type, you can provide value translations by clicking on the Click here to update value translations link.

You can also define a fixed value for the Field Mapping Source. For certain fields, StarShip will provide you with values to select from; many fields allow you to type in the value. With fixed values, this field will always be populated by the value specified.

Repeat this process until you have mapped all of the fields you require. When you are done, click OK.
For in-depth information about field mapping and value translations, see Customize Interface.

The Shipment Import Setup dialog contains additional settings for batch import and handling shipment data.
The top grid shows the import templates you've created. Data levels shown with a check mark have columns assigned to them. You can edit an existing template, create a copy of the import template configuration, or delete a template, using the buttons provided above the grid.
The details for the currently selected template display below.
Source File : This is the import file you selected in the first step as the source for the template. You can click the Update button to change the source file being used, without having to reconfigure the template’s configuration, provided that the new file adheres to the existing definition. Note : If an import template file is distributed to you, be sure to click the Update button in order to reselect the correct
Input Columns : This section lists the template's input columns, with a star indicating Primary Key columns. It also shows the field mapping for each column. To update the field mapping, click the Customize Interface button.
The Batch Name field allows you to specify the name of the batch.
In the Action field, you can select the action to take during the import process. The Ship/Process and print labels/documents option will automatically process the shipment and print out any labels or documents for all shipments. If you don't want to print labels/documents now, select the Ship/Process without printing option. To verify the shipment data and save the shipment without processing it, select the Validate and safe as draft option. Finally, to just save the shipments without processing them, select the Save as draft option.
The On Error setting defines how StarShip should proceed if any errors are encountered. The "prompt user for action" option is the default setting and means that when an error occurs on import, a pop-up will ask the user how to continue. Other choices are to always save the imported shipments as a draft, abort importing the batch, or to just skip the shipment causing the error.
The On Duplicate setting defines the action StarShip takes if a shipment that is being imported already exists in the StarShip database. You can choose to create new shipments from the duplicates, skip the duplicate shipments, or launch a prompt that asks the user how to proceed. The default setting is to create a new shipment.

At this point you can proceed with the import process by clicking Import, or exit and save the existing templates to the database.
You can also use the Import All Templates or the Export All Templates buttons (shown in red above) to import/export templates to a file in order to transfer this configuration data between databases. When distributing template files, make sure to update the Source file from the correct location.
The View Batches button will launch the Imported Batches screen.

Accessible from the Shipment Import Setup screen > View Batches, or from Tools > Imported Batches, the Imported Batches screen allows you to view and perform various actions on imported batches.
You can filter batches using the date, carrier, and shipment status fields at the top of the screen.

The batches display in the grid, identified by the Imported On date and the Batch Name. The following actions may be performed on batches :
When you click the View Shipments button, all of the shipments in a batch display in the Open Shipment dialog. From there you can view shipment detail, open the shipment, or create a return.

Once you have a batch selected, check the Use additional filter criteria check box to have additional shipment filters applied to the action you are performing against a batch. Checking this option will open a Batch Import Confirmation dialog where you can specify the additional filter criteria for Ship/Process, Print, or Delete.
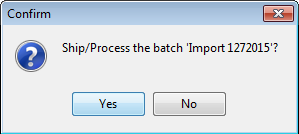
Click Ship/Process to process any remaining open shipments in a batch. The batch will be processed after you click Yes on the confirmation dialog.
Additional Filters
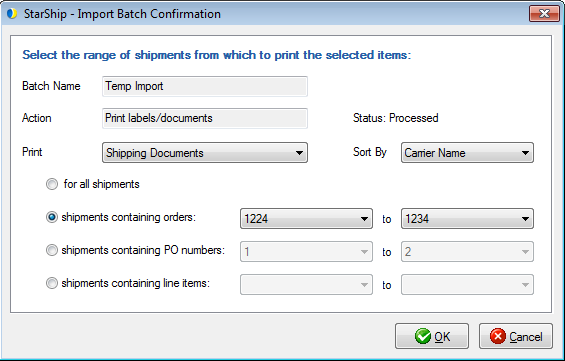
If you selected to use additional filters, the Import Batch Confirmation dialog allows you to Ship/Process and print labels/documents for all open shipments, or further filter the shipments. See Using Additional Filter Criteria for more information.

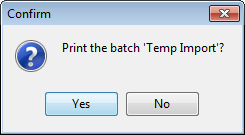
Click Print to print labels, BOLs, and shipment documents for all processed and posted shipments within the batch.
Additional Filters
If you selected to use additional filters, the Import Batch Confirmation dialog allows you to print labels/documents for all processed and posted shipments, or further filter the shipments. See Using Additional Filter Criteria for more information.
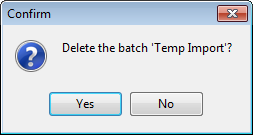
Click Delete to delete all open and processed shipments in a batch.
Additional Filters
If you selected to use additional filters, the Import Batch Confirmation dialog allows you to delete all processed and posted shipments, or further filter the shipments to delete. See Using Additional Filter Criteria for more information.
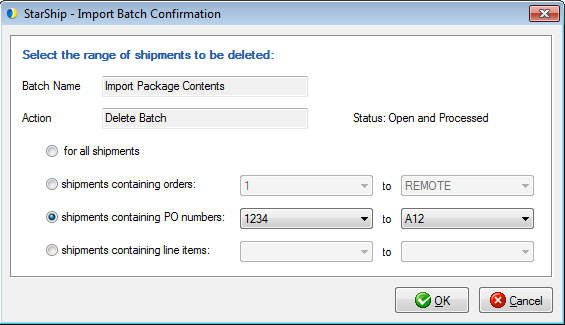
Additional filters are available for the Ship/Process. Print, and Delete actions for imported batches. After checking the "Use additional filter criteria" option, the Import Batch Confirmation dialog will appear and allow you to further filter the shipments to be included in the action for this batch. You can filter by Order #, PO #, or Line Items, and provide a range of values for each filter.
You can also define what labels and documents should be printed for these shipments using the Print field :
All Labels and Bill of Lading
All Labels
Bill of Lading
All Shipping Documents
This example shows a scenario that creates shipments with a basic amount of information. At the very minimum, the input data file contains columns for Invoice/Order Number, Recipient Company Name, Address 1, City, State, Postal Code, Carrier/Service, and Package Weight. For an input file containing this information, the final template setup screen might look like this; note that the Invoice column is set as the Primary Key at the shipment level :

Next, the following fields need to be mapped during the field mapping portion of import template setup.
Map the Address fields to the appropriate Recipient fields.
Map the Invoice column to the Order > Order Number field.
Map the POnum column to the Order > PO Number field.
Map the Service column to the Shipment > Carrier Information > Carrier – Service field.
Map the Weight column to the Shipment > Packaging > Total Weight (in weight UOM) field.
A sample input data row in the following format ....
2,,1315,MODULAR MAILING SYSTEMS,,2423 EAST MALL DRIVE,,FORT MYERS,FL,33901,,FDXG,66

...produces the following shipment :

This example uses more complex input data to create a shipment packaged line items from an order. In addition to the recipient address information, we must provide line item, order, and package information. We would also need to specify the package contents based on those line items and each item’s originating orders. This requires a package number for each package in a shipment so that line items are placed in the correct one.
See the field mapping section to review the fields that must be mapped in order to properly package line items in a shipment.

Invoice,Doc#,Customer Number,Company,Contact,Address1,Address2,City,State,Zip,Country,Service,Weight,Item #,Item Qty.,Item Weight,Item UOM,Item Description,Units Ordered,Units Shipped,Pkg. Num,Pkg. Contents Item #,Pkg. Contents Doc #, Pkg. Contents Item Qty
1,1234,36094,Mevco Marketing Group,Joe,3725 Watertown Road,,Maple Plain,MN,55359,,FDXG,1,100,1,1,EACH,Widgets,1,1,1,100,1234,1
1,1234,36094,Mevco Marketing Group,Joe,3725 Watertown Road,,Maple Plain,MN,55359,,FDXG,2,200,1,2,EACH,Toaster,1,1,2,200,1234,1
1,1234,36094,Mevco Marketing Group,Joe,3725 Watertown Road,,Maple Plain,MN,55359,,FDXG,3,300,1,3,EACH,Food Processor,1,1,3,300,1234,1

Each row has the same Doc# (the shipment Primary Key), so StarShip combines them into one shipment. The shipment result is this :

In this example, it is very important that the line item unit of measure (UOM) and package contents unit of measure fields are equal. If this is not the case, StarShip will not put items into packages. items will not be placed in the packages. If your input data does not include this information, you can create fixed value mappings for these fields :