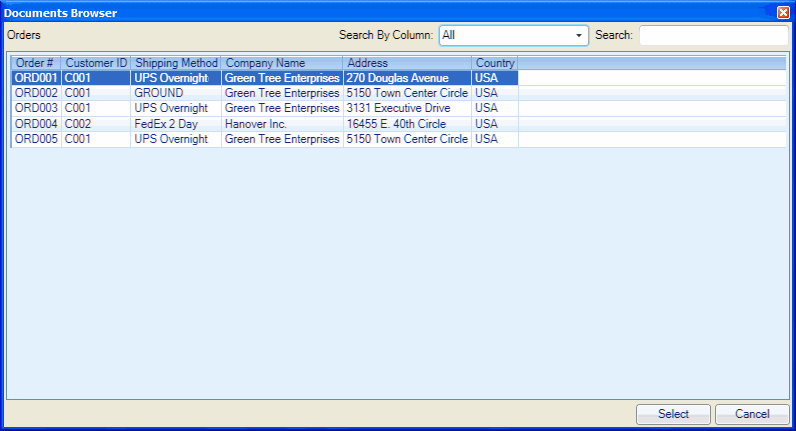
Select a sales order by scanning the sales order number.
You can also use the Browse button to view and select from the list
of current orders.
Add related orders from the list returned by StarShip,
if desired. StarShip allows you to combine multiple orders in order
to consolidate your shipments. Related orders are orders where the
"Ship To" address information is the same as the order you
selected. They are automatically populated under the "Related
Orders" section of the Shipping Assistant if you enabled that
option under Setup > Source Interface > Options.
To view details about the related order, select it from the list and
its data appears in the main information area. When adding related
orders, you can select one or more orders and use the arrow buttons
to add them to the shipment.
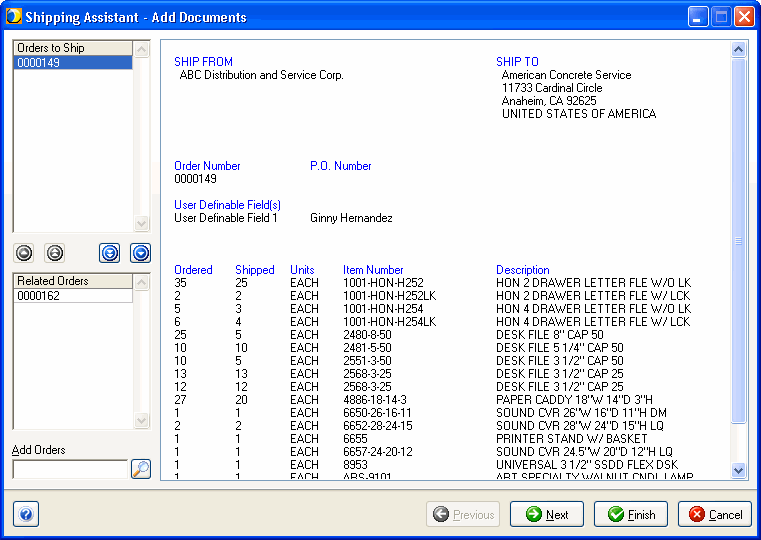
You may also add unrelated orders using the Add Orders field.
Next, enter or edit shipment quantities and classification. If any of the sales order items have previously been shipped, StarShip retrieves related freight information. If items have not been shipped before, you may need to enter additional information such as freight class (unless it is mapped to a field in the source interface).
Shipment quantities: StarShip displays the quantity remaining to ship. The "To Ship" column defaults to the quantity remaining to ship, but you can edit or reduce this number.
Classification: This is where you can specify NMFC code and subcode, class, and group. If you have set up groups in StarShip, you can select the group and the remaining classification data will be automatically populated.

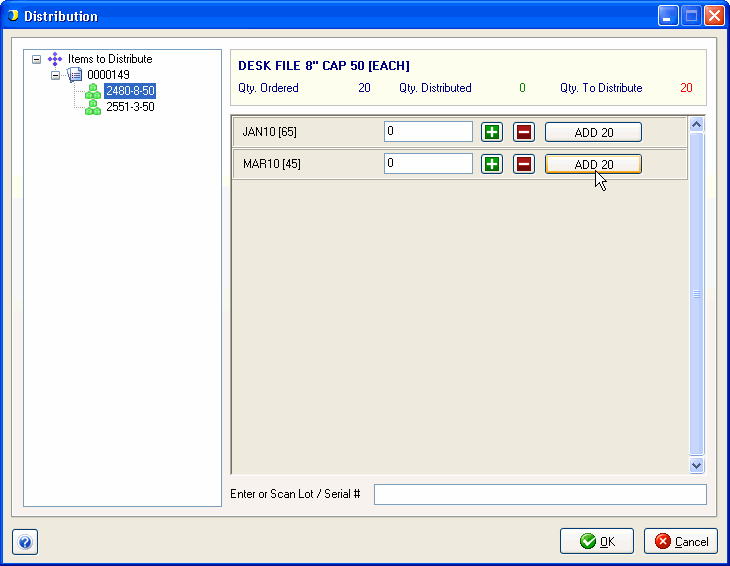
After confirming shipment quantities and classification
info, you may be prompted to distribute any items by lot
or serial numbers if required by your source interface. This information
is saved to the source interface immediately and is reversed if you
cancel the shipment. Click Next.
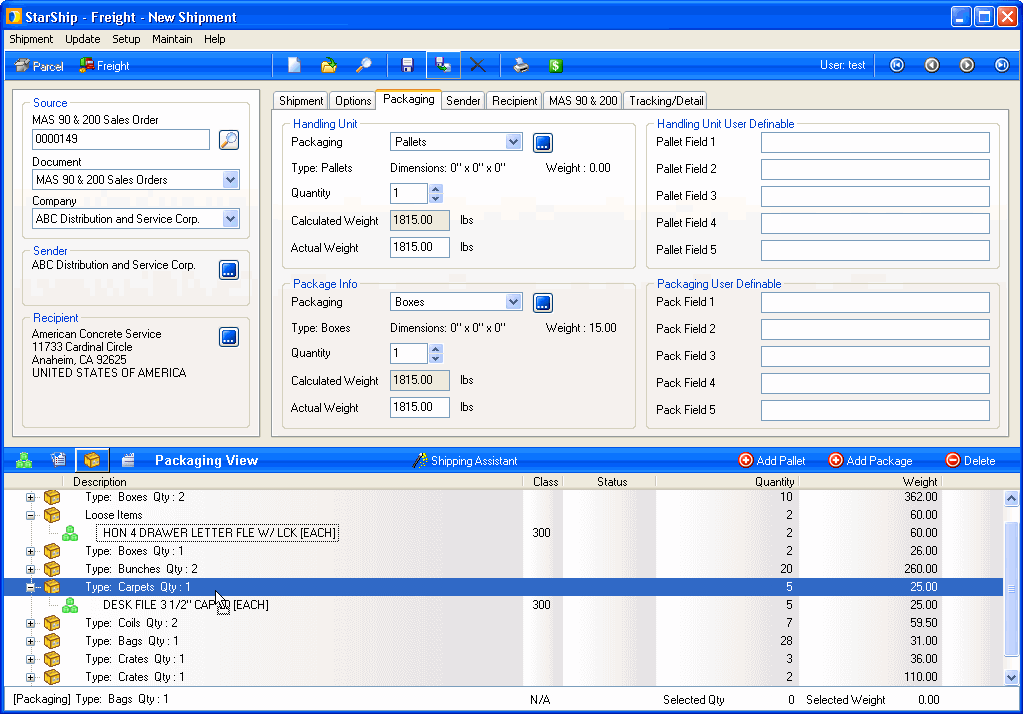
Using the Packaging View, add packages and drag and
drop the items into first level packaging. After you're done,
you can then palletize items by adding pallets and dragging and dropping
the packages onto the pallets.
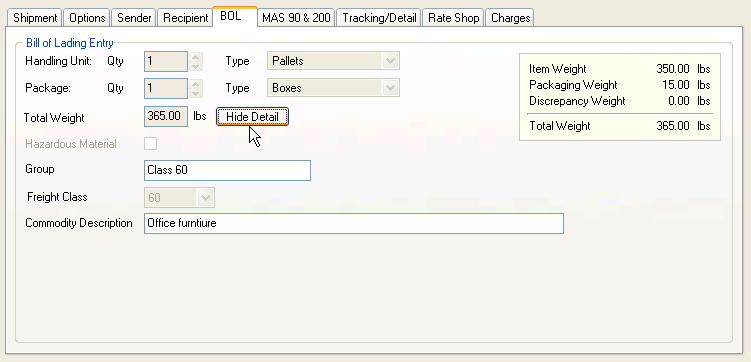
Using line item and packing information, StarShip
populates the bill of lading. You may change the commodity description.
( How does StarShip populate the bill of lading?)
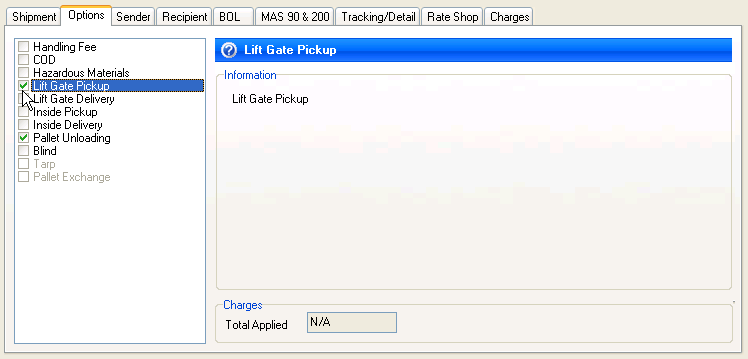
Enter any remaining shipment options that were not
populated.
See example
Rate the shipment
to get a list of available carriers and current shipment pricing.
To rate the shipment, you can click the ![]() button
on the toolbar or press Ctrl + R.
button
on the toolbar or press Ctrl + R.
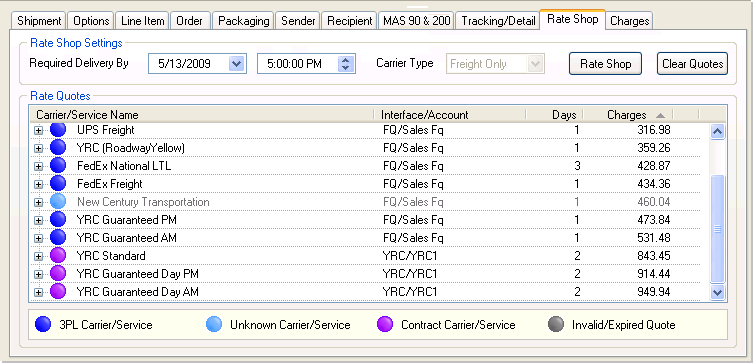
Select a carrier from the Shipment tab. Or, double-click
the carrier on the Rate Shop tab.
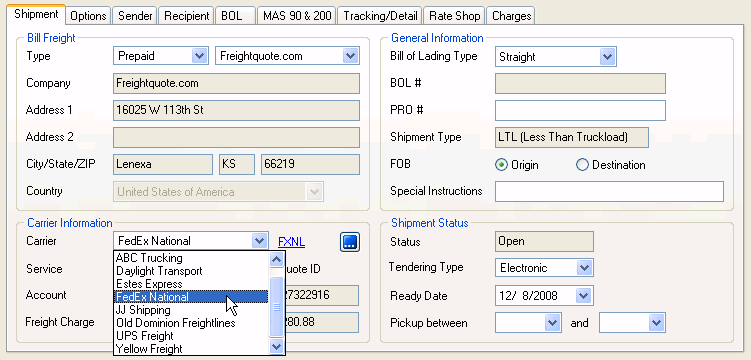
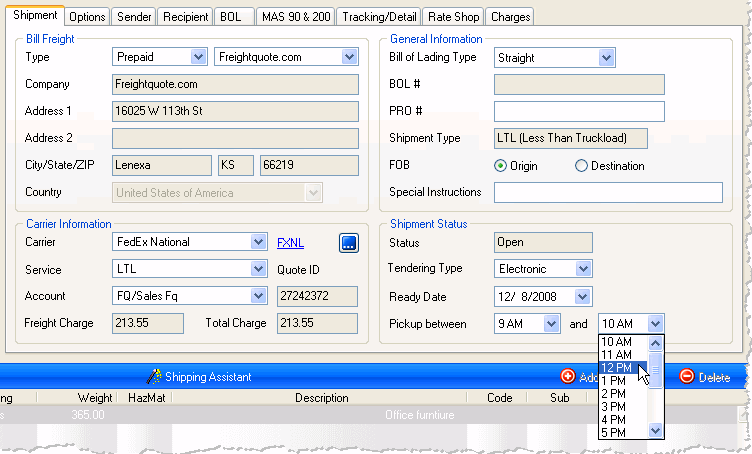
Enter the shipment's Ready Date and Time.
See example
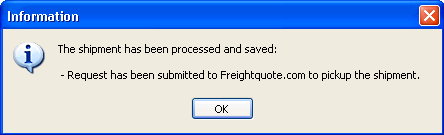
Save the shipment
There are two options for saving shipments.
Save: This saves the shipment but does not update the source interface. The shipment is essentially saved as a draft so you may open it and make changes.
Ship/Process: This processes the shipment. If you selected a Freightquote.com or YRC carrier, the shipment is tendered to the carrier. If you set up the bill of lading and labels to print automatically, they are now generated.