
With StarShip, you can import and ship open Sales Orders from SAP. You can batch process multiple Sales Orders, or load a Sales Order and select more shipment detail before processing it. Write-back of shipment information for Sales Orders occurs after you process the shipment in StarShip.
Creating Deliveries When Processing Sales Orders
By default, when shipping against Sales Orders, StarShip will create the SAP Delivery when you Ship/Process the Sales Order in StarShip. This is the most common setup scenario. StarShip will create and write back to the SAP Delivery when you process a Sales Order in StarShip, unless you disable Delivery creation for Sales Orders in Write-Back Setup. The "Do not create a Delivery Note when shipping Sales Orders document " setting in Write-Back Setup is disabled by default. If you do not want StarShip to create a Shipment when you process Sales Orders, and you want to create the Delivery manually in SAP, you can check this option. There will be differences in how write-back occurs when you have this setting checked.
See Write-Back End Results for Sales Orders for more information.
This section contains general information for manually shipping against Sales Orders. You can also use StarShip's Shipping Assistant, which simplifies shipping by providing a graphical, step-by-step means of importing, classifying, and packing items originating from source documents. If enabled, it will appear automatically when you import Sales Orders into StarShip.
Shipping Assistant
If you want to use StarShip's Shipping Assistant, make sure you have the Preferences setting "Always use Shipping Assistant when importing orders" checked in StarShip Setup. You can find it under Shipping Assistant Preferences for Parcel and for Freight.
To launch the Shipping Assistant manually from the Ship screen, click the Shipping Assistant button in the toolbar:
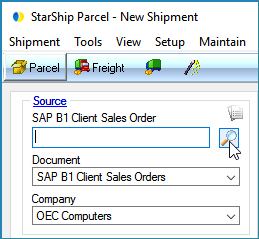
Make sure you have SAP B1 (version) Sales Orders selected in the Document field:
If you are entering the Sales Order number, type it into the Sales Order field.

If you want to browse a list of Sales Orders, click the magnifying glass next to the SAP Sales Order field.
Use the available filters to narrow down and sort your search results. The default setting for filtering Sales Orders is the Past Month. If you want to change the date range, you can click on the double arrows next to the filter for a list of other choices.
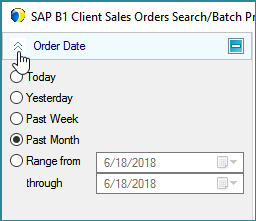
You can also add more filters to this or you can remove the default filter and change the filters to narrow down and sort your search results. The available filters vary depending upon the currently selected document.

See Search/Batch Processing for more information about Filters, Columns, and the Search/Batch window.
Note : You can click the "Group Related Orders" check box to view related orders grouped by the Ship To Address. The ability to do this is based on checking the "Retrieve related documents when shipping" setting in SAP Options.
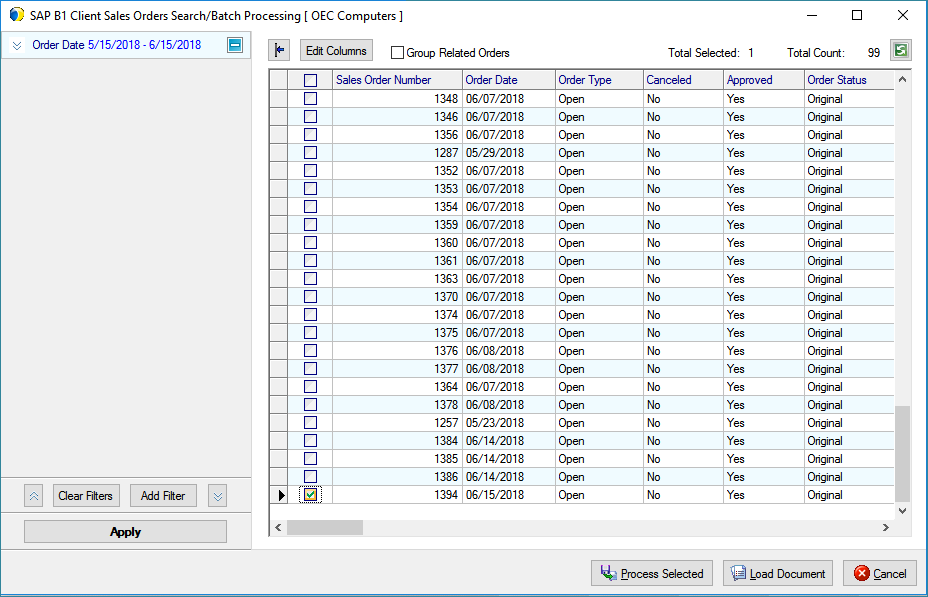
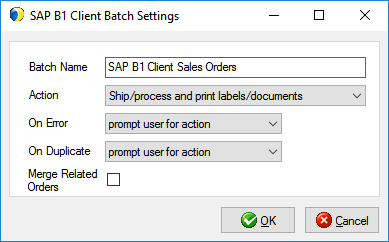
This option will process one or multiple Sales Orders without the user editing the shipment(s). StarShip will process the shipment(s) according to the batch settings you select. You can select to Ship/Process the shipment with or without printing labels and documents. You can also define what StarShip should do if an error occurs. For more information, see Batch Settings.
This option will import the Sales Order into the Ship screen, loading the Recipient information and other information from the Sales Order. To select a single Sales Order, double-click the row (or check the box and click the Load Document button). If any line items have previously been shipped, StarShip retrieves related freight information (if applicable). If items have not been shipped before, or line item detail is not mapped to SAP, you may need to enter additional information, such as freight class. Next, pack the line items in the shipment into packages.
You can pack the shipment manually, by clicking the Packaging View button. In the Packaging View, drag and drop the items into first level packaging (for example, Box).
Line items can be packed using learned or created packaging scenarios (added or modified in Maintain Inventory). If you've shipped any of the items before, StarShip retrieves packaging scenarios and automatically packs those items into first level packaging (boxes, cartons, etc). By default, auto-packing based on packaging scenarios is not enabled. You can enable this setting in Setup > Preferences under Shipment Processing (for Freight or Parcel); check the option, "Automatically pack items based on packaging scenarios." Control how items are packed using the related Auto Pack Preference setting below it.
Note: StarShip supports mixed items in one box. However, StarShip can only learn packaging scenarios for future shipments when you have one type of item in one package. The auto-learning of packaging scenarios is optional and can be disabled.
Items imported from SAP Sales Orders can be packed automatically into a default box. StarShip will pack loose items into default packaging based on the Preferences setting, "When importing orders, pack all loose items into a default package." This is the default setting; if you want to change this default, uncheck this setting in Parcel or Freight Preferences setup under Shipment Processing. Note that this setting is worded differently for Freight Preferences because it takes pallets into account.
More Information : Line Items
Enter Packaging Details
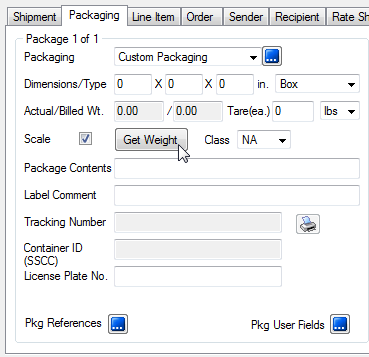
Packaging
For Parcel shipments, you would enter package detail for existing packages. Remain in the Packaging View and navigate through the packages to weigh them or add package level details on the Packaging tab.
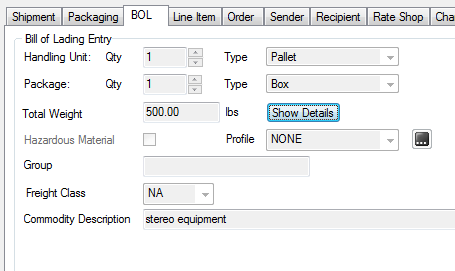
BOL (Freight Shipments)
For Freight shipments, StarShip populates the bill of lading using line item and packing information. Bill of Lading settings in Freight Setup allow you some flexibility regarding how StarShip converts item packaging information into the bill of lading body. Typically, similar items with the same class are grouped under one general description. The commodity description may be edited on the BOL tab. You can also manually enter the BOL.
Enter Freight Billing Info
Enter or modify the freight billing information of the shipment, if necessary.
Select the Shipping Method
If you mapped your Shipping Types in Customize Interface, the Carrier/Service will be automatically populated based on the SAP Delivery. If you need to select the Carrier/Service, select from the drop-down lists.
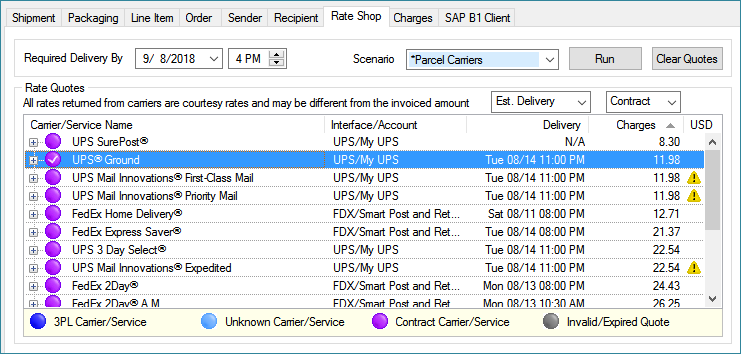
Rate the Shipment
Rate the shipment with the currently selected carrier by clicking Rate from the File menu or by pressing Ctrl + Alt + R. To rate shop, click the Rate Shop button in the toolbar or press Ctrl + Alt + S. Select a carrier from the Rate Shop tab. For more information, see Shipping Process > Rating in the StarShip Help.
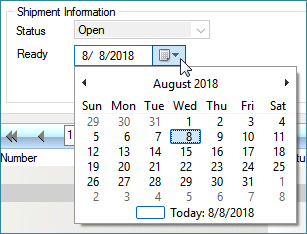
Ready Date and Time
Enter the shipment's Ready Date (and Pickup Time, for Freight) on the Shipment tab.
Save the shipment
There are two options for saving shipments.
Save: To save a shipment without processing it, select Shipment > Save, press Ctrl + S, or click the Save button on the toolbar. This action saves the shipment as a draft, but does not process the shipment, request pickup from the carrier, automatically print shipping documentation, or write back any information to SAP. The shipment is essentially saved as a draft so you may open it and make changes.
Ship/Process: To process a shipment, select Shipment > Ship/Process or select the Ship/Process button from the toolbar. The shipment is tendered to the carrier. If you set up the bill of lading and/or labels to print automatically, they are now generated. StarShip also performs write-back of Freight and Notes to SAP. Once a shipment is processed, the Shipment Status changes from Open to Processed on the Shipment tab. The status can now be modified.
After you Ship/Process a shipment, StarShip creates or updates the SAP Delivery for each Sales Order in the shipment. StarShip writes the Freight, Tracking, and Notes back to the SAP Delivery. If you selected to NOT have StarShip create the Delivery when you ship against Sales Orders, StarShip will write the shipment detail directly back to the Sales Order. (See Write-Back Setup)
For more information about Sales Order write-back, see Write-Back End Results.
Here are some notes:
If StarShip is updating an existing Delivery on write-back, and a freight amount already exists on the Delivery, StarShip will add the new freight amount to the total freight. This happens only if you do not have the "Override existing freight..." option checked in Additional Settings.
When you ship multiple orders and StarShip is set up to not create the Delivery, the freight will be distributed evenly amongst the Sales Orders.
StarShip imports the Recipient information from the SAP Sales Order. If you change the Recipient address in StarShip, it does not get updated on the Delivery when you process the Sales Order.
When you void a shipment in StarShip, the Delivery status will be set to Cancelled in SAP.
If you ship against a Sales Order that you previously voided, StarShip will create a new SAP Delivery document on Ship/Process.
When StarShip is set up to NOT create the Delivery on write-back, and the shipment is voided in StarShip, StarShip will remove the Notes and Freight from the Sales Order.
See also
More information about entering shipment detail