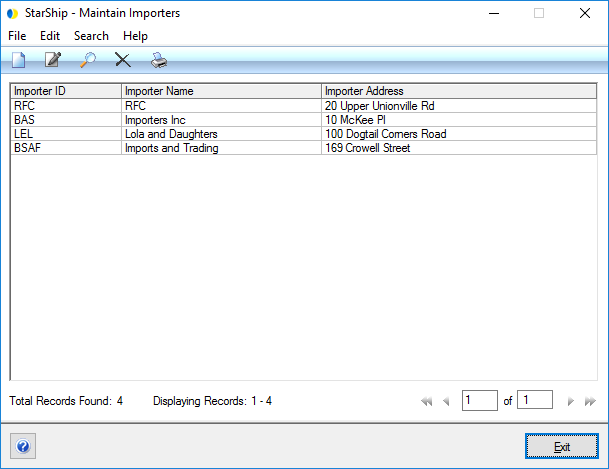
Maintain Importers allows you to add and maintain Importer information for international shipments. The Importers set up here are available on the International tab (Importers drop-down list) while processing an international shipment. You can also add importers on the fly while shipping.
The main window shows you a list of your currently set up Importers. Click on the column headings to change the criteria by which the list is sorted as well as the sort order (ascending/descending).

On the main dialog (Maintain > Importers), select New Importer from the menu. You can also select File > New Importer or use the keyboard shortcut Ctrl + N.
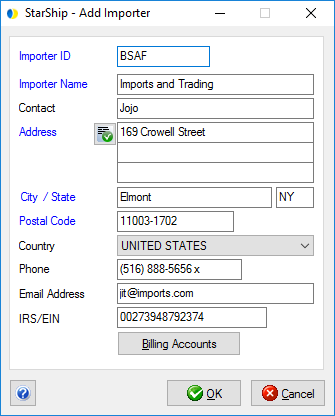
Enter the Importer information and click OK.

Blue field headings on the Add New or Edit Importer dialog indicate that the field is required.
Importer ID
Enter a unique ID for this Importer.
Importer Name
Enter the Importer company name.
Contact
Type in the Contact name associated with this address.
Address; City; State; Postal Code; Country
Type in the address information you want to associate with the Importer ID above.
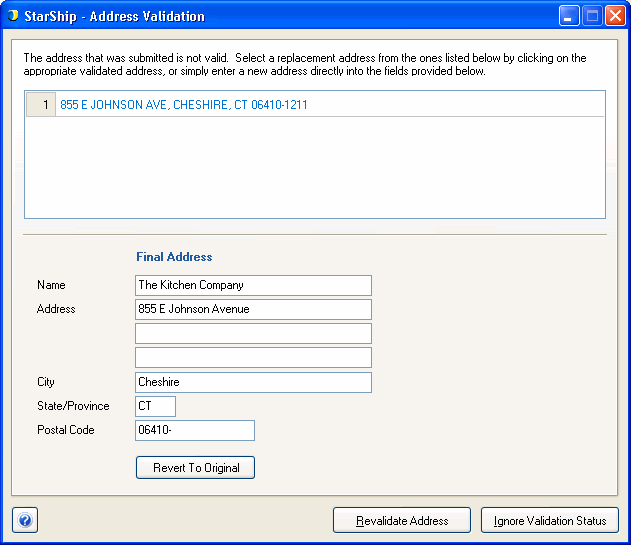
Address Validation : StarShip provides address validation for domestic addresses. When successfully validated, the button displays a green check mark.
To validate the address, click the ![]() button. If the address cannot be validated, you have the opportunity to
choose a new address or correct the final address in the Address Validation
dialog (appears automatically when you validate). For ambiguous addresses,
a range of addresses may appear.
button. If the address cannot be validated, you have the opportunity to
choose a new address or correct the final address in the Address Validation
dialog (appears automatically when you validate). For ambiguous addresses,
a range of addresses may appear.

See also : Address Validation setup
Phone
Enter a phone number, including an extension, for this address.
Email Address
You can provide an email address for each Importer. Make sure the address is properly formed. Example: john@abcworld.com.
IRS/EIN
An Employer Identification Number (EIN) is also known as a Federal Tax Identification Number, and is used to identify a business entity. Enter the importer's IRS/EIN number into the field provided.
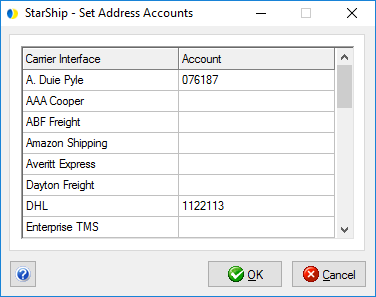
Billing Accounts
Each importer address can be associated with carrier
accounts to use for billing shipments. Click the Billing
Accounts button and then enter the account to use for the carrier
interface(s) in the Account field. Click OK.

Edit Importer
Double-click an Importer entry to launch the Edit Importer dialog. You can also press Edit Importer on the toolbar or select Edit > Edit Importer. Make any changes and then click OK to save them.
Delete Importer
Click the Importer you want to delete and select Delete Importer from the toolbar. You can also select Edit > Delete Importer or press Ctrl + D. Confirm that you want to delete the Importer by clicking Yes.
Search
To find an Importer, click Search
on the toolbar. You can also select Search
> Find Importer or use the keyboard shortcut Ctrl + F.
Basic Search : : Advanced Search
See Print Data for more information.