
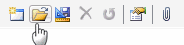
The Template Manager allows you to organize, administer, and open any saved templates from a central location. You can open the Template Manager from the designer's toolbar.
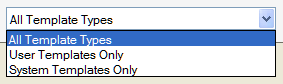
Template names are listed and can be selected on the left-hand side of the Template Manager. System Templates are global sample templates distributed with the eNotify application; they can't be modified. User Templates are user-created or modified templates. To display only a certain type of template, use the drop-down field at the bottom of the template list.
The default setting is to display All Template Types.
To open a template in edit mode, select it from the template list and click the Open button.
This tab shows a header and content preview of the currently selected template.
Tip : If you want to see a template preview with actual shipment data, see Load Preview Data.
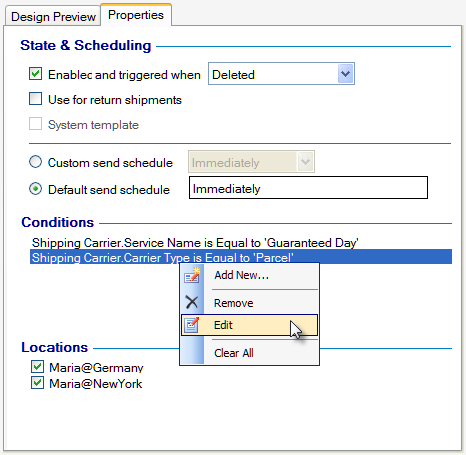
This tab displays all the properties associated with the currently selected template.
Enabled and triggered when : Check this option to send notification emails using this template when the designated action occurs. Choices are "Shipped (when shipment is processed), Updated (when shipment is modified), Shipped or Updated, or Deleted (when shipment is deleted).
Use for return shipments : Check to use this template when a return shipment is processed in StarShip.
Default send schedule : The Default send schedule is set from the global default setting in Server Options. The current default setting is displayed in the field. To set a different send schedule than the default, select the Custom send schedule option.
Custom send schedule : Change from the global default setting and use a custom setting for this template.
1 Send immediately : Emails are sent as soon as the trigger occurs.
2 Delay by : Emails are delayed for a set period of time; Set the delay by manipulating the 00:00 field.
3 Send at : Emails are sent in a batch at the time you specify; Set the time by manipulating the 00:00 field. The time is based on the email server's time.
4 Send manually : Emails are sent when the user chooses to send them from the Email Viewer.
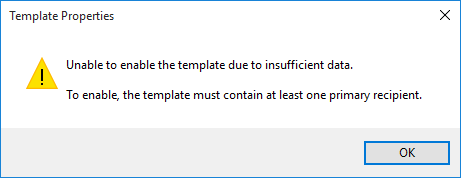
Note: A 'To' address must be specified in order to enable a template. If you attempt to enable and save a template that does not have a 'To' address set up, you will receive an error message when you try to save the template.
This section lists any existing conditions under which the email should be sent. You can also add, modify, or delete conditions here by right-clicking in the Conditions area. You may add up to three "AND" conditions per document. You may add up to three "AND" conditions per document.
Add condition
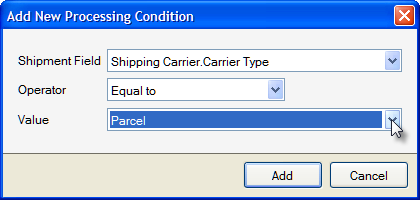
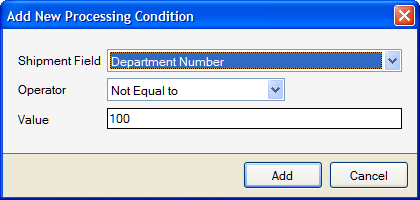
Add conditions by right-clicking in the Conditions area and selecting Add New. The resulting dialog allows you to choose a shipment field, an operator, and a value for that shipment field.
For example, to send an email for parcel shipments only, set the Shipment Field "Carrier Type" "Equal to" a value of "Parcel".
For some shipment fields, you can type a value into the Value field :
Remove or Edit Conditions
You can select an existing condition and then right-click on it to edit or delete it.
The import process can be used to import backup templates, or custom templates that have been distributed to you.
On the Import Templates dialog, click Import and then click Open.
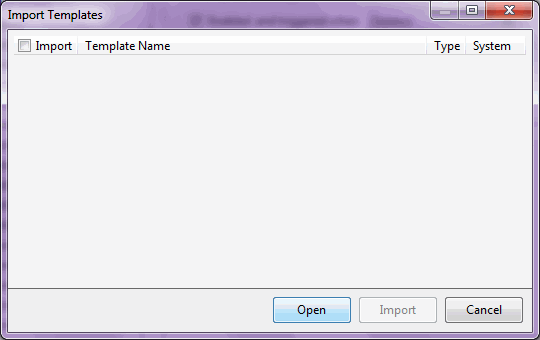
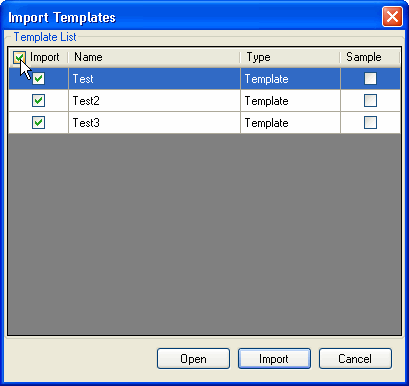
Navigate to and select the template XML file you want to import. Click Open. The template or templates display in the dialog. Select the templates you want to import by checking the check box next to the template name. You can also select to import all the templates by checking the check box in the Import column heading.
Note : When importing templates that have the same name as any existing templates, you will be asked if you want to overwrite them. If you choose to overwrite, the new templates will replace the existing ones.
You may want to export template(s) in order to have a backup or if you need to distribute custom templates that you have created. Templates are saved in .XML format and can be saved to a shared directory and then imported by other users.
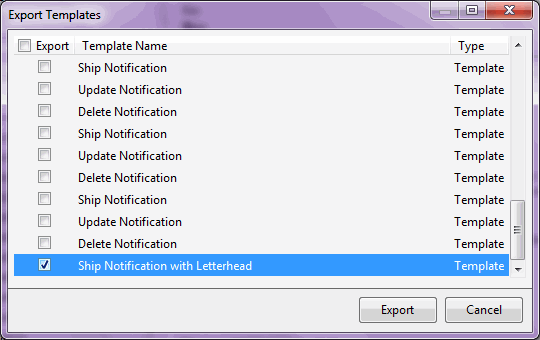
From the Template Manager, click Export. On the Export Templates dialog,
select the templates that you want to export by clicking the check box
next to the template name. To select all templates in the list, check
the check box in the Export column heading.
When prompted, navigate to the folder where you want to save the export file and click Save. You'll receive a confirmation dialog.
Settings for the outgoing email server can be accessed from the Server Settings button.
See Server Settings for more information.
You can change or test the connection properties for the eNotify Email Server from the Server Connection button.
See Server Connection for more information.