SmartLabels
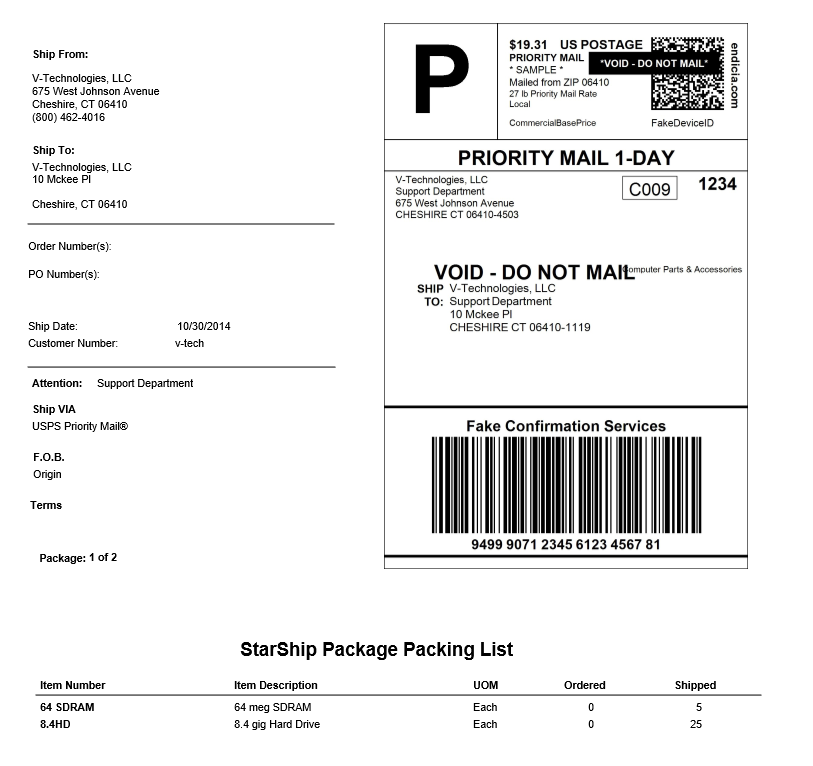
SmartLabels give you the ability to embed the carrier shipping label into a shipping document, along with other information and text. For example, you could create a SmartLabel that includes the carrier shipping label and the shipment packing list. StarShip allows SmartLabels for shipping documents that print for parcel shipments. SmartLabel documents can only be printed per package.
You can create your own SmartLabel or use/customize the default templates provided.
Default Templates
We provide two default SmartLabel templates, which can be found in Setup > Printing > Manage Templates under Shipping Documents. The templates are named SmartLabel_Portrait and SmartLabel_Landscape. The default templates include the carrier shipping label, sender and recipient fields, order fields, packing list, and more, in either a portrait or landscape format. Default (padlocked) templates cannot be renamed or deleted; they can be used as is, or copied under a different name and edited.
You can right-click on the template and select Create Copy to create an identical version of the template that you can then edit. Or, right-click on the template and select Edit; after editing the template, perform a Save As operation to save the edited template.
Create/Customize Template
From Setup > Printing in the StarShip Client, select Manage Templates.
- If you want to customize one of the default templates provided, see Creating a new template from an existing template.
If creating a new template, select File > New. These settings must be specifically configured for SmartLabels.
- Set the Template Group to Shipping Documents.
- Template must be set to Per Package.
- Template is for : Parcel Carriers only

- After clicking OK, the blank template opens. Right-click on the template body and select Insert Carrier Shipping Label.
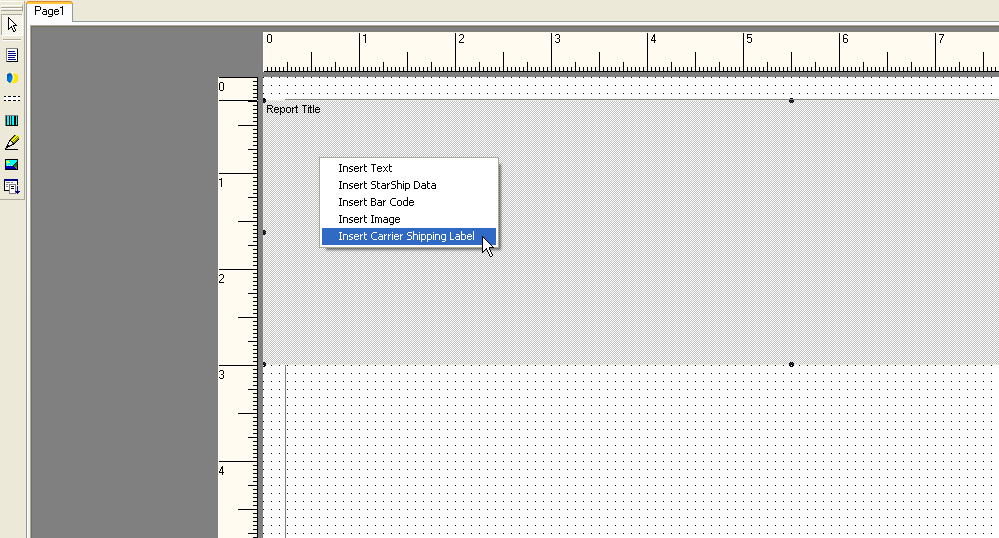
- Position the label in the template and then insert any other fields or text you want in the SmartLabel. You can find instructions for inserting fields/text in Manage Templates.
- Save the template.
Enable the SmartLabel document
- In Setup > Printing, select Manage Documents.
- Under Other Shipping Documents and Reports, select the SmartLabel you created.
- Check "Enabled" to make the document active.
See Configure Documents for more information about fields on this dialog.
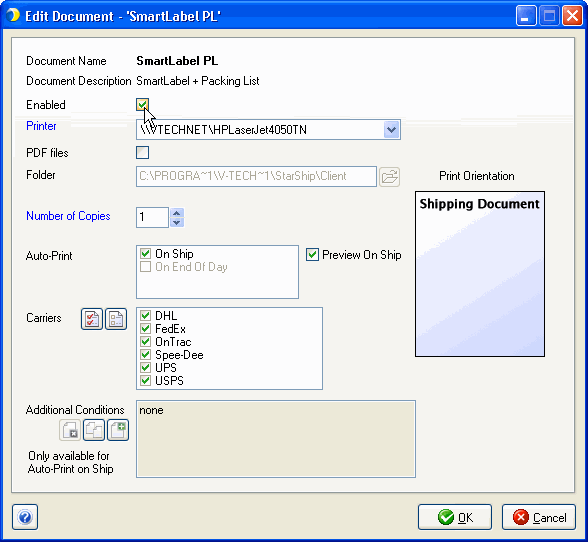
- Carriers : For FedEx, USPS, and DHL, only one label type (thermal, laser, or SmartLabel) may be enabled at any one time. Therefore, the SmartLabel cannot be co-enabled with the carrier's shipping labels. If you have carrier shipping labels enabled and try to enable the SmartLabel document for the same carrier, you will see this message. Click Yes to disable the carrier shipping label for the carrier(s) and print this integrated SmartLabel instead.

- Click OK and exit Printing Setup.
The SmartLabel document will print when the shipment is processed (if Auto-Print On Ship is set) or can be reprinted from Open Shipment (Shipment > Open).