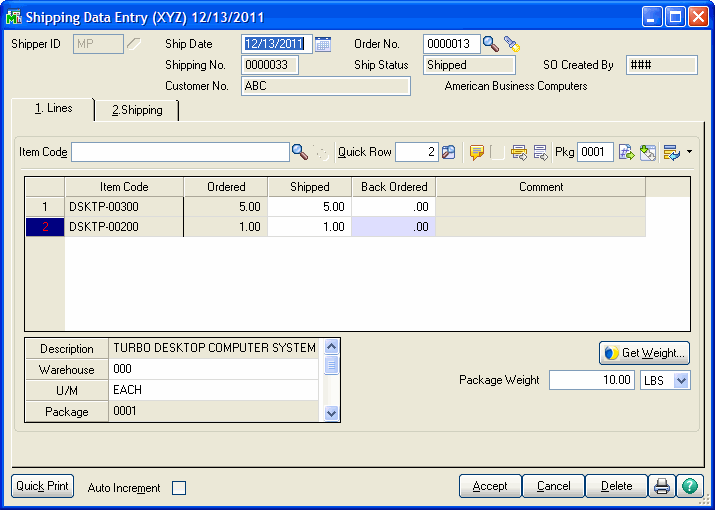
StarShip Link sends more shipment information to StarShip, including line item information, package contents, and custom fields. This means you have to enter less information than before in order to process the shipment.
The StarShip Client must be running to process shipments. After creating the shipment on the Shipping Data Entry screen :
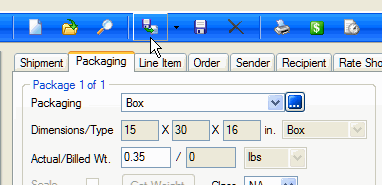
With StarShip Link, you can weigh packages using an electronic scale (set up in StarShip) by clicking the Get Weight button. You need to have checked the "Use Electronic Scale" in Shipping Setup Options.
Get Weight will fill in the Package Weight value for the currently selected package in Sage 100. You can also enter the package weight or weigh the package in StarShip.

See also : Setup > Scale Interface
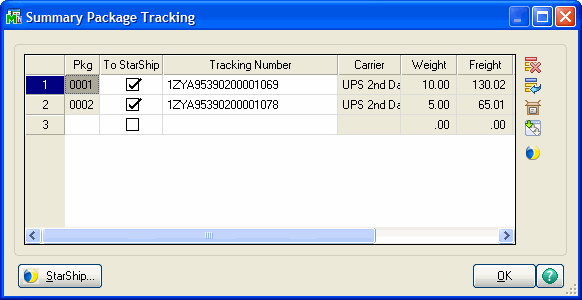
On the Shipping tab, you can click the Tracking button to specify packages you do not want to send to StarShip. Uncheck the To StarShip check box for these packages.
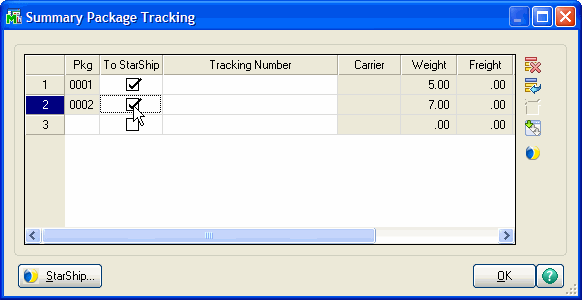
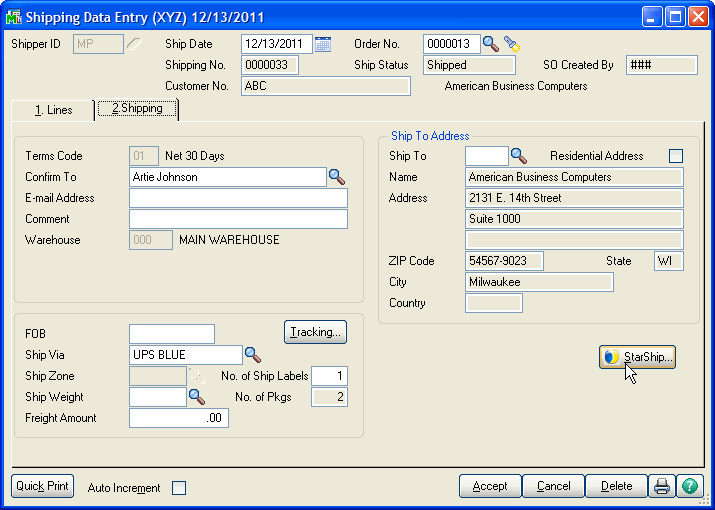
Click the StarShip button, either on the Summary Package Tracking dialog or the Shipping tab.
The shipment populates the Ship screen. If packaging and weight was available in Sage 100, the packaging information is populated. (If not, you can now pack and weigh the packages).
Note : If you unmap the package fields in Customize Interface, no packages will be imported into StarShip, even though they exist in Shipping Data Entry.
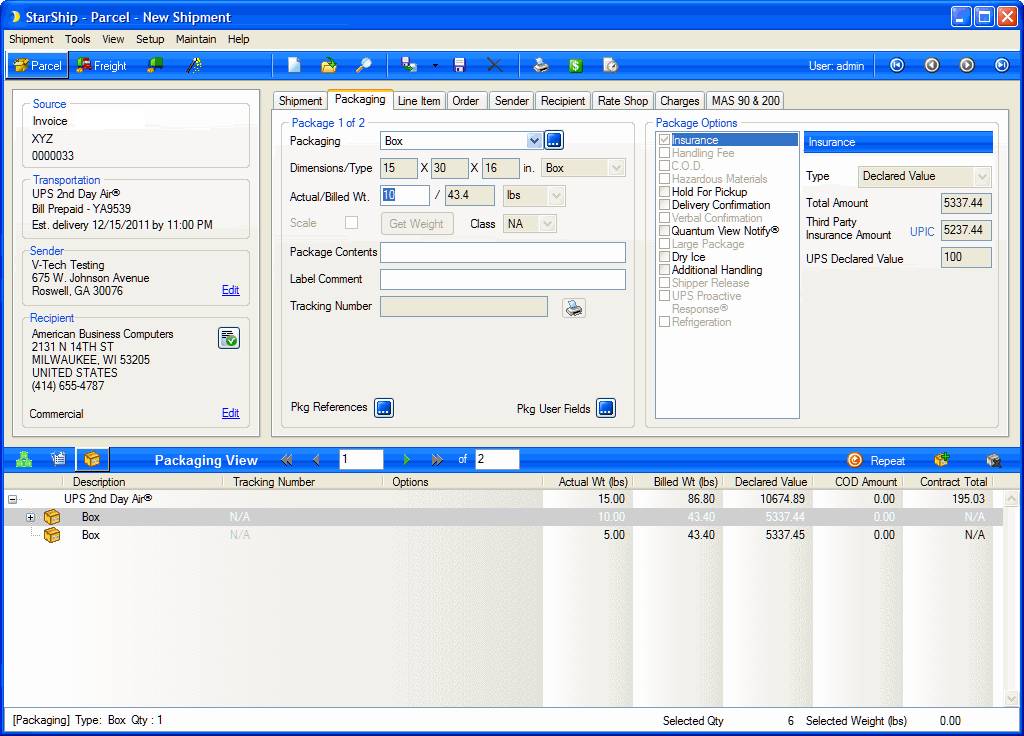
Enter any other shipment information or options. See Changes to Shipment Processing for more information about the Ship Screen.
When complete, click the Ship/Process button or press F5. If you want to save the shipment as a draft or cancel the shipment at this point, see these notes.
When the shipment is processed, StarShip minimizes and the Package Summary Tracking dialog and the Shipping Tab display the results of StarShip write-back based on your setup.
This is based on whether or not you checked the "Use StarShip Freight for Invoice Freight Amount" on the Entry tab of the Shipping Setup Options screen (Sales Order > Setup > Shipping Setup Options); and also, how you set up freight write-back in StarShip, which allows you to prevent freight update for individual shipments based on a prompt to the shipper or as a result of freight rules.
You can find more information about freight rules and write-back settings in the StarShip Help.
To view package and tracking
information, select the package and click the  icon
to the right to launch the StarShip Dashboard.
Write-back can occur to an Invoice in the shipment as follows:
The Invoice Freight Amount is updated.
The Package Tracking Table is shown when you click on the "Tracking..." button on the "2. Shipping" tab of the Shipment Data Entry screen. You can also view the Package Tracking Table from the Invoice by clicking the "Tracking..." button on the "1. Header" tab of the Invoice Data Entry screen. One package is entered for each of the first level packaging entries in the shipment as follows:
Pkg = Next available package number
To StarShip = Checked
Tracking Number = PRO Number or BOL Number (for Freight), or Tracking Number (for Parcel)
Carrier = SCAC Code (for Freight), or Carrier (for Parcel)
Weight = Total weight (for this order)
Freight = Each entry will contain the actual package freight amount if available, or if not, based on freight rules settings.
Freight Added = Actual freight value; if Sage 100 ERP is not set up to use StarShip freight, then it will be 0.00. (See Sage 100 Settings)
Comment = Contents of the Package Contents field
The Write-Back status for a shipment created from a Sage 100 Invoice is available on the Sage 100 tab of the Ship screen. If successful, the write-back status field shows as "Completed."
If you cancel out of the shipment in StarShip without processing it (or save it as a draft), you will receive a prompt. Click Yes to return to StarShip to process the shipment, or click No to go back to Sage 100 ERP Shipping Data Entry.

For more detailed information about processing shipments, launch the StarShip Help.