Using the Shipping Assistant
This section contains general information for shipping against Sage 100 ERP orders using the Shipping Assistant. The Shipping Assistant can be enabled to automatically launch when importing an order in Setup > Preferences > Freight Home or Parcel Home > Shipping Assistant. You can also configure Shipping Assistant defaults there. To manually launch the Shipping Assistant, select Shipment > Shipping Assistant on the StarShip Ship screen.
-
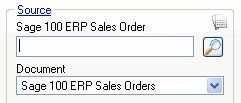
Select an order by scanning the order number or typing the order number directly into the Sage 100 Order field. You can also click the magnifying glass to use the Search/Batch Processing functionality to search for and process one or multiple documents.
-
Upon document import, StarShip will validate the recipient address. If the address is not valid, use the Address Validation to correct the address, if necessary.
-
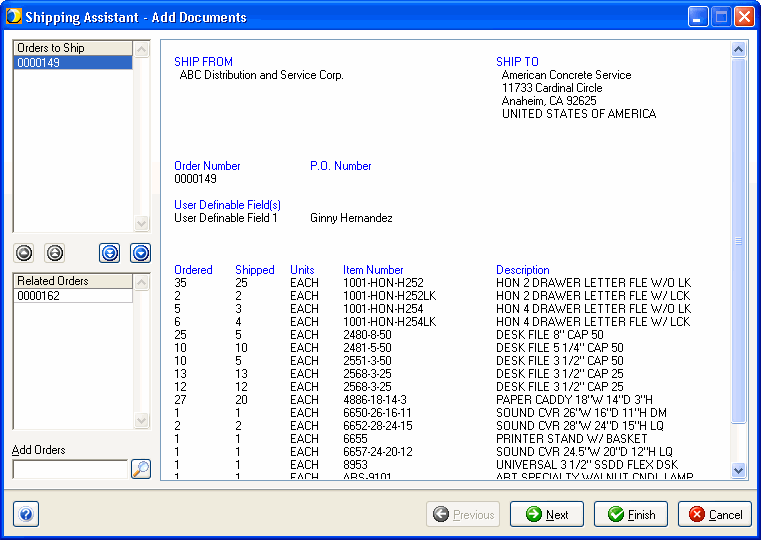
StarShip allows you to combine multiple sales orders to consolidate your shipments. Related orders are orders where the "Ship To" address information is the same as the order you selected. They are automatically populated under the "Related Orders" section of the Shipping Assistant when enabled in Source Interface Setup. To view details about the related order, select it from the list. When adding related orders, you can select one or more orders and use the arrow buttons to add them to the shipment ().
-
Next, enter or edit shipment quantities and classification. If any of the shipment items have previously been shipped, StarShip retrieves related information. If items have not been shipped before, you may need to enter additional information such as freight class (unless it is mapped to a field in Sage 100).
-
Shipment quantities : StarShip displays the quantity remaining to ship (i.e. the order quantity minus the shipped quantity on a currently open document). The "To Ship" column defaults to the quantity remaining to ship, but you can edit or reduce this number. Note that StarShip does not support overshipment of lines(regardless of whether you enabled the ”Allow Overshipment of Lines” check box in Sage 100 Shipping Setup Options) .
-
Classification : This is where you can specify NMFC code and subcode, class, and group. If you have set up groups in StarShip, you can select the group and the remaining classification data will be automatically populated.
Note : Classification, freight class, and groups refer to Freight shipments only.
- After confirming shipment quantities and classification info, you are prompted to distribute any items that have lot or serial numbers. This information is saved to Sage 100 immediately and is reversed if you cancel the shipment. Click Next.

-
Continue on to Ship with item packing or Ship without item packing.
See also : Validation rules for selecting Sales Orders
Continue to ship with item packing or ship without item packing.
With item packing
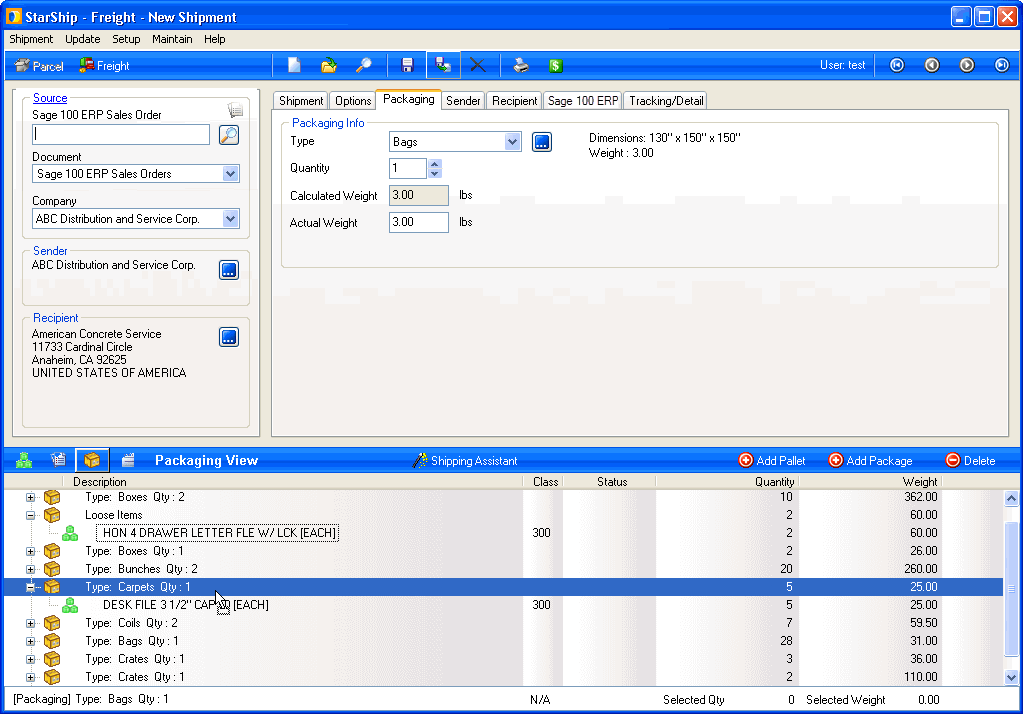
Within StarShip Freight and Parcel Preferences Setup, there are settings that enable/disable item packing. When you turn on item packing settings, StarShip will pack line items from the order using packaging scenarios. StarShip also determines the bill of lading information from the class of the items and how they are packed. Follow these steps to package a shipment when you have item packing enabled:
-
You should now be on the Package Detail window. If you've shipped any of the items before, StarShip retrieves packaging scenarios and automatically packs those items into first level packaging (boxes, cartons, etc.). If items have not been shipped before, drag and drop the items into first level packaging or use keyboard shortcuts.
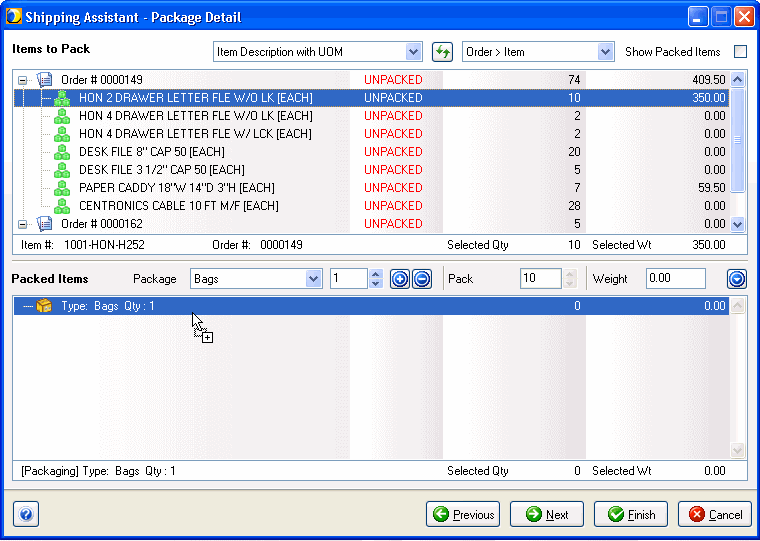
StarShip supports mixed items in one box. However, Starship can only learn packaging scenarios for future shipments when you have one type of item in one package. The auto-learning of packaging scenarios is optional and can be disabled.
-
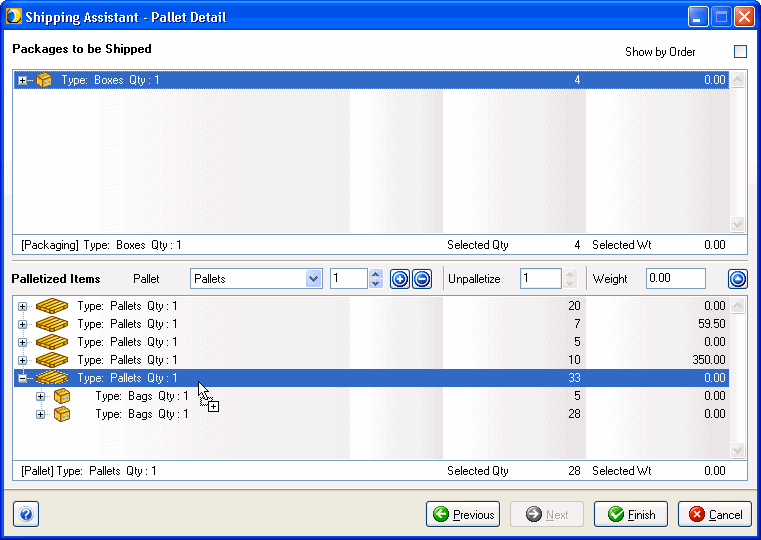
For Freight shipments, pack the boxes onto larger handling units (for example, pallets) using either drag and drop or . There is no auto-packing option for larger handling units.
Continue on to Complete the shipment.
Without item packing
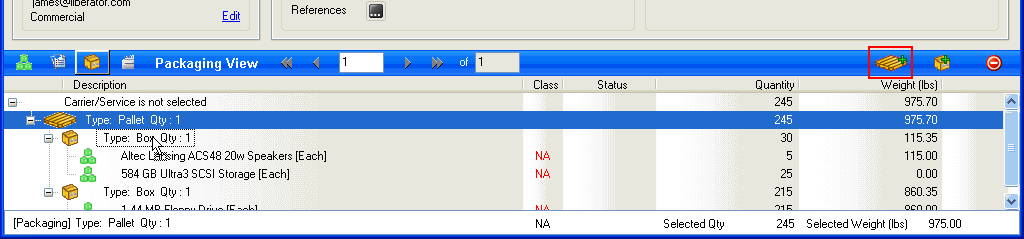
When item packing is disabled, line items from the order are not packed into boxes and/or pallets in the Shipping Assistant. Follow these steps to pack the shipment when item packing is disabled:
Click the Packaging button. In the Packaging View, add packages and drag and drop the items into first level packaging (for example, Box).
If this is a Freight shipment, click the Add New Pallet button to add handling units and then drag and drop packages onto them. Page through handling units by using the arrows, or by clicking on them.
Note: To leave items loose or loose on a pallet, you need to have the following Preferences setup configuration for the BOL:
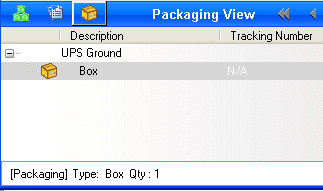
For Parcel shipments, if you checked the option in Parcel Preferences "When importing orders, pack all loose items into a default package," one default package is added in the shipment detail view.
Complete the shipment
-
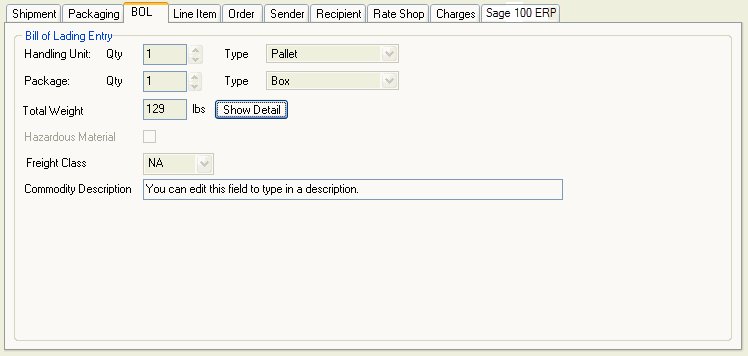
For Freight shipments, StarShip populates the Bill of Lading using line item and packing information. Bill of Lading settings in Freight Setup allow you some flexibility regarding how StarShip converts item packaging information into the Bill of Lading body. Typically, similar items with the same class are grouped under one general description. The commodity description may be edited on the BOL tab.
You can also manually enter the BOL.
-
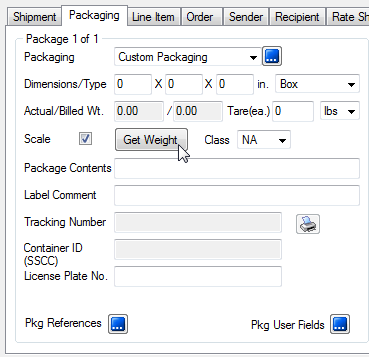
For Parcel shipments, you would enter package detail for existing packages. Remain in the Packaging View and navigate through the packages to weigh them or add package level details on the Packaging tab.
-
Enter or modify the freight billing information of the shipment, if necessary.
-
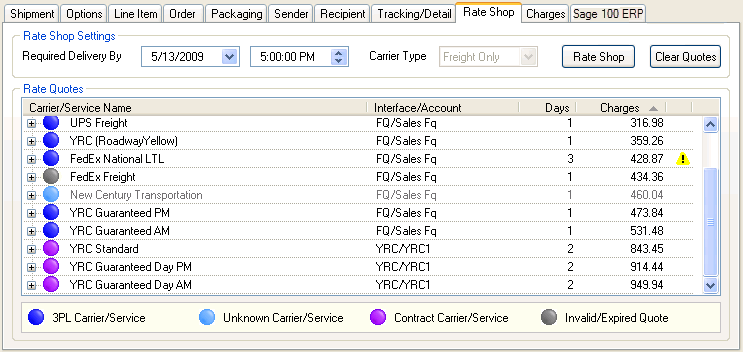
Select the shipping method - carrier and service - on the Shipment tab, and enter shipment detail that was not populated. You can also Rate Shop to select a carrier and service.
-
Rate the shipment with the currently selected carrier by clicking Rate from the File menu or by pressing Ctrl + Alt + R. To rate shop, click the in the toolbar or press Ctrl + Alt + S. Select a carrier from the Rate Shop tab. For more information, see Shipping Process > Rating in the StarShip Help.
-
If Batch Processing is enabled, the batch displays on the Sage 100 tab. Alternately, you can create a new batch. Your future shipments will use this batch until you change it.

Save the shipment
There are two options for saving shipments.
-
Save : To save a shipment without processing it, select Shipment > Save, press Ctrl + S, or click the Save button on the toolbar. This action saves the shipment as a draft, but does not process the shipment, request pickup from the carrier, automatically print shipping documentation, or write back any information to Sage 100 ERP. The shipment is essentially saved as a draft so you may open it and make changes.
-
Ship/Process : To process a shipment, select Shipment > Ship/Process or select the Ship/Process button from the toolbar. The shipment is tendered to the carrier. If you set up the bill of lading and/or labels to print automatically, they are now generated.
Shipment Status
Once a shipment is processed, the Shipment Status changes from Open to Processed on the Shipment tab. The status can now be modified.
Invoice Creation/Write-Back
After you Ship/Process a shipment, StarShip creates or updates Sage 100 ERP invoices for each order in the shipment. Here are some notes:
-
Comments and Miscellaneous Charges from the order are written to the invoice even though they do not appear in the StarShip shipment.
-
Drop shipped items do not appear in the StarShip shipment, but are automatically backordered.
-
StarShip writes the freight amount back to the invoice. In the case of a multiple-order shipment, StarShip divides the freight amount equally among the invoices. If StarShip is updating an existing invoice, it will increment the existing freight amount by the amount of the shipment.
-
If the Ship To address on the shipment differs from the Ship To address on an order, the Ship To address saved in StarShip is the one that will be written to the invoice. The original sales order Ship To address remains unchanged.
-
StarShip does not support the ”Automatically Print Shipping Documents” setting in Sage 100 Shipping Setup Options.
-
StarShip allows you to create a shipment against a sales order that already has an open invoice against it only if the first invoice was created by StarShip or Shipping Data Entry. A second invoice cannot be created if the first invoice was entered within Invoice Data Entry. You would then receive the error message: "Currently being invoiced" when selecting the sales order.
See also : For in-depth information about processing shipments, see Shipping Process in the StarShip Help.