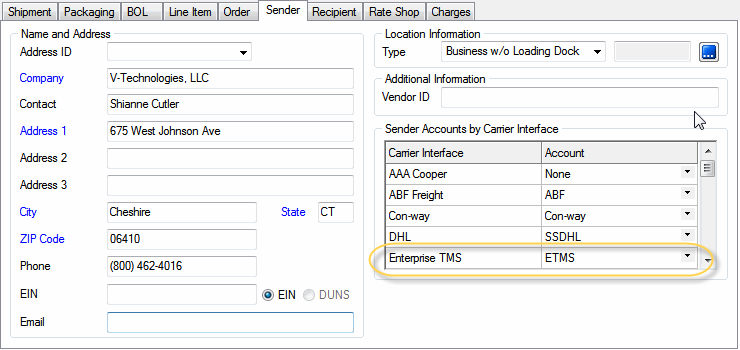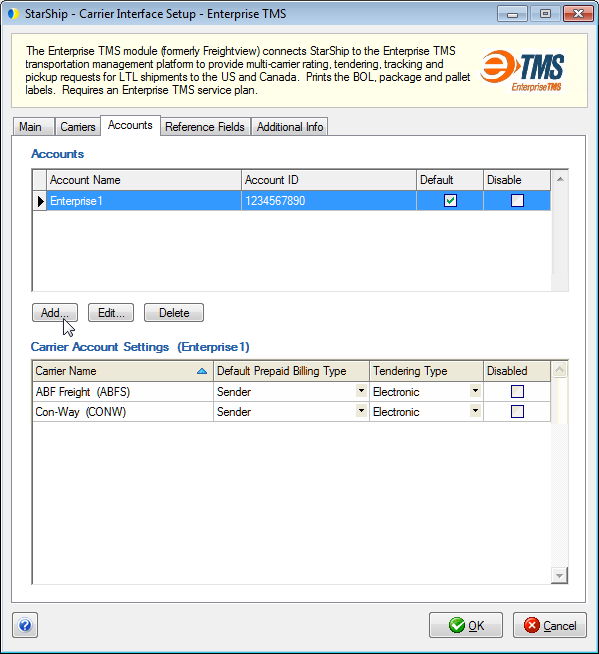
The Enterprise TMS module connects StarShip to the Enterprise TMS transportation management platform to provide multi-carrier rating, tendering, tracking, and pickup requests for LTL shipments. StarShip prints the BOL, package, and pallet labels for shipments to the US and Canada.
Have the information from your Enterprise TMS service plan available before setting up your account in StarShip. To access Enterprise TMS setup, select Setup > Carrier Interface > Enterprise TMS from the StarShip Ship screen.
Note : Enterprise TMS was formerly known as Freightview.
Account Name : Type in a name that will be used to identify this account within StarShip. More information
Authentication ID : Enter the account number assigned to you by Enterprise TMS.
Authentication
Key : Enter the password that was configured for your account
with Enterprise TMS.
Both the Authentication ID and Key fields are limited to 10 digits.
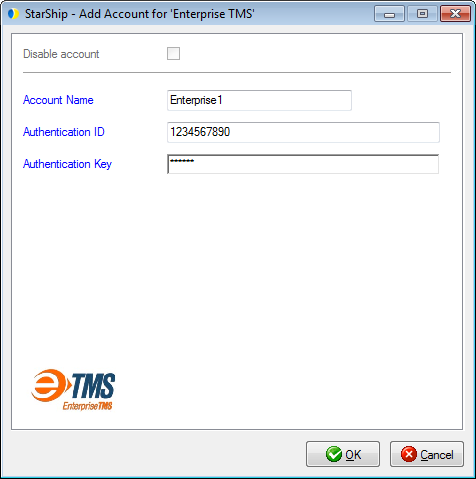
Click OK. The Account
appears in the list. To add additional accounts, repeat these steps.
To set the default account, check the Default check box next to the
account.
You'll notice that the Carriers tab is empty when you add your first Enterprise TMS account; this is because the Enterprise TMS interface has no carriers assigned by default. A quick and easy way to add carriers is to create a basic shipment and perform a Rate Shop on it. Alternatively, you can add carriers manually at any time from the Carriers tab in Enterprise TMS Setup.
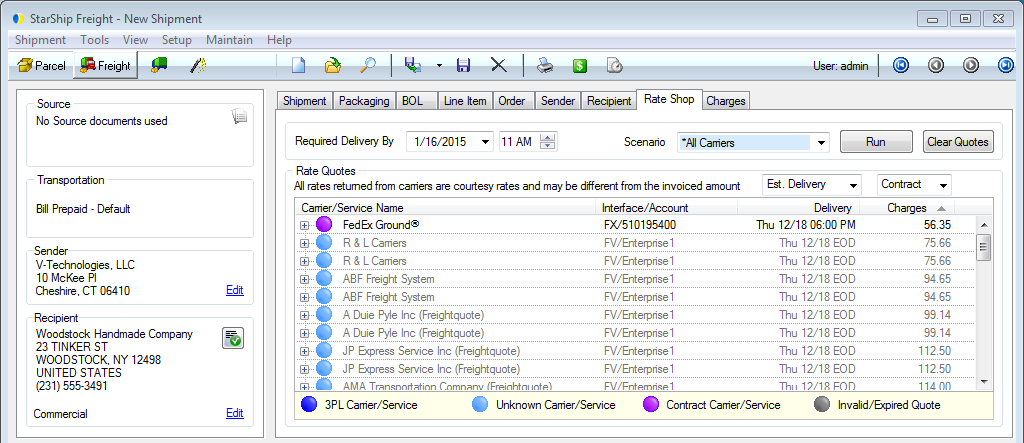
To add carriers using the Rate Shop method, create a basic shipment and provide the line item and weight. On the Shipment tab, do not make any selections from the Carrier or Service fields : leave the fields on their default settings of "Select a Carrier" and "Select a Service." On the Recipient tab, enter a recipient with a typical destination zip code to which you normally ship.
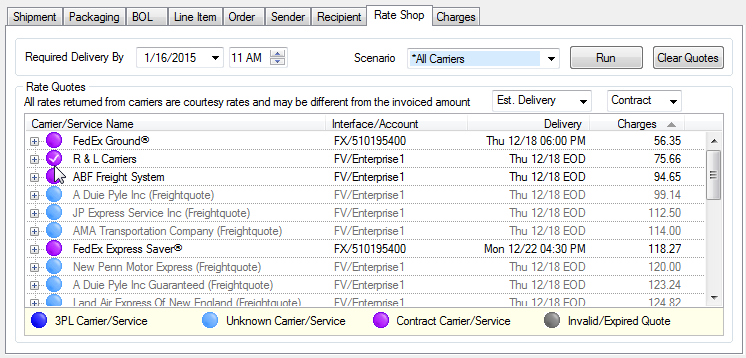
Click the Rate Shop button on the menu bar
:

Then, click the light blue circle beside the carrier you want to set as a default carrier for Enterprise TMS.
You will see the New Quote Confirmation dialog. From the Select Carrier drop-down list, perform one of the following actions :
Select an existing
carrier from known StarShip carriers. Then, click on Select Service
drop-down to select an existing service or create a new one.
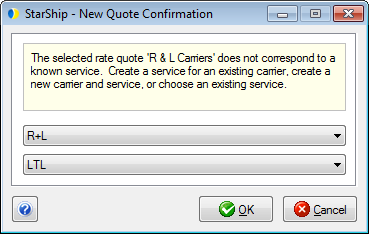
Or, use the selected
carrier to create a new carrier. Select Create Carrier from the Select
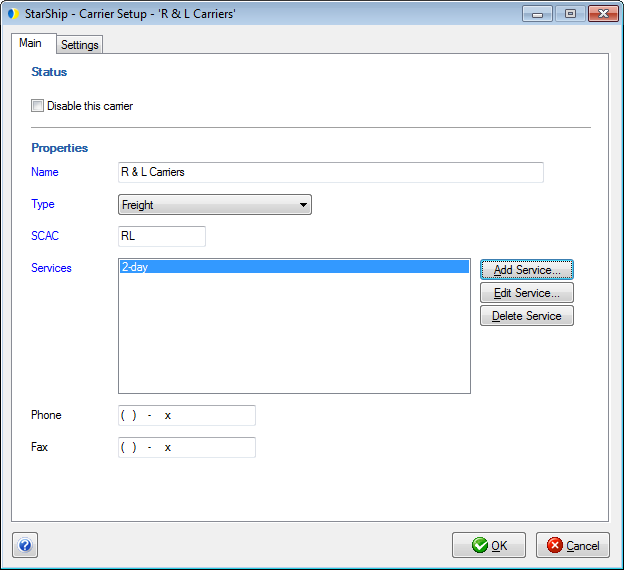
Carrier drop-down list. The Carrier Setup window appears. See Maintain
Carriers for more information about configuring this dialog. Enter
the required information and add any Services, if applicable.
Click the OK button to save the settings. The circle will change from light blue to purple, indicating it is a Contract Carrier/Service. Repeat this process for any Enterprise TMS carrier that you expect to use, in order to have them pre-mapped. Users can always add more carriers as they perform additional rate shopping for new shipments. While these steps are not required, it will make it easier to have the carriers mapped prior to shipping. The Enterprise TMS carriers returned by performing the rate shop rely upon the chosen Sender and Recipient detail. Providing different Sender and/or Recipient addresses may result in receiving rates from different Enterprise TMS carriers.
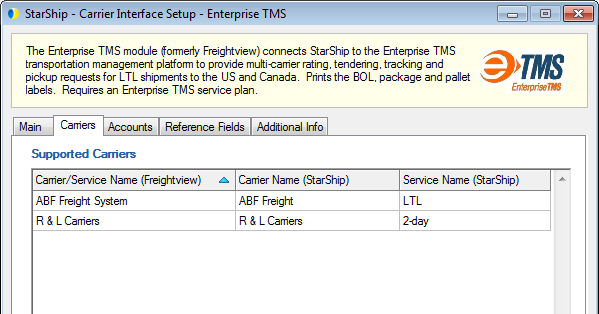
The carriers you add will also appear on the Carriers tab in Enterprise TMS Setup.
This tab displays information about Enterprise TMS settings and currently registered Enterprise TMS accounts for this StarShip installation.
Disable use of Enterprise TMS
Check this option if you do not want Enterprise TMS to be available for rating or shipping. Enterprise TMS will not appear in the Carrier field on the Shipment tab.
Enable background tracking
Background tracking collects shipment data so that you can look up delivery information for past shipments and generate late deliveries reports from the StarShip Dashboard.
Background tracking must be generally enabled for StarShip in the StarShip Server under Tools > Options > Background Tracking. It can then be enabled/disabled for each individual carrier in carrier setup.
When rate shopping, only display rates for contract carriers
Check this option if you want to return rates for your contract carriers, and not Freightquote.com carriers, when rate shopping freight shipments.
This tab lists all carriers that have been added for Enterprise TMS. To add a carrier from this tab, click the Add button. The same dialogs will appear as in the Add Enterprise TMS Carriers steps above.
The Accounts tab is where you set up the account information for your Enterprise TMS account(s). Under the Accounts section, you can add, edit, or delete accounts.
You can also set the default account or check "Disable" to disable an account. Once disabled, you will not be able to rate or ship using this account and it will not be available in the Accounts drop-down field.
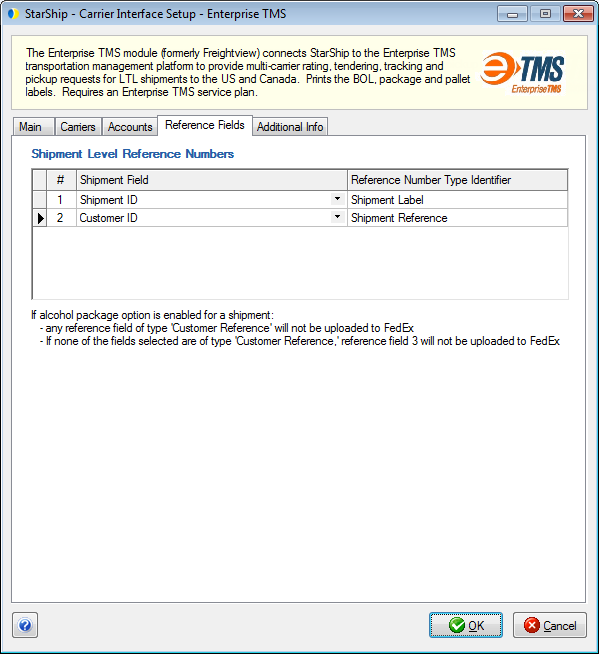
Reference fields allow the recipient to track incoming packages using a reference field (such as PO Numbers) along with the ship date or your shipper number, or other information that may not normally appear in a shipment’s details. StarShip supports 2 Reference fields at the shipment level.
Specify the shipment fields to include as reference fields by selecting them from the drop-down lists, or select Advanced... for more options.
This tab displays the supported billing types and shipment options available for this carrier interface.