StarShip Data Conversion
This topic covers the conversion of data from StarShip version 9.x to version 11.x. Once you have successfully installed StarShip 11, you can use the Export Utility to export StarShip records from version 9 and import them into version 11.
The Export utility is available from the StarShip client directory.
The Financial System data that you import will create a new interface (a set of mappings and value translations) for each interface that existed in v9. The interfaces will be named “Imported ABC” where ABC is the company code. In StarShip v11 you will have the ability to add or modify field maps and change these interfaces; see Customize Interface for more information.
Because StarShip v9 and v11 may be installed on different computers, the conversion is a two-step process :
1. Use the Export tool to export data from StarShip v9.
2. Import data to StarShip v11 via the StarShip Server Manager.
Data
The following table lists the data types that the Export tool can convert from v9 to v11, as well as each data type's location in v9 and new location in v11.
History
Shipment history cannot be converted. It is recommended that you maintain the StarShip v9 installation for past shipment look ups and reporting.
Export data from StarShip v9
-
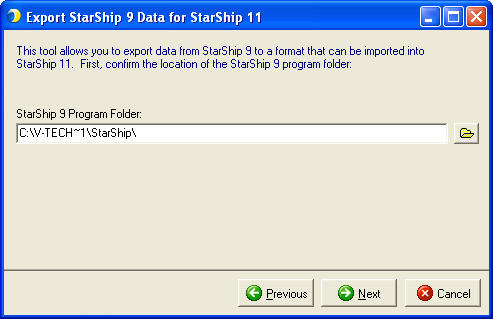
Run the Export11 utility from a computer that has the StarShip v9 client installed. Export11 will automatically launch after installing (and a desktop icon will be created if you need to run it again). You will be prompted to enter the StarShip v9 program folder. If you only have one StarShip v9 installed, this value will be populated correctly. If you have multiple installations, you may have to modify this path.
-
You will be prompted to select the StarShip v9 company and data folder.
-
If you only have one StarShip data folder, this value will be populated correctly.
-
If you have the StarShip v9 Citrix (remote site license) option, the list of companies and data folders will automatically be populated and you can select the company to export from.
-
If you have more than one separate installation, you may have to modify this path.

-
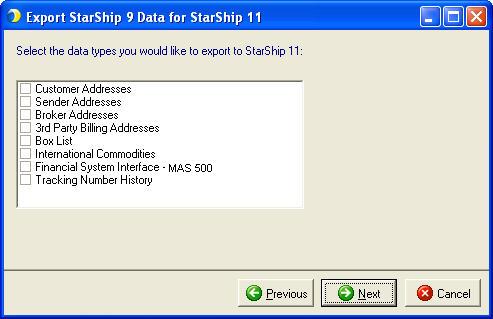
Select the type of data you want to export from StarShip v9:
-
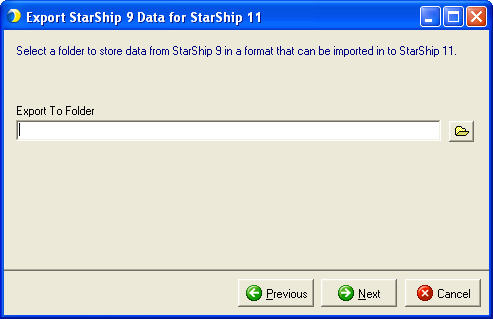
Enter the path where the exported files will be saved. This path should be accessible from the computer where StarShip v11 Server Manager is installed.
-
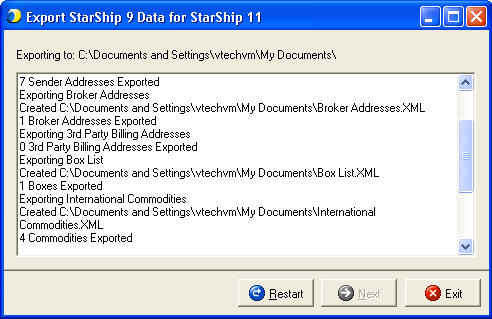
Click Next to begin the export process. The dialog lists the export status for each data type and any errors that occur.
-
Click Restart if you want to export data from another StarShip v9 company. If you are done exporting data, click Exit.
Import data into StarShip v11
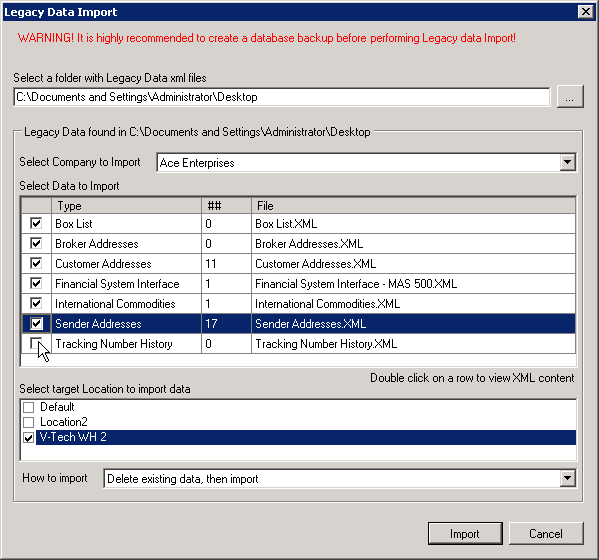
On the computer where the StarShip v11 Server Manager is installed, double-click the StarShip Server Manager icon in your system tray. If Server Manager is not already running, select Start > All Programs > StarShip Server > Server Manager to launch it. Select Database > Import Legacy Data to bring up the Legacy Data Import screen.
Folder and Company
Enter or browse for the folder where the v9 data was exported (step 4 above). The import tool scans the files and populates the available data for each company. If multiple companies exist, you can choose the company from the Company To Import drop-down list.
Location
In StarShip v11 a Location is used to handle multiple sets of shipping data, similar to a StarShip v9 company folder. Typically, a Location corresponds to a physical shipping location or warehouse. If you have multiple shipping locations, you must set these up as part of the StarShip registration process. Contact the StarShip Sales Team (800-462-4016) to add additional locations.
How to import
At the “How to import” prompt, specify how to handle duplicate information. You can choose from the following options :
§ Delete existing data, then import : StarShip deletes any existing records prior to importing the new records.
§ Do not delete data, update existing records : If StarShip finds matching records, they will be replaced by the newly imported ones.
§ Do not delete data, skip existing record : If the same type of records exist, StarShip ignores the imported records.
Import
Click Import to begin importing the StarShip v9 data into StarShip v11. If you are sure that you want to continue, click Yes.

If the import is successful, the following dialog will display.

Next : StarShip Setup Wizard


