Source Interface Setup’s default interface defines options used to write freight and tracking information back to your source interface when you ship against certain document types (such as Orders and Invoices). Write-back status, if supported, is viewable on the Source Interface tab.
The available settings for Write-Back will change depending upon your source interface, and is noted in the sections below.
From Setup > Source Interface > "your source interface," click Customize Interface.
Next, select the document link (for example, Orders).
On the bottom left of the Customize Interface window, click the Write-Back Setup button.
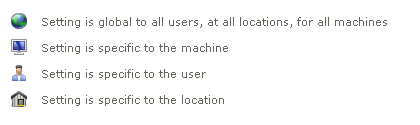
Within Write-Back sections, you can view the level at which each setting is applied by clicking the Show Setting Types link at the bottom of the Setup > Preferences window. You can toggle this setting on or off at any time.
![]()
For freight write-back, you can decide when and if freight is written back to source interface document.
Select the Freight Settings node.
Make a selection from the available freight write-back choices:
Always write freight to (source document): When you save or void a shipment in StarShip, the freight amount is written back to your source document.
Prompt shipper to write freight to (source document): When you save or void a shipment in StarShip, the shipper receives a prompt asking if freight should be written back to the source document.
Do not write freight back to the (source document).
This option is available for some source interfaces: Decide what should happen when StarShip encounters an existing freight value for a source interface document during write-back:
Replace existing freight only when the Tracking List for the (source document) is empty: StarShip will override an existing freight value only when the Tracking List for a source document is empty and then adds to the freight value after that.
Always retain the existing freight - increment or decrement as shipments are processed: StarShip keeps the freight value and adds or subtracts freight charges from the existing value as you process new or delete shipments against a source interface document.
Always replace existing freight with freight from the last shipment processed: StarShip will always overwrite the existing freight value.
This information applies to Developers Interfaces, ADE Interfaces, and SQL FSI Interfaces.
The fixed field called Package ID more easily allows interface developers to link StarShip package information write-back to packages in the ERP interface. It can be added by ERP interface developers to the input file for Shipment type documents. When used, it should represent a unique identifier for the package. StarShip will also use the same Package ID for write-back to this field.
Using this field is optional. If you do not use the Package ID field, StarShip uses the Package Number as the Package ID for write-back.
Guidelines for using Package ID :
The Document file is the input file from the ERP interface. When Package ID is specified, it will be used as a unique identifier for the package. This field will also be preserved in the Shipment File with the same value for the package. This field does NOT have to be listed in the Field List xml to be recognized. For SQL FSI interfaces, a Package ID field added to the Field List in the SQL Interface Builder will be used in the same way.
The Shipment File is the output or write-back from StarShip to the ERP interface. For SQL FSI interfaces, this would be the Write-Back SQL statements.
When Package ID is specified, it will be used as an Index number for imported packages. For packages added manually by the user, the value will always be -1. If the Document file imported contains a Package ID field with a valid value, the same value is returned in the Shipment file. If no Package ID was initially imported, this field will use the Package Number value instead. This field does NOT have to be listed in the Field List xml to be recognized.
For tracking information write-back, you can customize which StarShip fields are written back to the source document. This section appears for some source interfaces.
Click the Notes Settings node.
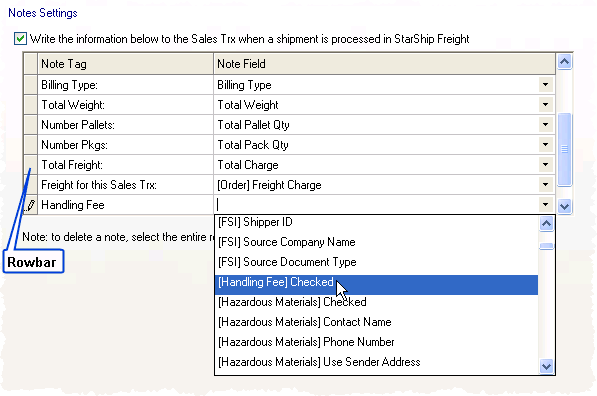
Enable the Write the information below to (source document) when a shipment is processed in StarShip check box.
Modify the Note Tag and Note Field Names.
The Note Tag is the printed title; the information from the designated StarShip field will appear next to the Tag words in the source interface document.
When you type in a Tag row, a pencil icon is activated to the left of it. A selected row will have a triangle next to it. To add Tags, position the cursor in a blank field and begin typing. Then, select a Note Field Name from the drop-down list to be associated with the new Tag.
To delete a row, hover over the rowbar until an arrow appears. Single-click with the mouse so that the row is highlighted. Then, press Delete on your keyboard.
For source interfaces that support Batch IDs, assign the Batch ID value to apply to the source interface document for deleted batch-shipped shipments. This is available for some source interfaces.
Make a selection from the drop-down list:
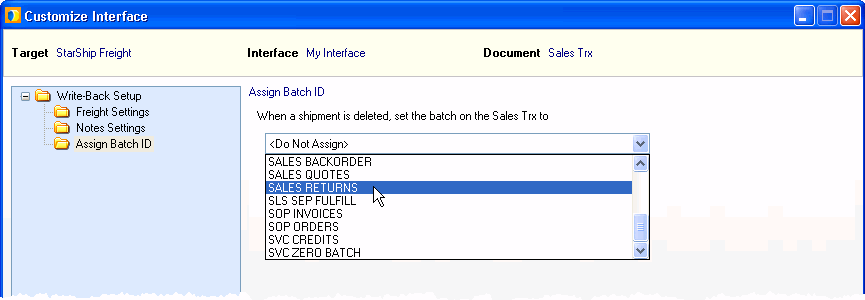
When shipments are processed, the Batch ID value to apply to the source interface document is assigned on the shipment entry screen.
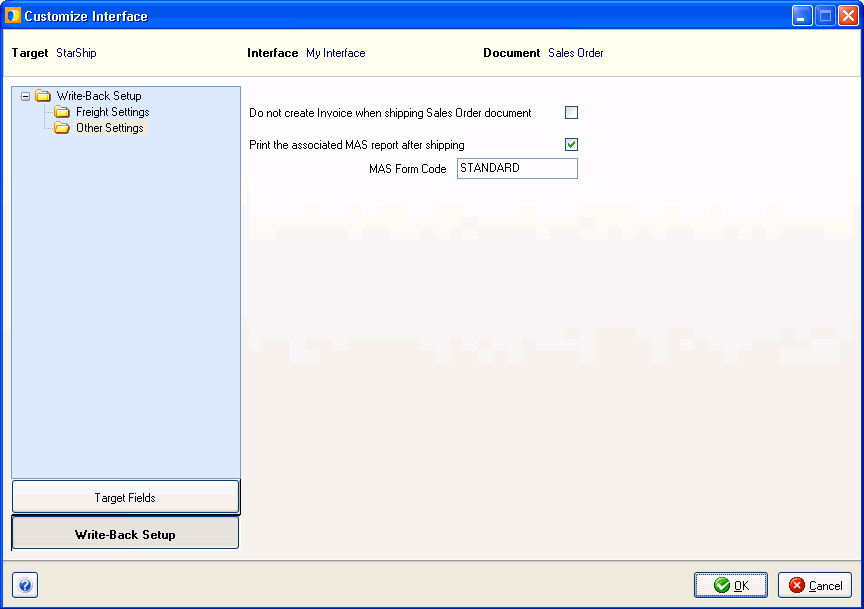
Do not create invoice when shipping Sales Order document
This option is available for Sales Order write-back. When you check this check box, no invoice is created and only the Applied Charge is written back to the Sales Order (to Totals > Freight Amount).
Print the associated MAS report
When checked, StarShip will print the associated MAS report to the default printer. The MAS report is defined in MAS in the Form Code field, after clicking the “Accept” button in the “Shipping Data Entry” dialog, or by clicking the “Quick Print” button. By default, the Form Code field is pre-populated with the default form code, or the last used Form Code, in the print dialog.
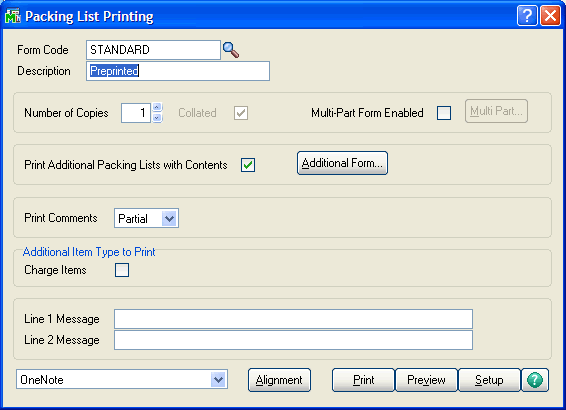
MAS 90 & 200 print dialog
The Lookup button next to the Form Code field brings up the list of available forms. The Print Code must be in this list in order for StarShip to use it to print the report.
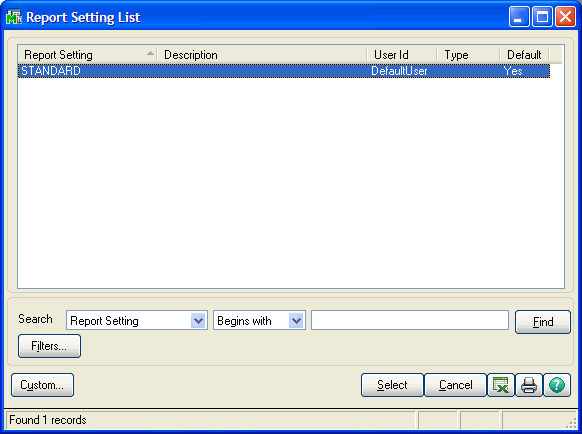
MAS 90 & 200 lookup dialog
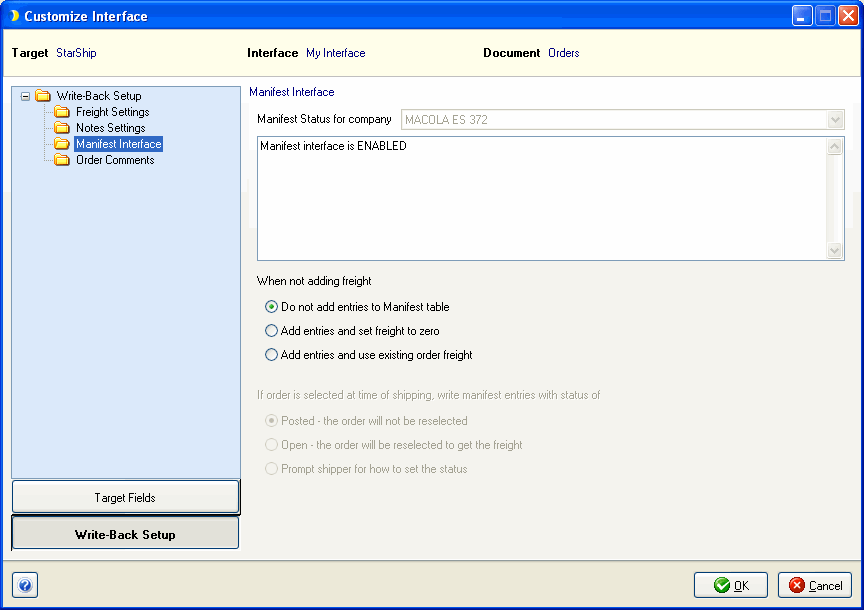
In addition to Freight Settings and Notes Settings, you can configure Manifest Interface and Order Comments settings.
The Manifest Interface status displays for the currently connected company in StarShip. When disabled, freight is written directly to the Freight field in the order.
If the Manifest Interface is enabled, configure the When not adding freight setting. This setting determines what gets written back to the manifest table when you selected "Prompt the shipper to write-back freight..." or "Do not write-back freight to the Orders" in the Freight Settings section. Even though freight is not being written back, the second and third choices, "Add entries and set freight to zero" and "Add entries and use existing order freight," allow you to still use the Manifest Select function in Macola and maintain shipment history in the manifest table. For more information, see the Macola Interface Guide.
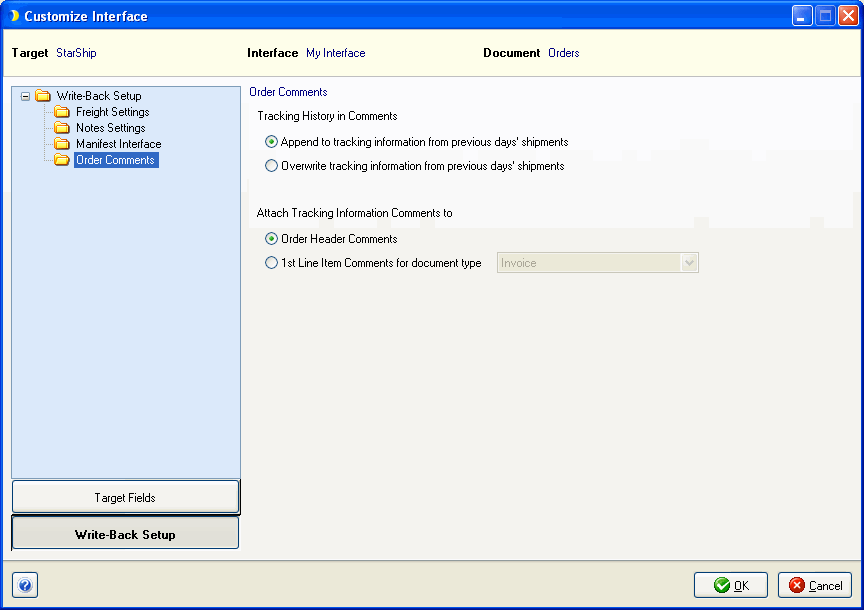
The Order Header comments print on any document that has the "Comment" field in its layout. Order Header comments usually print above the first line item. Use this option if you want the comments to print on all documents.
StarShip can write tracking Information back to the Order, to the Header Comments or Comments attached to the first line item. Decide how to maintain tracking history in the Order Comments: overwrite the previous day's shipments, or append to them. You can also select where to attach tracking information comments. For more information, see the Macola Interface Guide.