This topic highlights changes to StarShip's shipping interface from v9.
A major difference is that the shipment processing screen is not separated from StarShip's menu. The Ship screen is always open while StarShip is running.
Unlike StarShip v9, you no longer have to exit the Ship screen to modify settings and information used when processing shipments. For example, you can change your Preferences settings (Setup > Preferences) when a shipment is on-screen. Any changes you make are immediately applied.
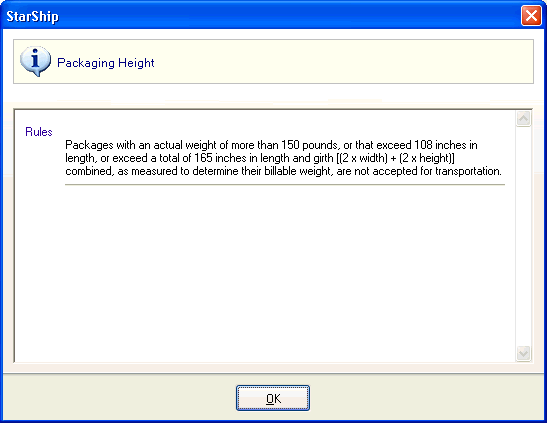
StarShip now makes the carrier business rules being implemented more transparent to the user while shipping.
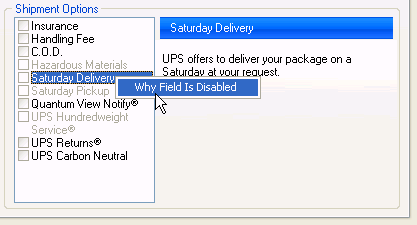
When an option or field was disabled, for example, the shipper had to reference documentation to find out why.
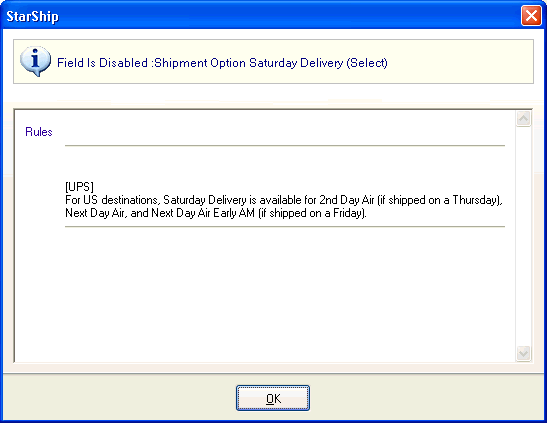
When an option or field is disabled, you can right-click on it and select Why Field is Disabled for an explanation.
Explanation dialog :
In addition, if a field value is invalid, it will be highlighted in red. Right-click on the field and select Fields from the menu.
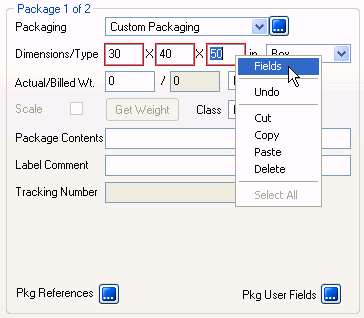
Then, you can choose to either display or correct the error.
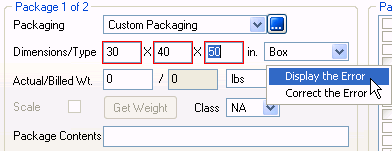
Here, we are viewing the error :
Or, select Correct the Error to set a valid value :
![]()
You could not view key information such as the Sender and Recipient at the same time.
The top-left panel of the Ship screen contains key shipment information and is always visible when processing a shipment.
When you first open StarShip, or are on a new shipment, the Sender address is the default address for your company and the Recipient is blank.
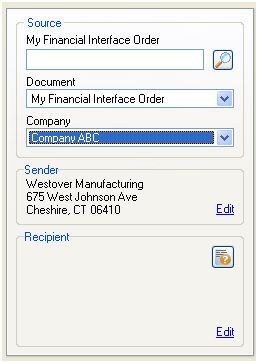
Selecting a Source :
For financial system interfaces that allow users to initiate the shipment from within StarShip, you can select a document to ship against from the Source section.
Company : Use this drop-down list to select a company if you want to switch between companies in your financial system.
Document Type : Use this drop-down list to select the financial system document type you want to ship against. For example, orders.
Specific document : Type in the document number and press Enter; or, scan the document number, for example, the order number.
Browsing for a document : To browse for the source document, click the magnifying glass icon next to the document field.
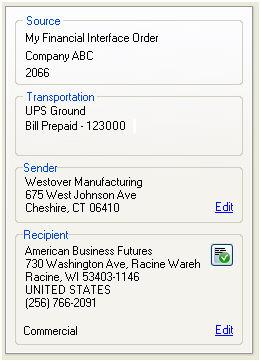
Once a document has been imported, the Source fields become read-only. The Transportation section displays the carrier, service, and billing type.
The Sender and Recipient sections show the addresses associated with the source document. Click the Edit link to switch to the corresponding tab so you can view or modify that information.
Address Validation status displays next to the Recipient. The button graphic and color indicates the validation status; red x = failed, green check = validated, and orange ? = not yet validated. Click on the button to see validation results.
□ Sender Addresses are set up in Setup > Company.
□ Settings for Address Validation can be configured in Setup > Preferences > Address Validation.