StarShip allows you to customize the way data is translated between Sage 100 source documents (Invoices) and the StarShip shipment entry screen. Customize Interface controls how the data in the source document is translated. It defines what information populates the shipment fields, and how the data is interpreted into accepted shipment values. A set of field maps and value translations is called an "interface."
You can update translations for fields that are mapped from one value on the Sage 100 side to another value on the StarShip side. In StarShip Link 1.0, fewer Sage 100 input fields were available and there was no ability to modify the field mappings. Therefore, you could only provide value translations for Ship Via and Terms. With StarShip Link 2.1, you can map any Sage 100 fields and provide value translations for almost any field in Sage 100 that has a list of values.
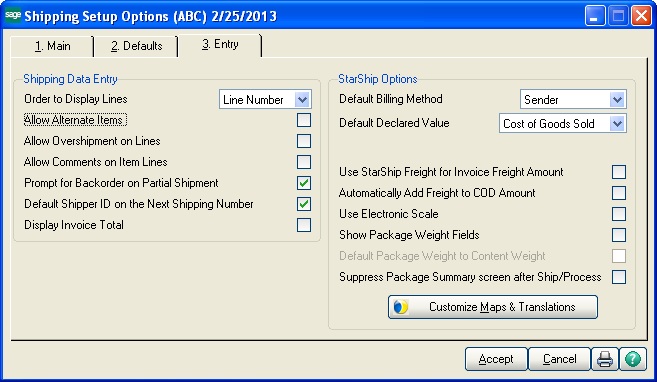
You can access this module from Shipping Setup Options by clicking the Customize Maps & Translations button or from within StarShip, from Setup > Source Interface > Sage 100 5.0 StarShip Link (or your version). If a company was not manually added during StarShip setup, the current company will be created automatically when you click on the Customize Maps & Translations button. The company will be added based on information available in the transaction initiated by clicking on the button. See the Setup Wizard for more information about adding companies.

The interface can be customized as follows:
Map any StarShip shipment field to a fixed value or to an available Sage 100 field. A pre-defined list of Sage 100 ERP fields is accessible from Customize Interface.
Map user-definable fields (from Custom Office) to
the StarShip shipment. User-defined fields from the tables below are
supported:
SO Sales Order Detail
SO Sales Order Header
SO Ship To Address
AR Customer Master
AR Sales Person Master
CI Item Master
Customize value translations for field mappings
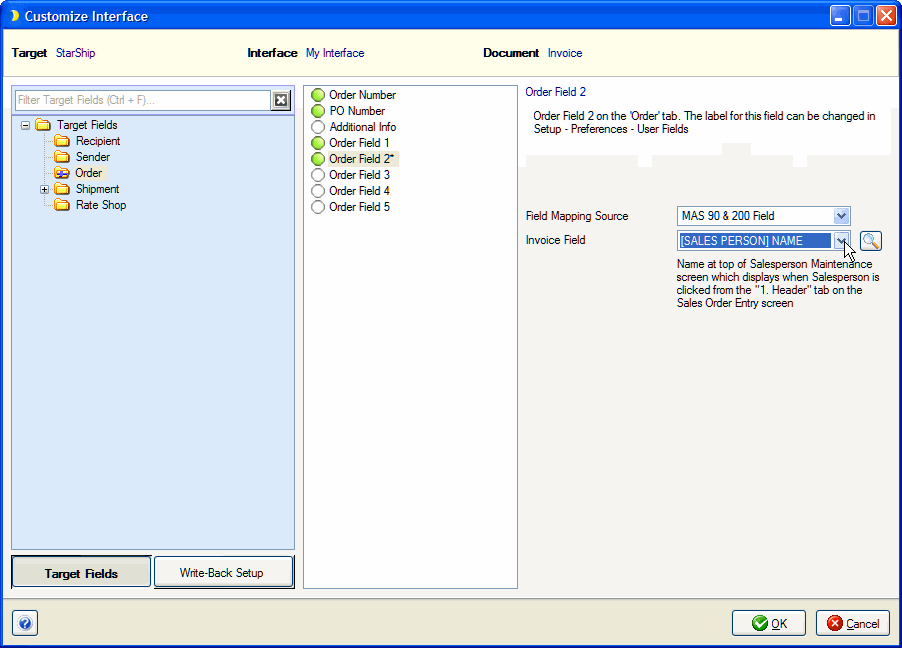
This example shows you how to map a field containing Salesperson information from Sage 100 to a user-definable field on the StarShip shipment entry screen.
In Customize Interface, select the Invoice.
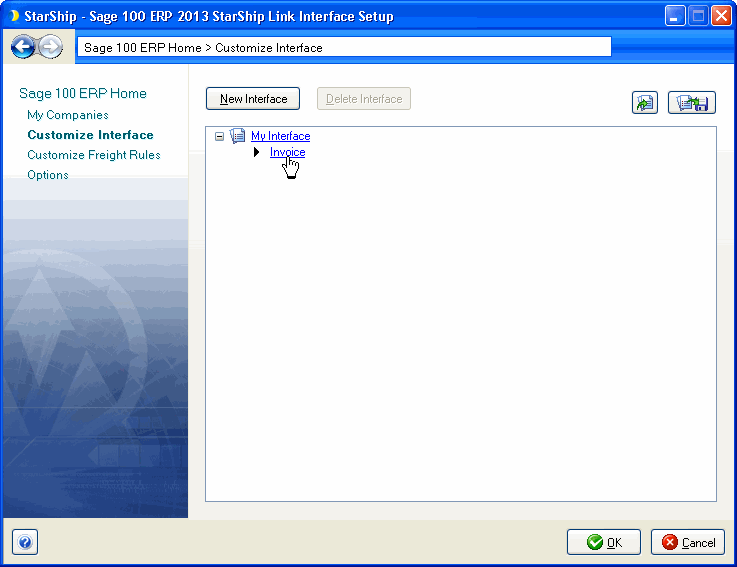
Select a Target Field group on the left-hand
side of the window.
In the center panel, select the shipment field
to which you want to map. Then, In the Field Mapping Source field,
select a source.
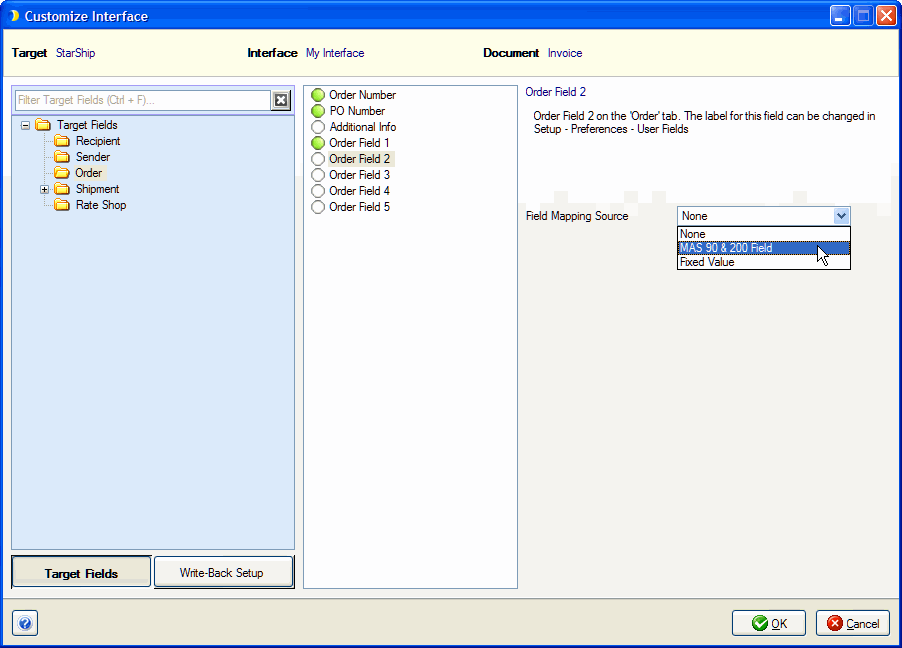
In the Sales Order or Customer source field,
either type in a value if you selected Fixed Value or select a field
from Sage 100.
Many fields in Sage 100 are mapped by default as part of the basic interface. If you want more control over how data is translated from Sage 100 ERP into shipment fields, you can add or customize field mapping and value translations to suit your company's needs.
For example, a common field map is from "Ship Via" in the source interface to "Carrier" in StarShip. You can customize this field map based on the carrier values set up in Sage 100. Here's how to accomplish that :
Click Customize Interface.
Select Invoice.
Expand the Target Field group "Shipment"
and then select the Carrier Information folder. In the Shipment fields
section, when you click on Carrier - Service, you will see the default
mapping to the right.
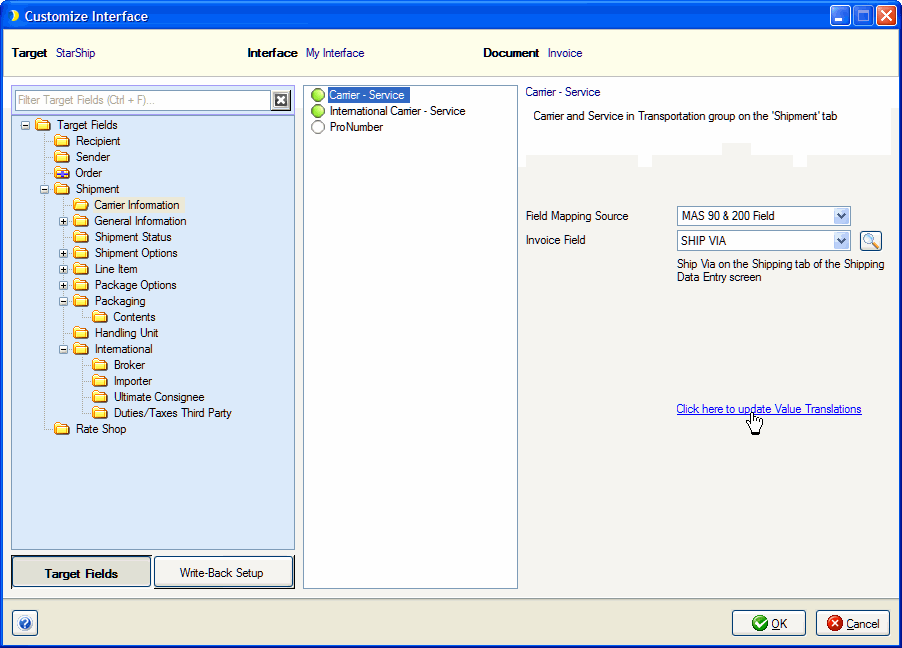
When you select "Click here to update Value
Translations," you will see the way Ship Via is currently mapped
to the Carrier - Service value in StarShip. And you can adjust the
values:
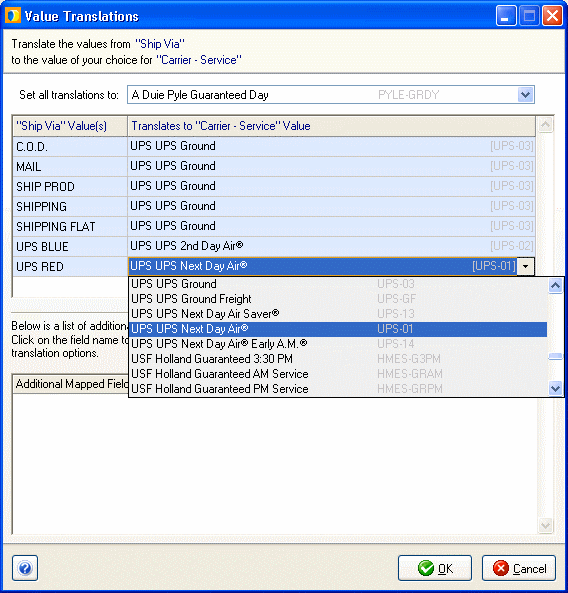
Click OK.
Many fields are mapped by default. To completely clear a field mapping, right-click on the folder or field you want to unmap and select Clear Mapping.
Note : If you clear the package mappings, no packages will be imported into StarShip, even though they exist in Shipping Data Entry..

When mapping to User Definable fields from your source interface, although it is possible to map StarShip User Definable fields to different level source fields, we recommend that you only map User Definable fields to the same level fields from the source interface. For example, you might want to map StarShip Line Item User Definable fields to an invoice level field. This can produce unpredictable results when there are multiple sales orders on the same shipment containing the same line item. In that case, StarShip would use the first value it receives to populate the User Definable field to which you mapped.
Source Interface Setup’s default interface defines options used to write freight and tracking information back to Sage 100 Invoices. Write-back status, if supported, is viewable on the Sage 100 tab on the StarShip Ship screen.
From Setup > Source Interface > Sage100 StarShip Link (or your version), click Customize Interface.
Next, select the Invoices link.
On the bottom left of the Customize Interface window,
click the Write-Back Setup button.
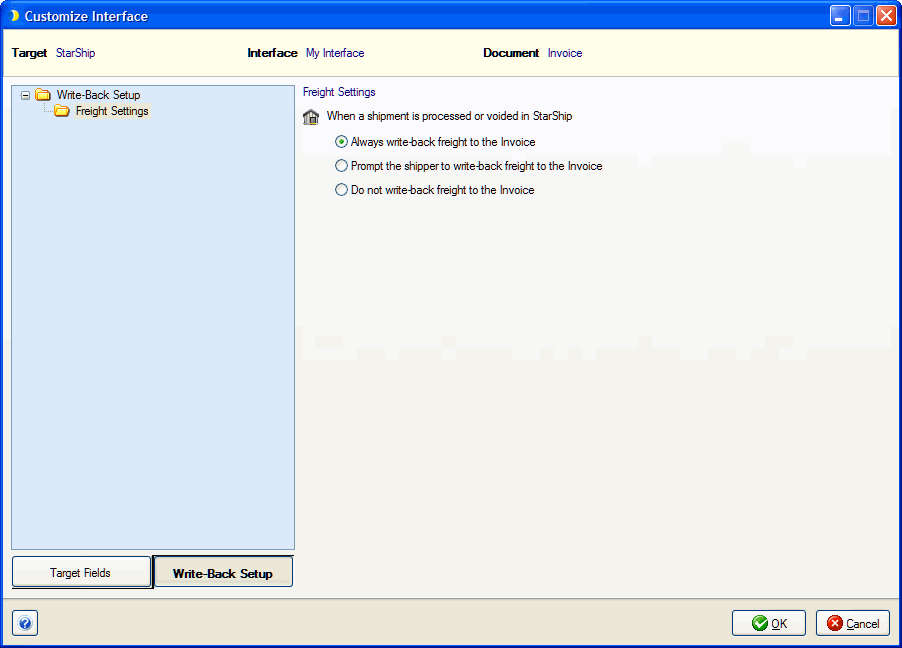
For freight write-back, you can decide when and if freight is written back to source interface document.
Select the Freight Settings node.
Make a selection from the available freight write-back choices:
Always write freight to the Invoice: When you save or void a shipment in StarShip, the freight amount is written back to your source document.
Prompt shipper to write freight to the Invoice: When you save or void a shipment in StarShip, the shipper receives a prompt asking if freight should be written back to the source document.
Do not write freight
back to the Invoice.
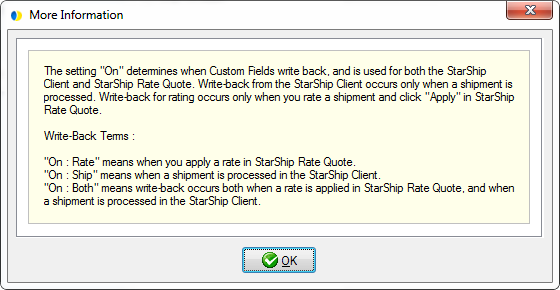
The Custom Fields feature allows you to map the Ship Weight field for write-back. This field supports write-back for both "On : Rate" and "On : Ship". For more information about how write-back occurs for each of these methods (Rate, Ship, and Both), click the "More info" link next to the "On" setting.
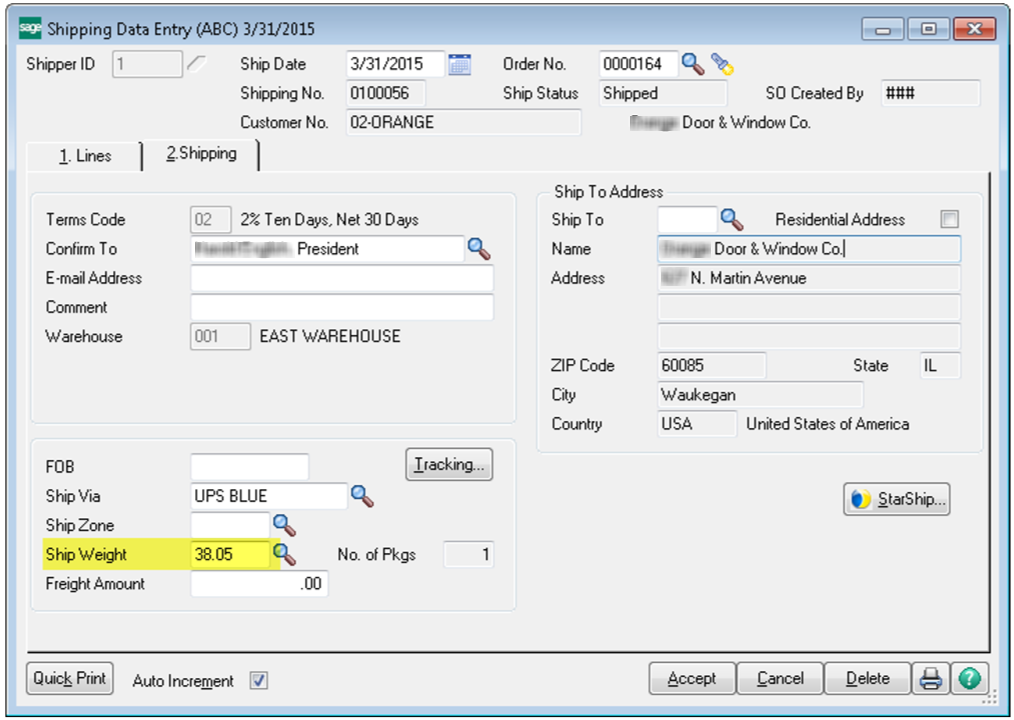
StarShip can now update the Ship Weight on the "2. Shipping" tab of Shipping Data Entry screen.
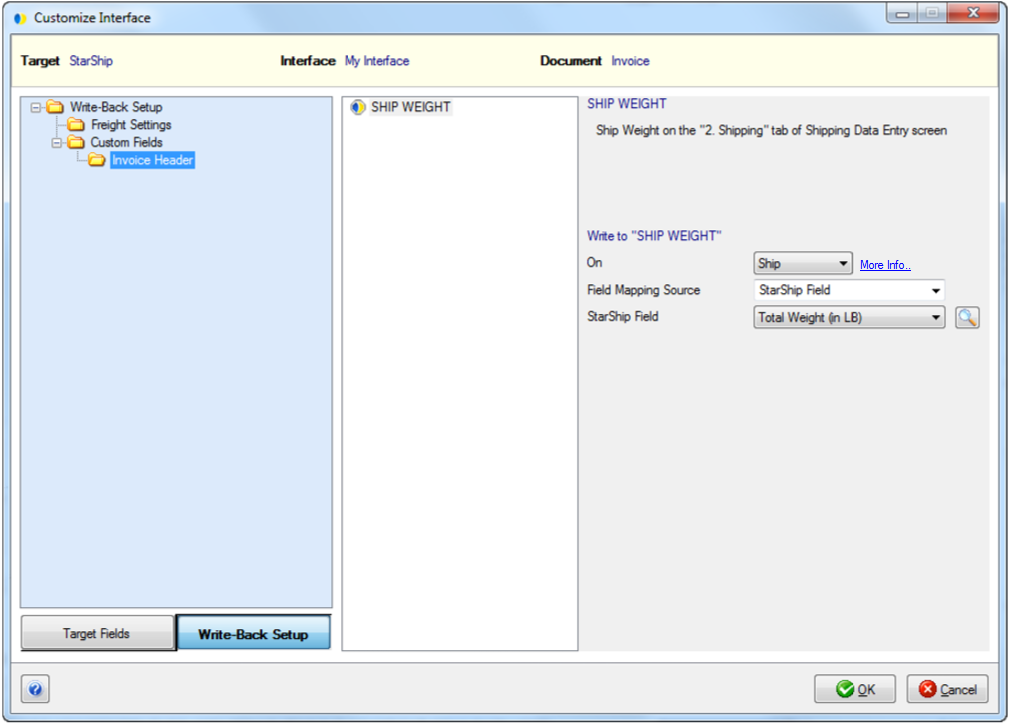
In the above screen shot, the Invoice Header field "Ship Weight" is mapped to the StarShip field "Total Weight (in LB)". When you process a shipment, StarShip will write the Total Weight value to the Ship Weight in Sage.
Note : This field must be mapped to the StarShip field in order for write-back to occur.
