To access Write-Back Setup, select Setup
> Source Interface > QuickBooks Online and select Customize
Interface. Click the Write-Back Setup button.
To access Write-Back Setup, select Setup
> Source Interface > QuickBooks Online and select Customize
Interface. Click the Write-Back Setup button.
StarShip supports writing freight and tracking information (notes) directly to Invoices and Sales Receipts; this is called "write-back". Data goes from StarShip → QuickBooks Online when a shipment is processed (or voided) in StarShip.
You can set up how and when write-back occurs, and control what is written back as well.
To access Write-Back Setup, select Setup
> Source Interface > QuickBooks Online and select Customize
Interface. Click the Write-Back Setup button.
Select the Freight Settings node to define when freight should be written back to QuickBooks Online when a shipment is processed or voided in StarShip.
Always write freight to the <document> : When you save or void a shipment in StarShip, the freight amount is written back to the document.
Prompt shipper to write freight to the <document> : When you save a shipment in StarShip, the shipper receives a prompt asking if freight should be written back to the document
Do not write freight back
to the <document> : Freight is not written back or updated.
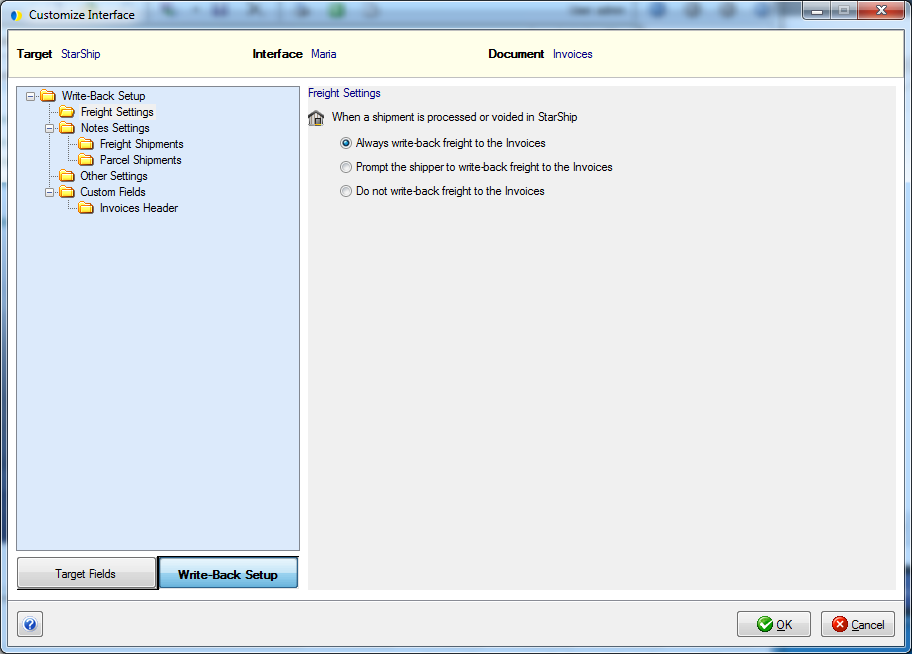
Tip : What does the house icon mean? This setting is applied by Location, which is selected when you log in to
StarShip.
.
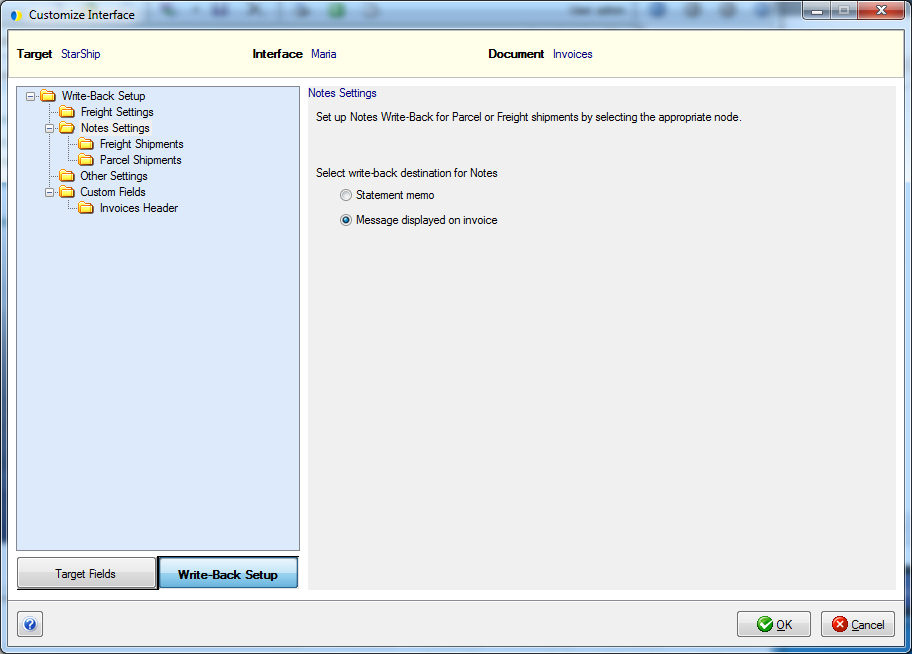
Select Notes Settings for Freight and Parcel to customize the StarShip fields that are written back to the source document.
Choose the field to which Notes write-back should occur. You can choose to write back to the "Statement memo" or the "Memo displayed on the invoice".
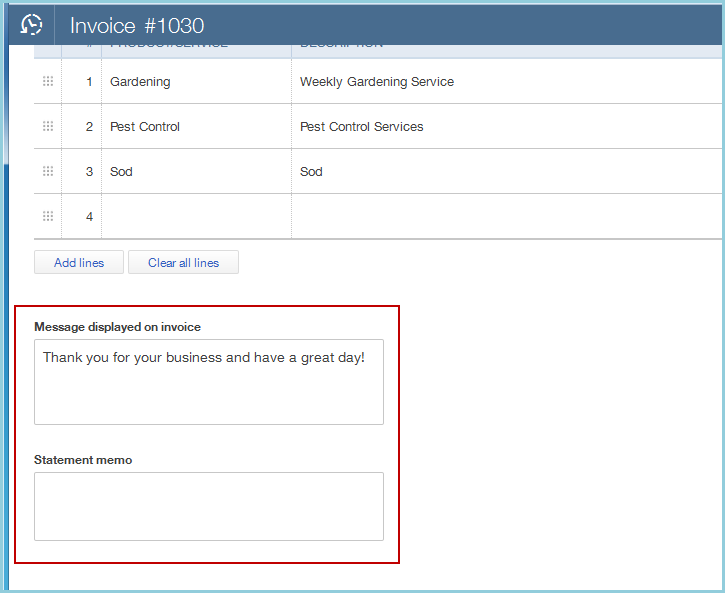
The field you choose to write back to will contain notes for all processed shipments against the same QuickBooks Online document. When all shipments are voided, the "Statement memo" or the "Memo displayed on the invoice" field will be cleared of notes. You should not use the field you chose for write-back for any other purposes because its value will be overwritten each time a shipment is processed, edited, or voided.
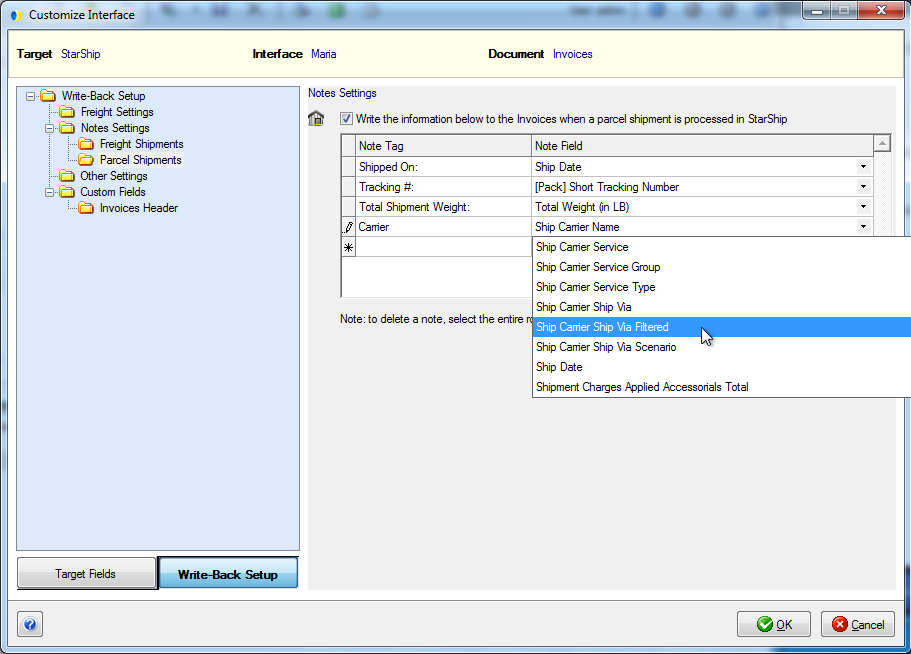
To allow Notes Write-Back, check the "Write the information below to the <document> when a parcel/freight shipment is processed in StarShip" check box. Then, you can:
Modify the Note Tag or Note Field names : The Note Tag is the printed title; the Note Field is the field value in StarShip that will be written back to QuickBooks Online under its corresponding Note Tag. To change an existing entry, click in the row and type or make a selection from the drop-down list when applicable. When you type in a Tag row, a pencil icon is activated to the left of it. A selected row will have a triangle next to it.
Add Tag/Field names : To add Tags, position the cursor in a blank field and begin typing. Then, select a Note Field Name from the drop-down list to be associated with the new Tag.
Delete a row: Hover over the rowbar until an arrow appears. Single-click with the mouse so that the row is highlighted. Then, press Delete on your keyboard.
Notes
The Print Later and Send Later settings in QuickBooks Online allow you to mark an Invoice or Sales Receipt to be sent or printed later, so that you can batch print or send many transactions at once instead of one by one.
StarShip can check one or both of those options for you automatically when you process a shipment, and uncheck them if you void a shipment..
Check the "Print Later" checkbox after processing a shipment.
If checked, the "Print Later" check box will be enabled for the transaction after you process the shipment in StarShip, and the transaction will be added to the "print later" queue.
Uncheck the "Print Later" checkbox after voiding the last shipment against the document.
If checked, when you void the final shipment of a document (Sales Receipt, Invoice), StarShip will deselect the "Print Later" check box.
Check the "Send Later" check box after processing a shipment.
If checked, the "Send Later" check box will
be enabled for the transaction after you process the shipment in StarShip,
and the transaction will be added to the s"send later" queue.
Uncheck the "Send Later" check box after voiding the last shipment against the document.
If checked, when you void the final shipment of
a document (Sales Receipt, Invoice), StarShip will deselect the "Send
Later" check box.

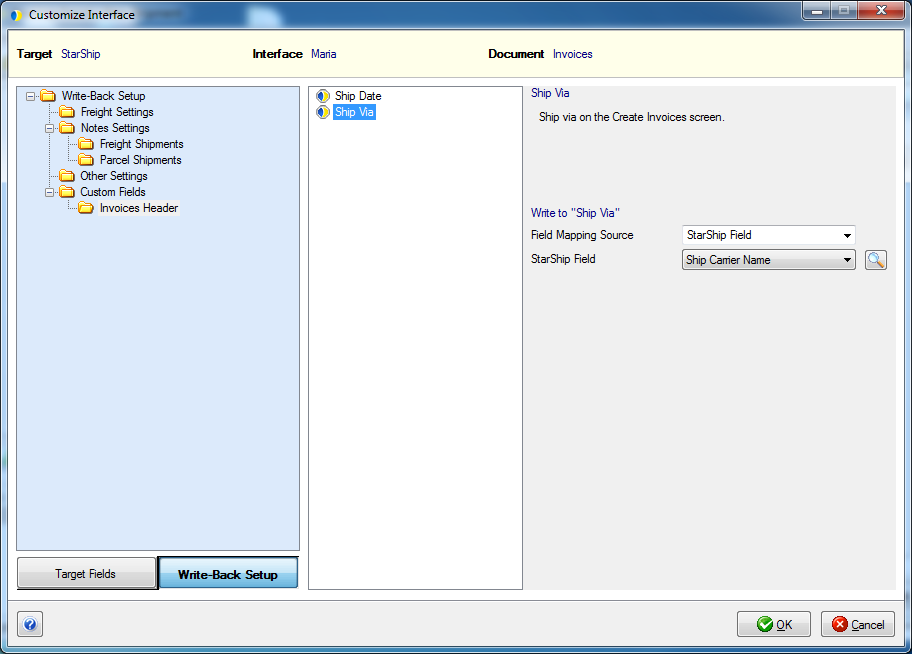
StarShip supports write-back to several fields in QuickBooks Online. Below, you can see that these fields are mapped by default so that the shipment value writes back to QuickBooks Online.
Note : If a shipment is deleted, no updates are made to these fields after the initial write-back.
Ship Date
StarShip will update the "Shipping date" on the Create Invoices or Create Sales Receipts screen with the value from the StarShip field "Ready Date" when a shipment is processed.
Ship Via
StarShip will update the "Ship via" on the
Create Invoices or Create Sales Receipts screen with the value from the
StarShip field "Ship Carrier Name" when a shipment is processed.