EasyPost Account Setup
The StarShip interface for EasyPost allows you to ship with USPS and
USPS Consolidator services for domestic and international shipments (including
Canada-origin) through your EasyPost account(s). Consolidators will appear
as Carriers in StarShip once you set them up.
Don't have an EasyPost account?
If you don't already have an EasyPost account, you can
create a free EasyPost account using the link on the Setup page. Or,
click here
to register for a free EasyPost account.
EasyPost account sign-up includes a USPS account, which
is automatically created for you. You'll be able to select this account
during StarShip setup. Note: If you already have an EasyPost account set
up, the API Keys will already be populated in the EasyPost setup dialog.
Add the EasyPost Account
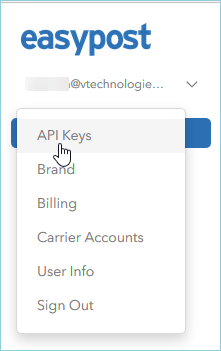
- Log into your EasyPost account. In the EasyPost
Dashboard, click the arrow next to your account name to reveal the
menu.
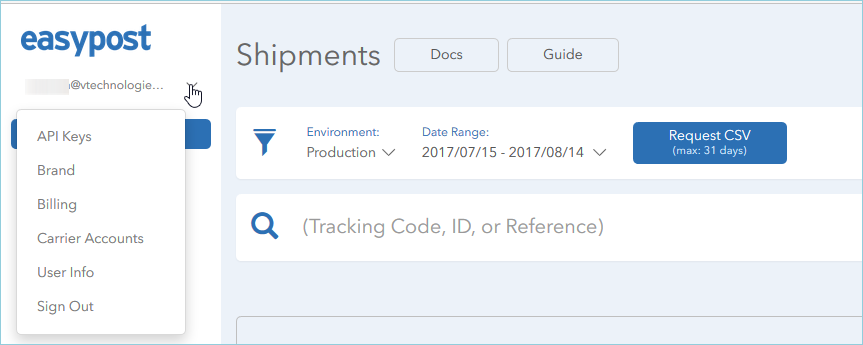
- Select the API Keys menu item.
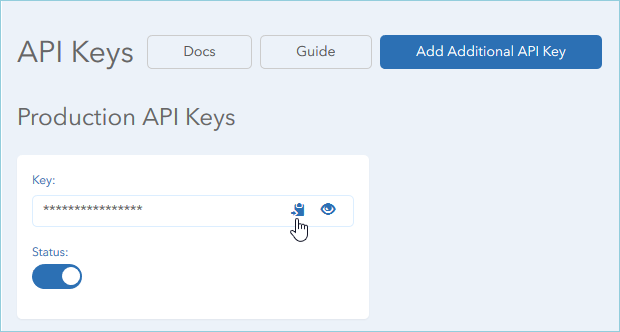
- Use the Copy button to copy the Production API Key
to the Windows clipboard.
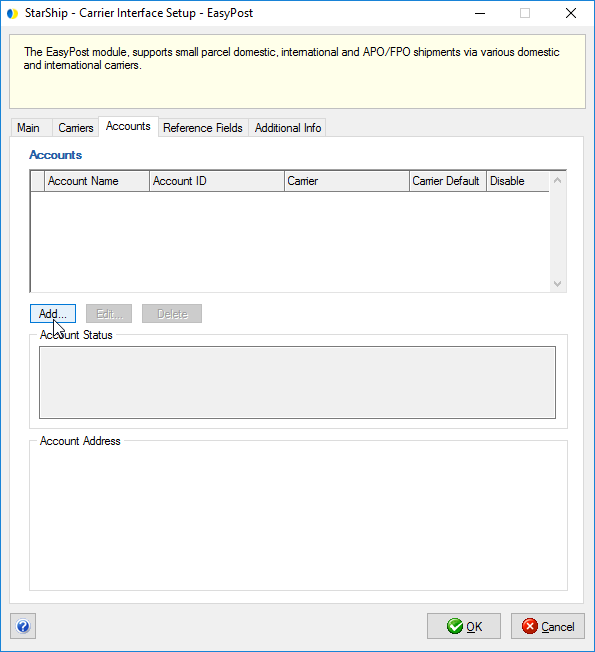
- In the StarShip Client, select Setup
> Carrier Interfaces > EasyPost. On the Accounts tab,
click New Account.
- In the API Key field, paste the Production API Key
you copied earlier.
- Back in the EasyPost Dashboard, copy the Test API
Key.
- In StarShip, paste the Test API Key into the Test
API Key field.
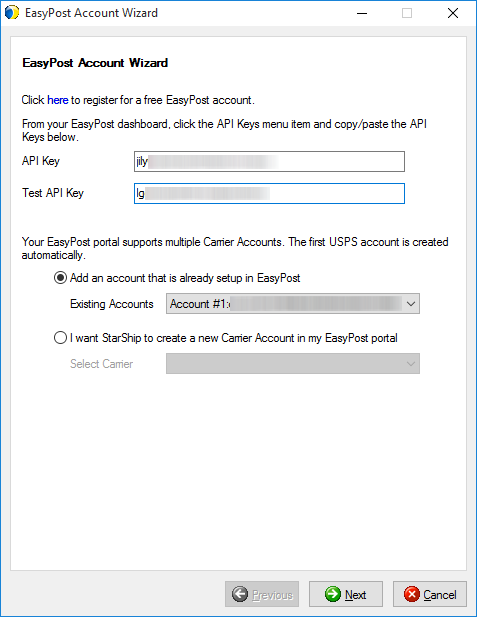
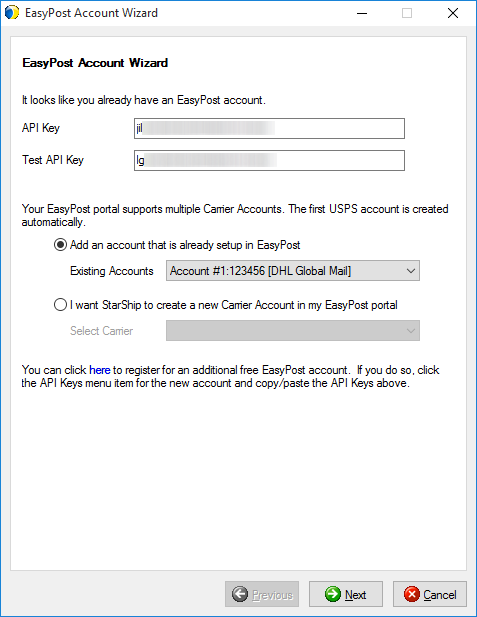
Add the Carrier Account
Once you have entered the API keys, you can either select to add an
existing EasyPost carrier account, or create a new carrier account in
your EasyPost portal.
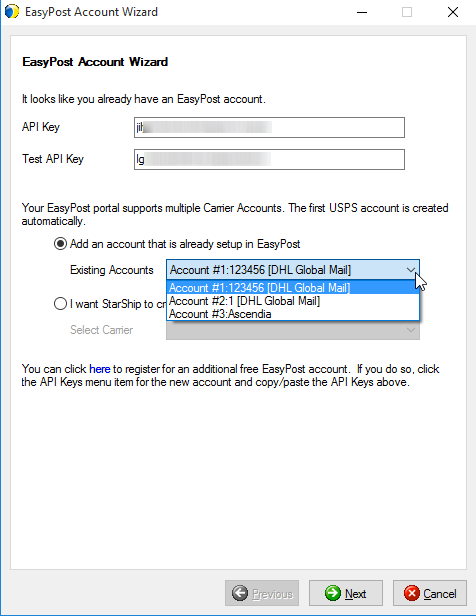
"Add an account that is already set up in EasyPost" Option
- After selecting this option, select the USPS account
from the Existing Accounts field. Click Next.
More info: See how to display a meaningful
reference instead of the long account number in StarShip.
- Enter USPS shipping data and click Next.
Account Name: Enter a unique name to identify
this account in StarShip.
Account Number: This field will be used for the EasyPost
Reference.
Account ID: The Account ID is automatically populated.
This is the Carrier Accounts > Account ID in the EasyPost Dashboard.
Mailer ID: This ID is set up
in your EasyPost Dashboard. Once entered, it cannot be changed.
Facility: This is the Facility code for default distribution
center: assigned based on your location, i.e. USORD1.
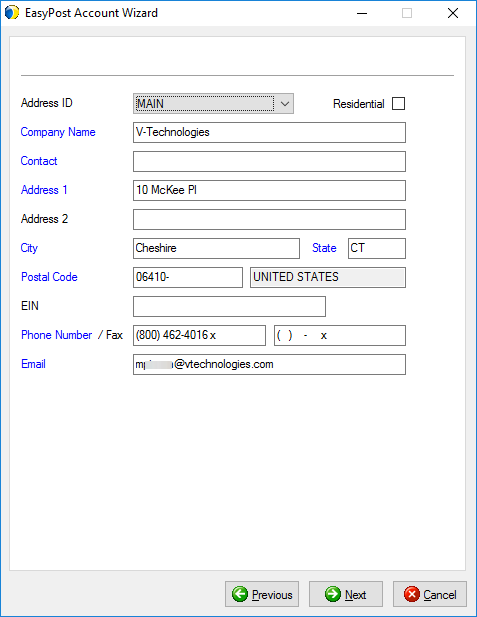
- Enter or confirm the address information. You can
also select an Address ID to associate with this account; this will
populate the fields with the address saved for that Address ID. If
you do choose to link this account with an Address ID, you will then
be able to select the USPS Account on the Shipping window > under
Sender while processing a shipment. Click Next.
- Configure account settings as described below, and
click Finish.
Services
My account has been set up to use the Media
Mail service: Check this box if your account is enabled for Media
Mail. If checked, the Media Mail service will appear under Services for
USPS on the Shipping window.
I have a special USPS
Bill on Delivery Returns account to use for return shipments :
Check this box and enter your Returns account number if you have a returns
account. When this option is checked, StarShip sends the Bill On Delivery
Returns to EasyPost with the account number you entered. If this option
is unchecked, StarShip sends the current Pay-On-Use return to EasyPost.
SCAN Form
Print SCAN Form: The Shipment Confirmation
Acceptance Notice (SCAN) form consolidates an entire day’s shipments into
a single form with a barcode that is scanned by the USPS driver when the
packages are picked up.
Note
for DHL : EasyPost only returns the manifest for domestic shipments
(DHL eCommerce). For international shipments, the DHL Global Mail International
Manifest info is transmitted to DHL on End of Day but the manifest must
be printed from your DHL Web Portal. If you are shipping domestic and
international, you must give the driver the manifest forms for both.
Group By: You can also select to group
shipments on the SCAN form by Sender Zip Code or Cost Center.
Pickup
Send pickup request to USPS (will be
scheduled for the next day): When enabled, StarShip will send the pickup
request to USPS and the options below are available.
Send pickup on Fridays for Saturday pickup?:
Check to have the pickup request sent on Friday for a Saturday pickup.
Pickup Location: Select the pickup
location from the drop-down list. If you select Other, you can type your
instructions in the Pickup Instructions field.
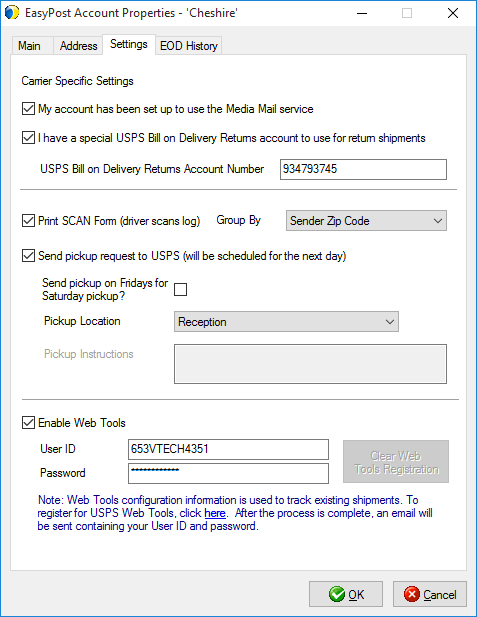
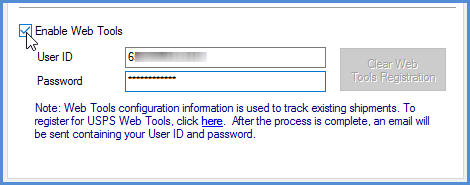
Web Tools
StarShip uses USPS Web Tools to return tracking information
for a shipment. To register for USPS Web Tools, you can use this link:
USPS
Web Tools Registration. After submitting the form, you will receive
an email containing your login information, which you can enter below.
Enable Web Tools: Check this option
to track shipments, and then enter your USPS Web Tools login information.
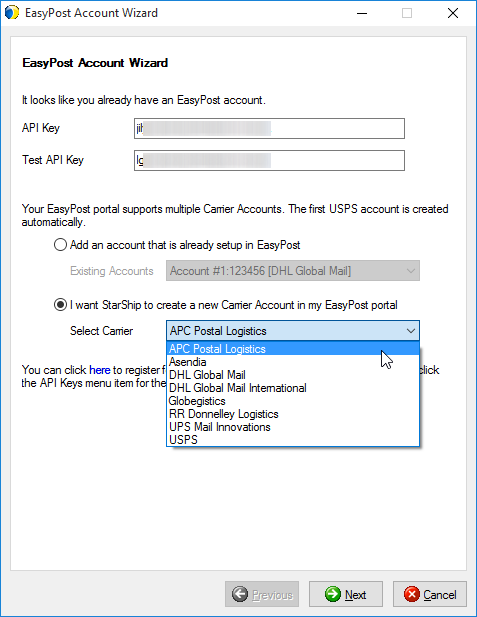
"I want StarShip to create a new Carrier Account in my EasyPost
portal" Option
After signing up with EasyPost, you can also add new accounts for use
with Consolidators.
Note: If you create a new EasyPost
Carrier account in StarShip, and later delete the account in your EasyPost
Dashboard, the account is not automatically deleted from StarShip. You
must delete the account manually in StarShip Setup.
- Select the Carrier from the drop-down list and click
Next.
Supported Consolidators
- APC Postal Logistics
- Asendia
- DHL eCommerce and Global Mail International
- Globegistics
- RR Donnelley Logistics
- UPS Mail Innovations
- USPS
- Canada Post
- CanPar
- Purolator
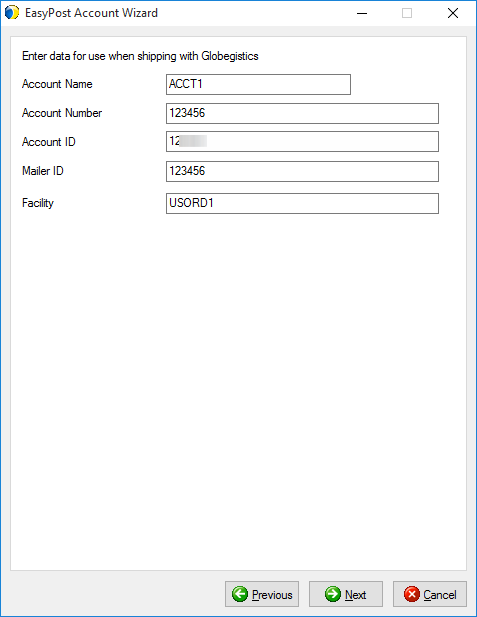
- Enter the account data used for shipping with this
Consolidator. The requested information varies based on the Consolidator
but generally includes the account data, such as the Account Name,
Account Number, Username, Password, etc. for the Consolidator.
- Enter or confirm the address information. Click
the Status icon to validate the address. You can also select an Address
ID to associate with this account; this will populate the fields with
the address saved for that Address ID. If you do choose to link this
account with an Address ID, you will then be able to select the USPS
Account on the Shipping window under Sender while processing a shipment.
- Click Finish.
Set Up Additional Consolidator Accounts
To set up additional Consolidator accounts.
- In Setup > Carrier
Interfaces > EasyPost, select the Accounts tab and click
New Account.
- The API Key will populate automatically. You can
a) Add an existing account or b) Create a new account.
a. Add existing account: Select the Consolidator
from list of Existing Accounts. StarShip only lists the accounts that
have not already been added. Select the Consolidator and click Next.
b. Create new account: Select the Consolidator
from the drop-down list. Click Next.
- Enter the data to use when shipping with this Consolidator.
The requested information varies based on the Consolidator but generally
includes the account data, such as the Account Name, Account Number,
Username, Password, etc. for the Consolidator. If you chose to add
an existing account, some or all fields will already be populated.
Notes
- You can create new EasyPost Carrier accounts in
StarShip. However, if you decide to delete one of these accounts in
your EasyPost Dashboard, it will not be removed from StarShip automatically.
When StarShip rates a shipment using this account, the user will receive
an error. To avoid rating with a deleted EasyPost account, you can
go into Setup > Carrier Interface
> EasyPost, click on the Accounts tab, and delete the account.

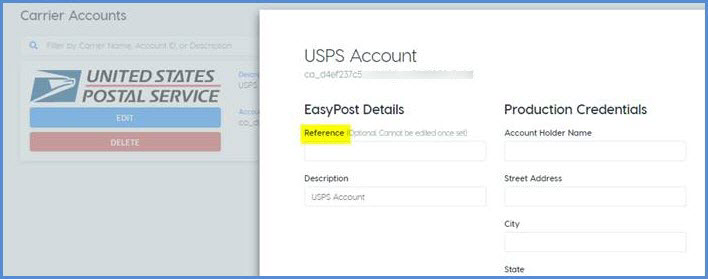
- USPS Carrier Account
References: If you use multiple carrier accounts for EasyPost, you
can more easily identify them in StarShip by populating the Reference
field in your EasyPost Dashboard. For example, instead of the long
account number, you can display a location name or other identifying
term.
To do this, log in to EasyPost and navigate to your USPS Carrier Accounts.
Select one and update the Reference field. Once you do this, the Reference
will display in StarShip.
See also : EasyPost Shipping