First, map Packaging to the Ship Via input field from BusinessWorks.
On the left-most pane, select Packaging under the Shipment folder. Click on the Packaging field in the center pane. By default it is mapped to the fixed value of Custom Packaging. Change the Field Mapping Source from Fixed to BusinessWorks Field. Select SHIPVIA as the Order Field to map.

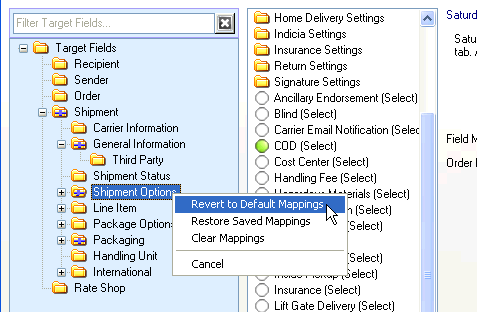
Next, map the Saturday Delivery (Select) flag to the SHIPVIA input from BusinessWorks. On the left-hand pane, select Shipment Options under the Shipment folder. Select the Saturday Delivery (Select) field in the center pane. Change the Field Mapping Source from None to BusinessWorks Field. Choose SHIPVIA as the Order Field to map.
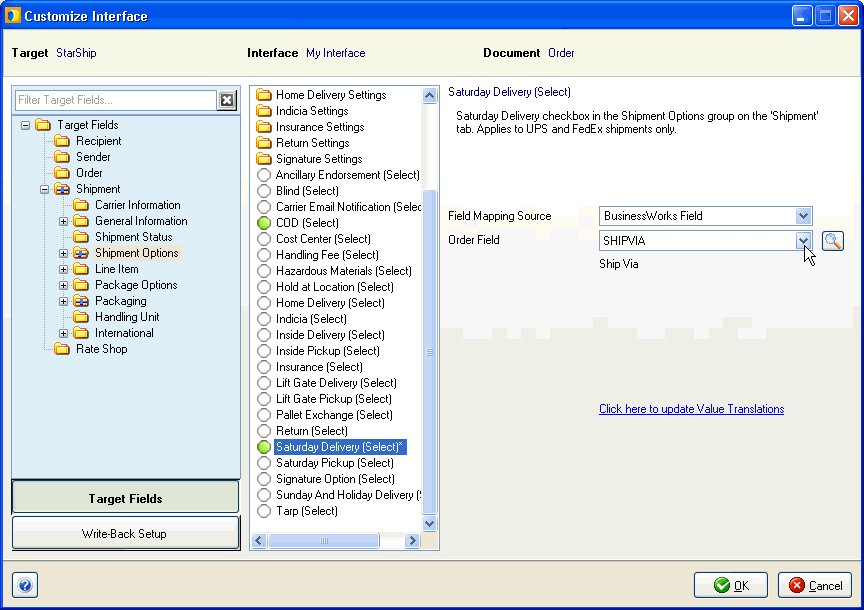
Select the "Click here to update Value Translations” link.
On the Value Translations dialog, click the Edit Values button.

Type in each of the Ship Via string values as they appear in BusinessWorks. Click Add after entering each one. Then, click OK.

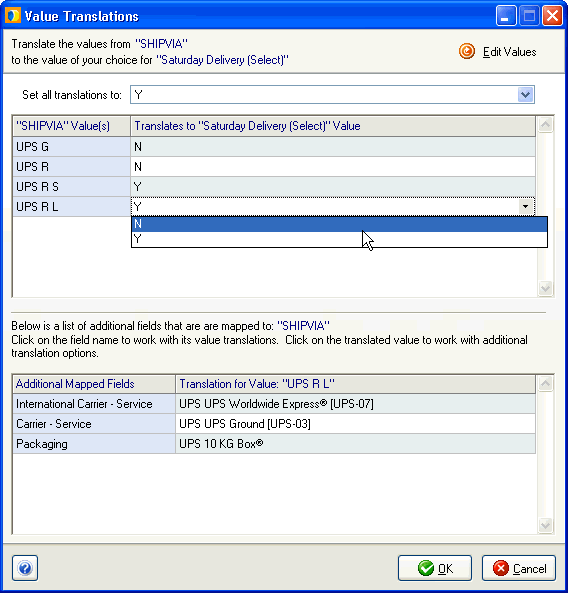
The ShipVia values you added display on the left. Next, set up the translations between the ShipVia input field and the Saturday Delivery (Select) field. To do this, edit each value under Translates to ‘Saturday Delivery (Select)’ Value to the appropriate Y (Yes) or N (No) value by selecting from the drop-down lists, as shown below.
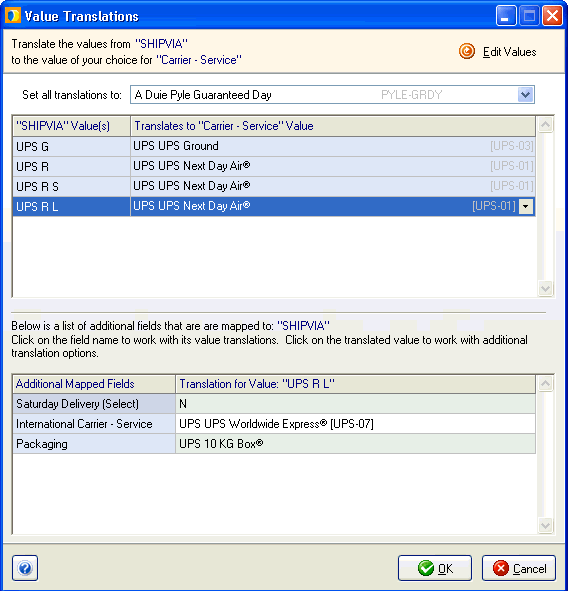
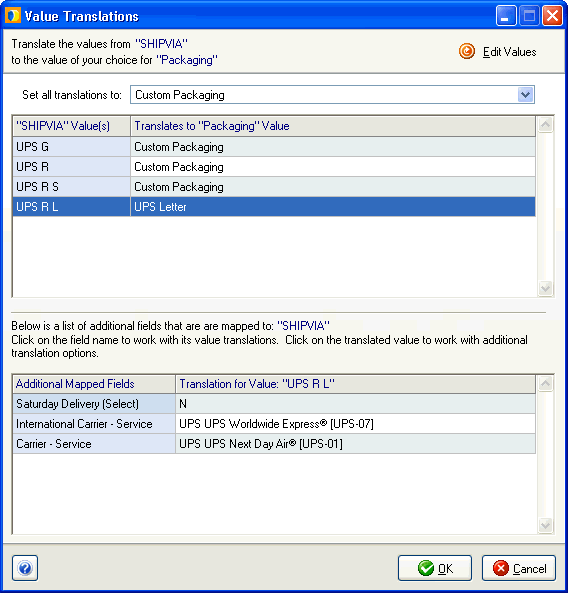
Now, you can set the translations for Carrier – Service, which is also mapped to SHIPVIA.
(Note: You could also click OK here, navigate to the Carrier – Service field, and modify the translations via the Click here to update value translations link as we did for Saturday Delivery. However, because Carrier – Service is already mapped to ShipVia by default, it is shown in this dialog. You can just click on it.)

At the prompt [Work with translations for field: “Carrier – Service”?] click Yes.

Update the translations for UPS R, UPS R S, and UPS R L as shown in this example :
Next, click on Packaging under Additional Mapped Fields. Click Yes at the prompt again.
In the Set all translations to: field, select Custom Packaging. Then, set the translation for UPS R L to UPS Letter, like this :
It is a good idea to update translations for International Carrier-Service as well. When complete, click OK to exit Value Translations, and continue to click OK until you exit setup.