These additional settings need to be configured for Acumatica in order to successfully process a shipment using StarShip for Acumatica.
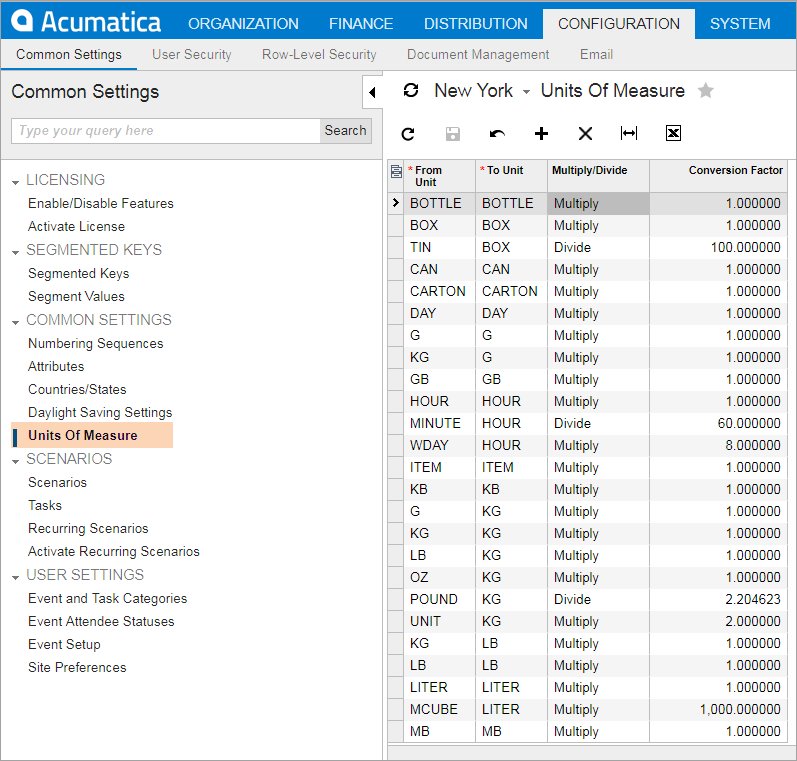
StarShip supports the following units of measure : G, KG, LB, and OZ. Write-back from StarShip to Acumatica may fail if you do not have a UOM conversion set up for each value. You can set up these conversions in Configuration > Common Settings > Units of Measure.
Default Weight UOM:
You'll need to know the default Weight UOM for your company so you can set up the conversions properly. If your default value is KG, for example, then you would need to set up conversions for G/KG, KG/LB, LB/KG, KG/OZ, OZ/KG, KG/G, G/KG. To view your company's default Weight UOM, go to Distribution > Inventory > Setup > Inventory Preferences > General Setting Tab > Inventory Options > Weight UOM.
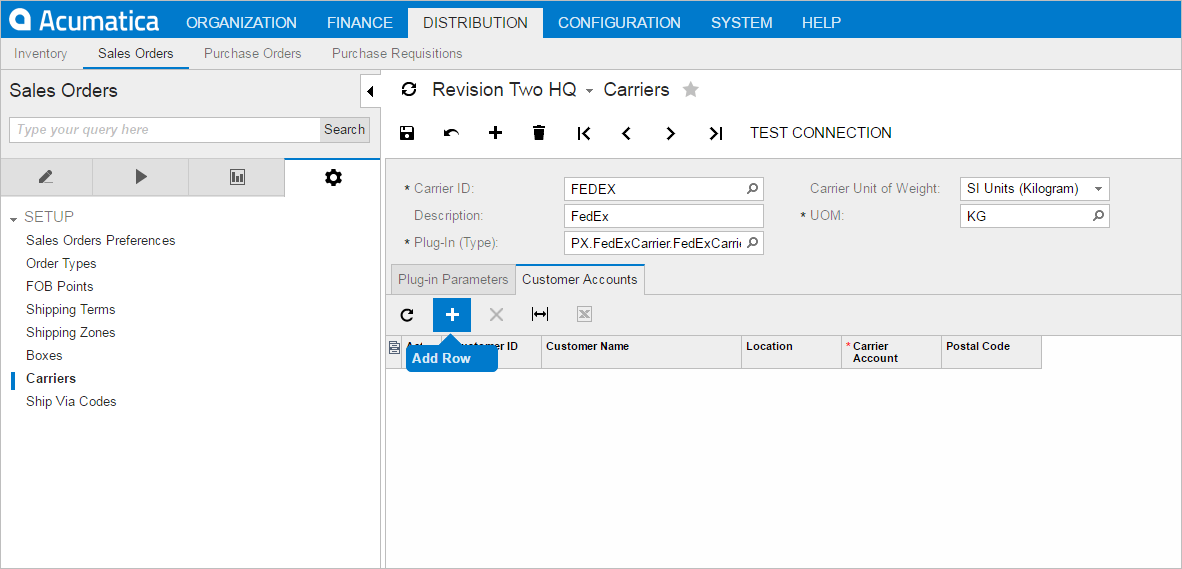
To enable the ‘Use Customer’s Account’ flag on the Sales Order or the Shipment, the Customer Account will need to be configured.
In Acumatica, go to Distribution > Sales Orders > Configuration > Carriers >Select Carrier ID > Customer Accounts tab.
Click the Add Row button.
Find the Customer ID you would like to set up.
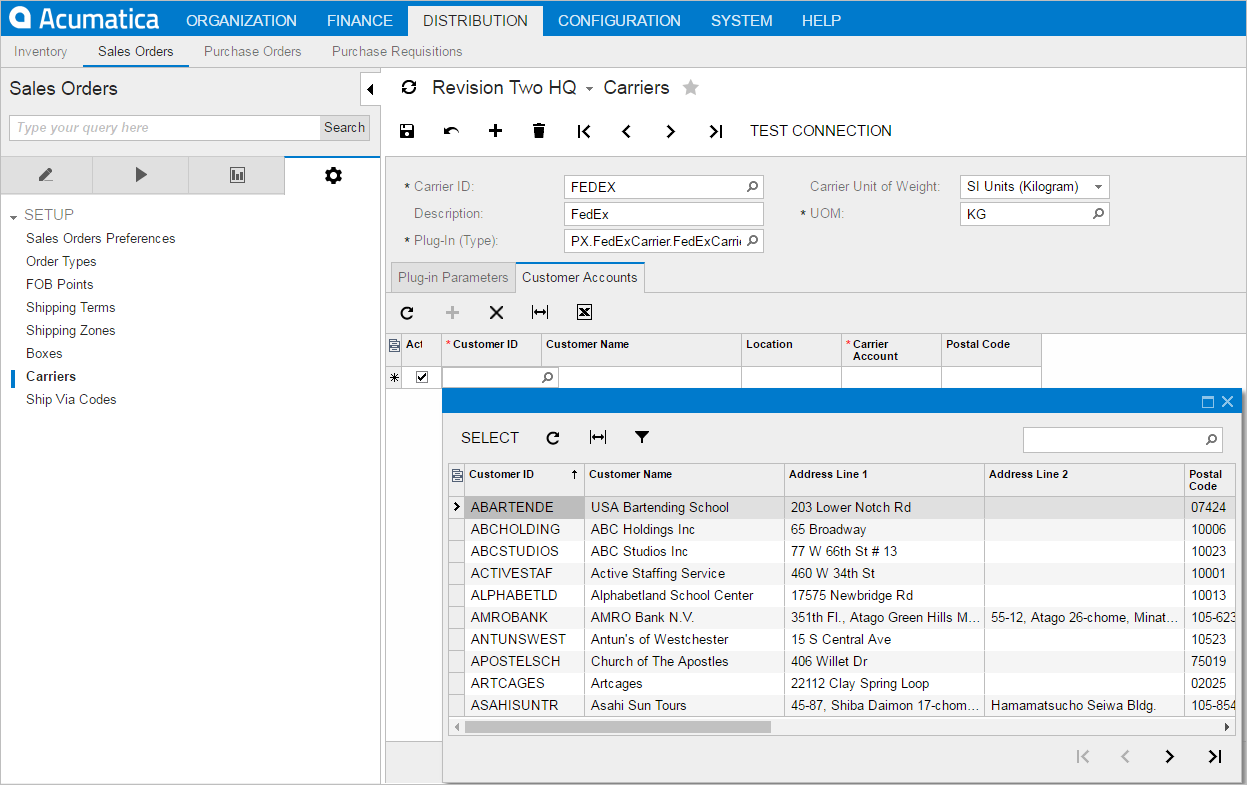
Select the Location.
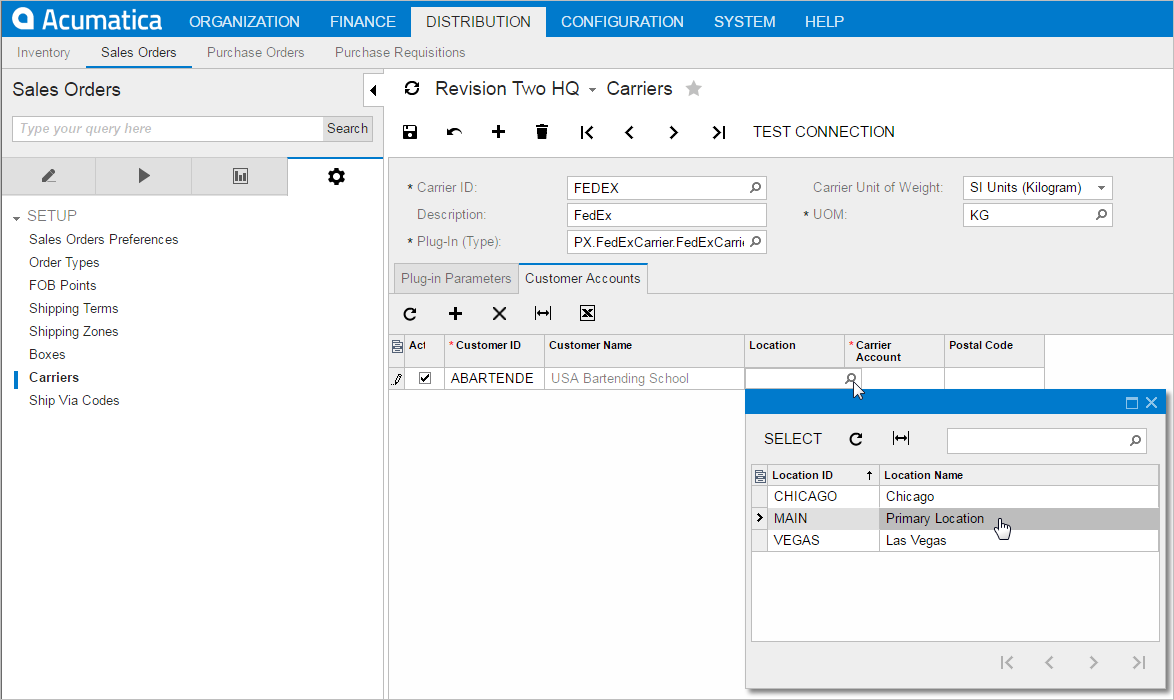
Type in the Customer's Carrier Account # and Postal Code.

To confirm the Customer was properly configured, go to Finance > Accounts Receivable > Work Area > Manage > Customers. In the Shipping Instructions section in the lower right-hand portion of the screen, verify the “Carrier Accounts” includes the information you set up.

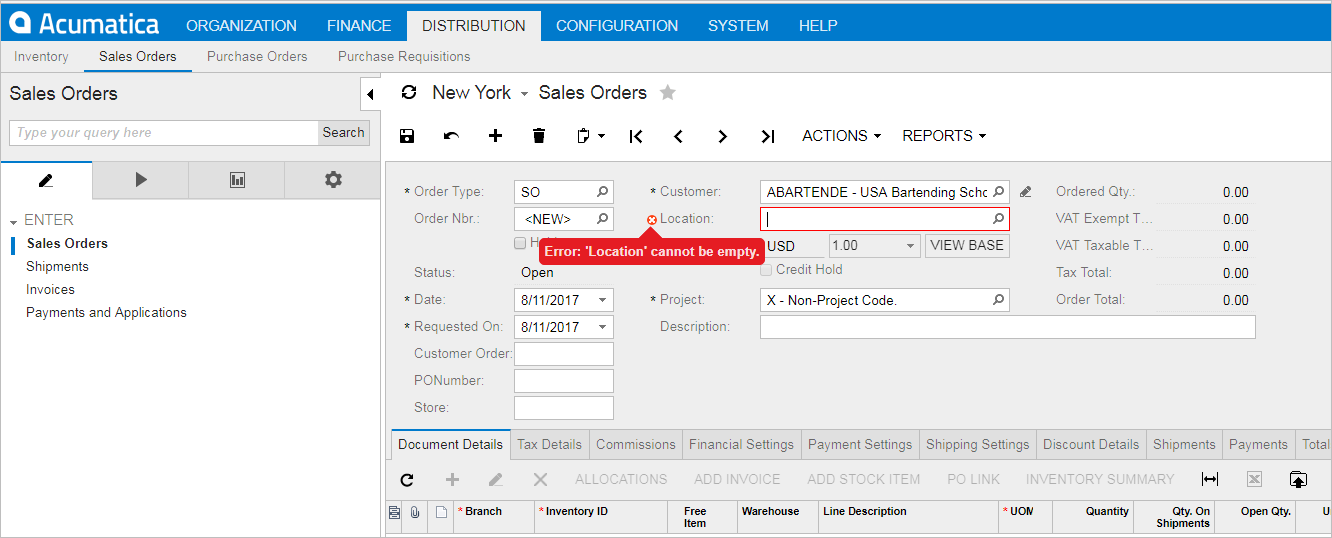
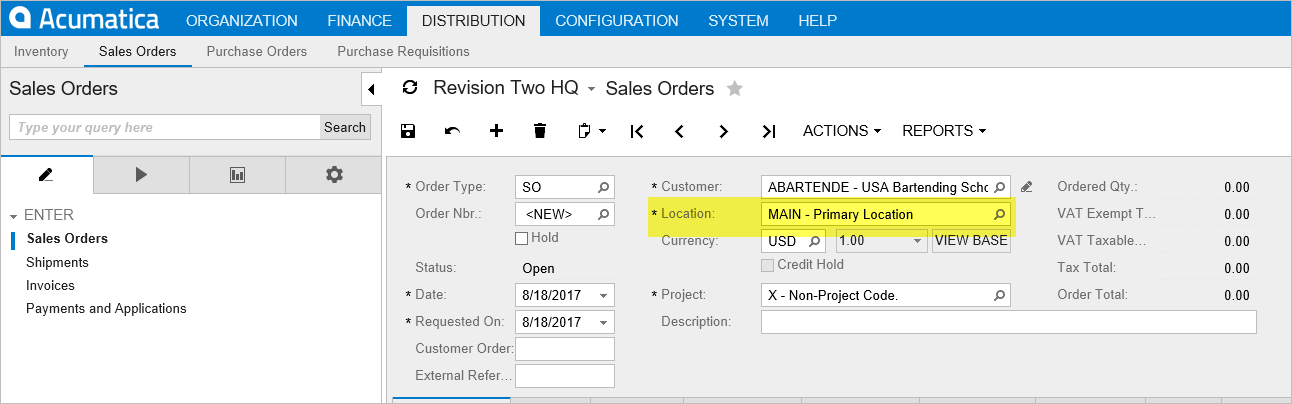
The availability of the Location field on the Sales Order screen can be enabled/disabled using the Business Account Locations feature on the Enable/Disable Features (CS.10.00.00) form. If enabled, the field will appear as a required field on the Sales Order screen and must be populated.
To access the Enable/Disable Features, select Configuration > Common Settings > Licensing > Enable/Disable Features > Business Account Locations.
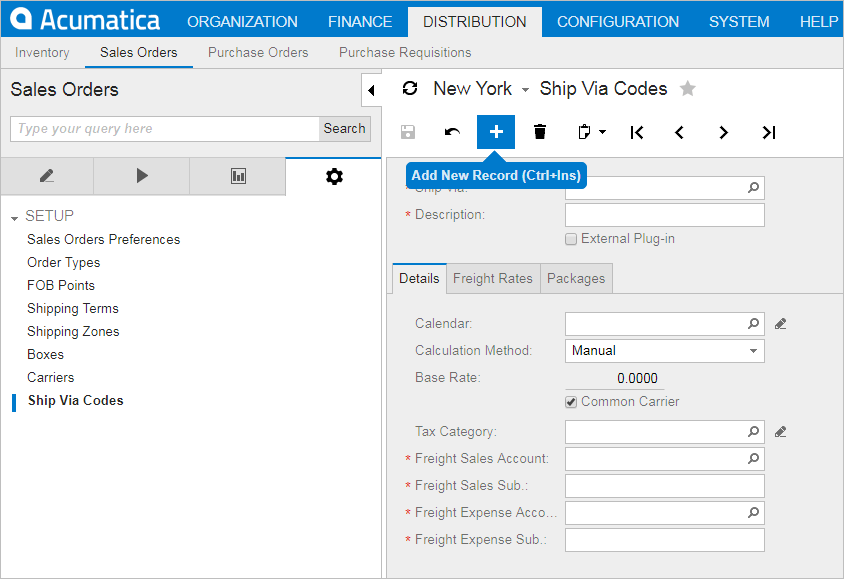
You will need to add at least one Ship Via code in Acumatica.
You must add at least one Box in Acumatica. Additionally, to use a Box with a Ship Via code, you must add it to the Ship Via code.
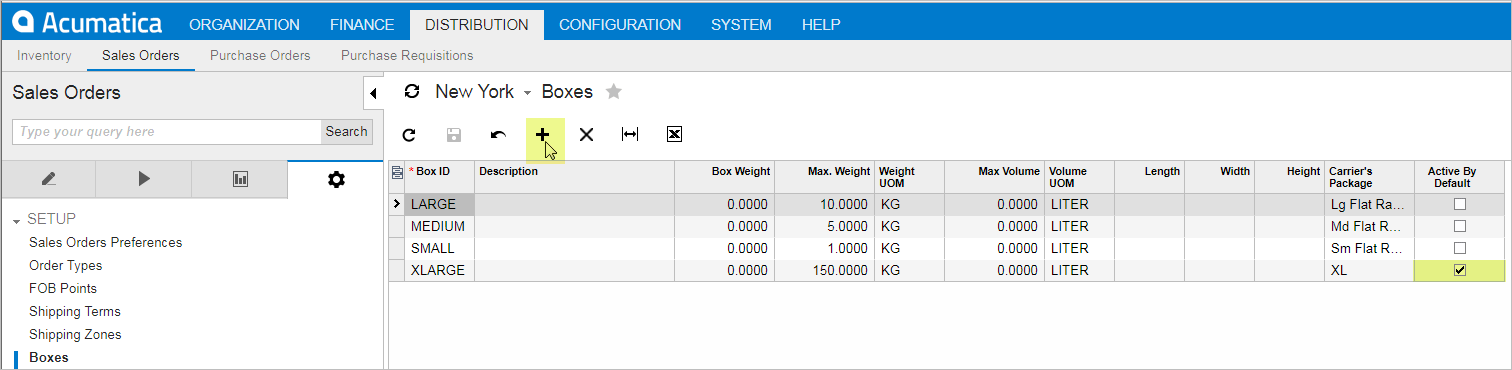
Create the Box(es)
Add Box(es) to the Ship Via code
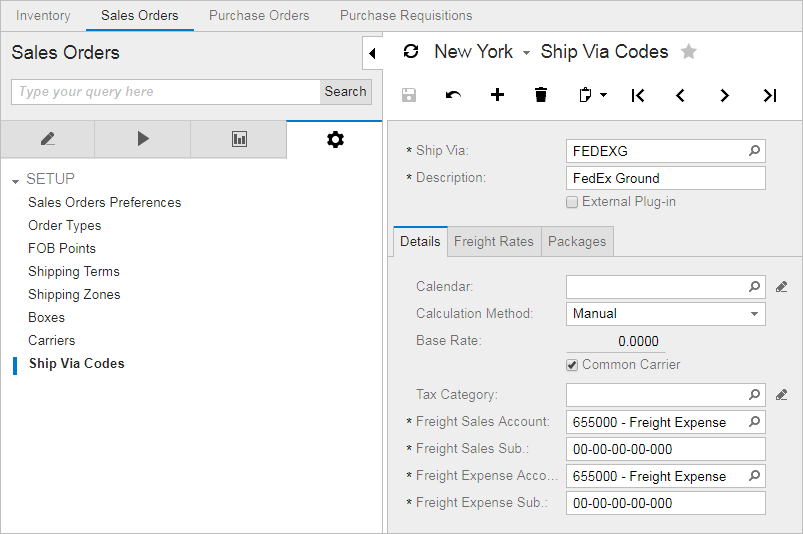
In Acumatica, go to Distribution > Sales Orders > Configuration > Setup > Ship Via Codes.
Select the Ship Via Code.
Click on the Packages tab.
Click the " + " sign to add the box to the Ship Via code.

StarShip now allows importing of package dimensions (Length, Width, and Height) for the Shipments document. This can be set up in a few different ways, depending upon your needs.
Note: In order to import package dimensions, you will need to add a conversion to the UOM chart in Acumatica. See UOM Setup above for more information.
Map or Default the Package ID Only
If you only want to import the Box Name from Acumatica, you can map/default the Package ID and use value translations for that field (and clear dims/tare weight mappings). The Package Name must be added to StarShip Maintain Packaging, and the Package Name must be identical to the Box Name in Acumatica. You must set up a value translation in Write-Back Setup to be mapped to the correct Box in Acumatica so that write-back can occur. When this package is imported into StarShip, without dimensions, the Package ID will populate properly.
Map or Default Dimensions/Tare Weight Only
If you only want to import Dimensions/Tare Weight into StarShip, map or default these fields to StarShip shipment fields. In this case you would remove any field mappings for Package ID in Shipment > Packaging > Packaging. StarShip will bring in dims/tare weight and use Custom Packaging. The dimensions import and the box becomes 'Custom Packaging' on write-back. You must set up a value translation in Write-Back Setup to be mapped to the correct Box in Acumatica so that write-back can occur. For example, create a Box in Acumatica called Custom and for the write-back value translation, map ‘Custom Packaging’ in StarShip to ‘Custom’ in Acumatica.
Map or Default Both Package ID and Dimensions/Tare Weight
In this scenario you would map the Package ID and Dimensions/Tare Weight to StarShip shipment fields. You will need to add a package in StarShip Maintain Packaging with the package dimensions. The Package Name and Dimensions in StarShip must be identical to the Box name and dimensions in Acumatica. You must also set the value translation in Write-Back Setup to be mapped to the correct Box in Acumatica so that write-back can occur. If either the Package ID or Dimensions do not match a StarShip package, Custom Packaging will be used for the package when shipping.
In order to ship Non-Stock Items, the "Require Shipment" option must be enabled on the item in Distribution > Inventory > Manage > Non-Stock Items. The “Require Shipment” option is located on the General Settings tab, below the Default Warehouse selection.
Please correct any missing information on the Acumatica screen prior to importing the Sales Order or other document into StarShip. In this example, the Customer Location field (which is required) is not populated and shows a red "X" next to the field. If an error is not corrected in Acumatica, we will also get an error in StarShip when we import the document.