Third Party/Recipient Billing How-to
This Acumatica How-to is for users that have the Shipping Carrier Integration External Plug-in enabled but still want to be able to bill to a Third Party or Recipient's UPS or FedEx account using the Customer Account. To achieve this, we will set up special Ship Via codes in Acumatica and then map certain StarShip fields to the Ship Via codes we created.
Acumatica only makes the Customer Account field available when the External Plug-in is enabled or "checked". However, when it is checked, Acumatica will use data from the Integrated Carrier to overwrite the tracking numbers that were written back by StarShip. To use the Customer Account number from Acumatica to bill a Third Party or Recipient's UPS or FedEx account without losing the tracking numbers from StarShip, you will need to set up special Ship Via codes in Acumatica as shown in the procedure below. You will then use those Ship Via codes as both the Carrier -Service and Billing Type in StarShip.
Note : We do not encourage customers to utilize this configuration, but if you do need to use the Customer Account field, you can use this process to work around the issues caused by having the Carrier Integration plug-in enabled in Acumatica.
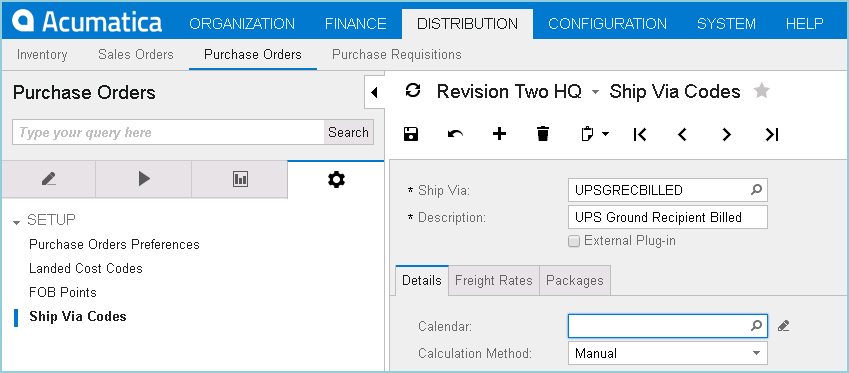
Create Ship Via Codes in Acumatica
- In Acumatica, create Ship Via Codes that will represent the billing type(s). Make sure that the "External Plug-In" check box is unchecked. These Ship Via codes will be used as both the Ship Via and the Billing Type in StarShip. You will want to give the Ship Via codes easily recognizable names. In our example, we used UPSG3rdParty and UPSGRecBilled to indicate these will be used for Third Party and Recipient Billed billing types.
Map Fields in StarShip
- In StarShip, go to Setup > Source Interface > Acumatica 6.0 - 6.1 and select Customize Interface.
- Click Sales Orders or Shipments.
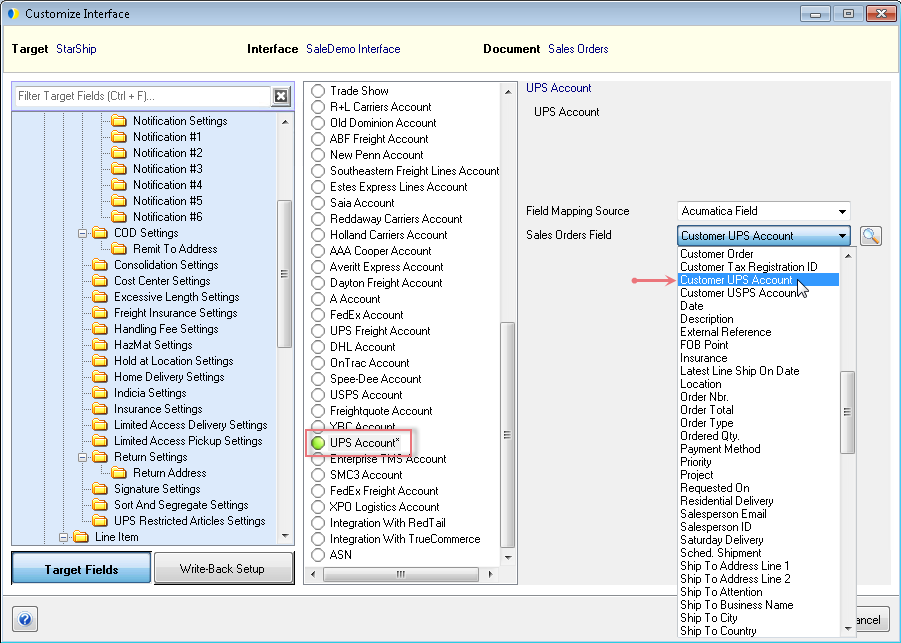
- Select Recipient > UPS Account (and/or FedEx Account). Set the Field Mapping Source to "Acumatica Field" and select Customer UPS Account (or Customer FedEx Account, depending on the carrier you are setting up).
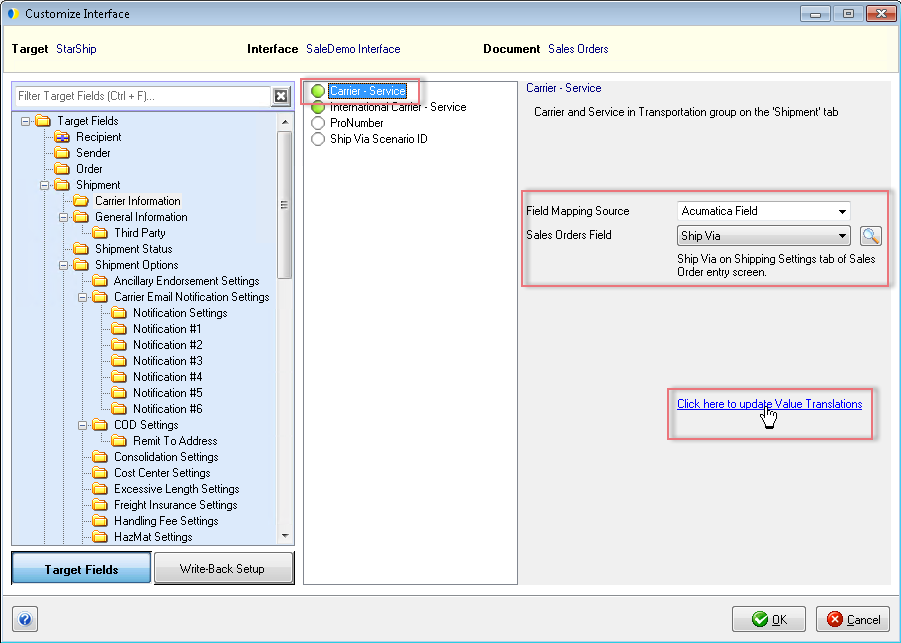
- Next, select Shipment > Carrier Information > Carrier - Service. Set the Field Mapping Source to "Acumatica Field" and select Ship Via from the Sales Orders/Shipments Field. Select the "Click here to update Value Translations" link.
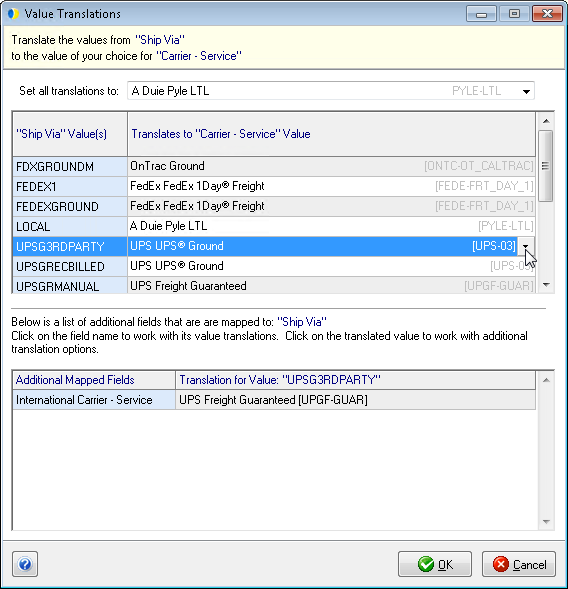
- Locate the Ship Via codes that you previously created. Set them to the corresponding Carrier; for example, set UPSG3rdParty to UPS Ground.
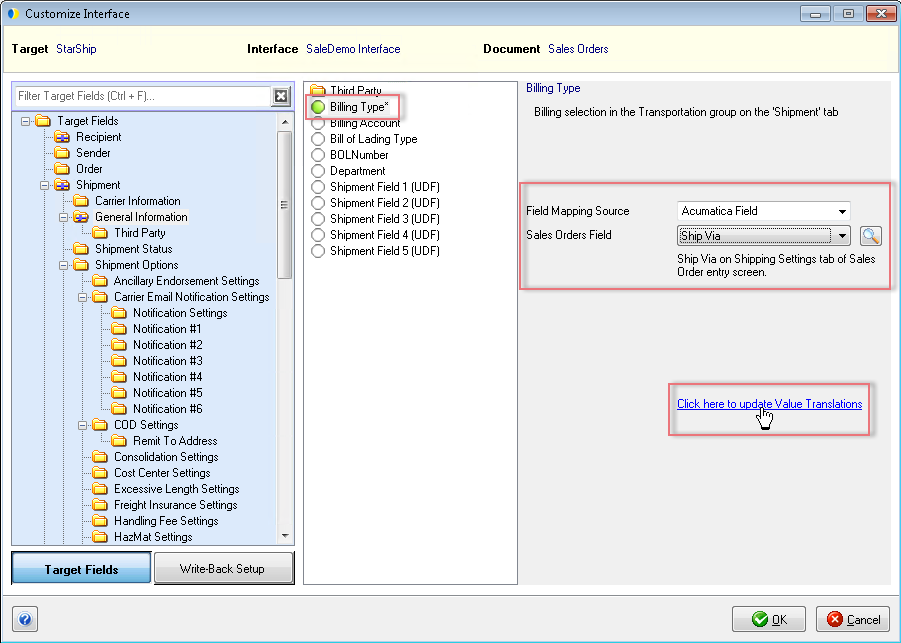
- Select Shipment > General Information > Billing Type. Set the Field Mapping Source to "Acumatica Field" and select Ship Via from the Sales Order/Shipment Field. Select the "Click here to update Value Translations" link.
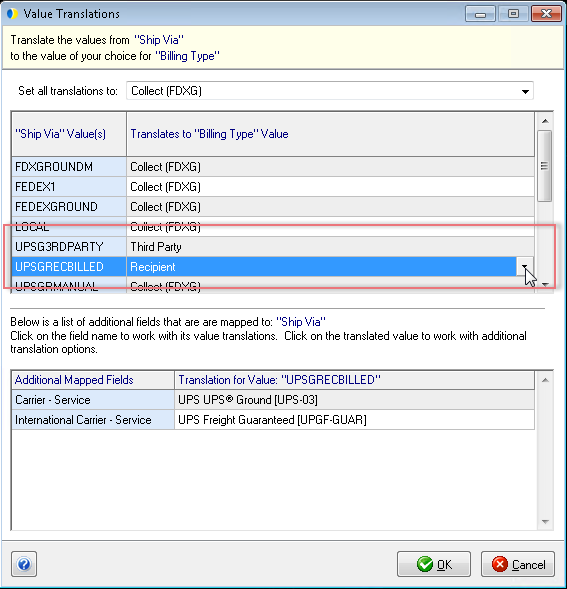
- Locate the Ship Via codes that you previously created and set them to the corresponding Billing Type; for example, set the UPSG3rdParty Ship Via to the Third Party Billing Type, and the UPSRecBilled Ship Via to the Recipient Billing Type.
- Click OK until you exit Customize Interface to save your changes.